Table of Contents
Advertisement
Quick Links
Advertisement
Table of Contents

Related Manuals for Doro PhoneEasy DECT 315

Summary of Contents for Doro PhoneEasy DECT 315
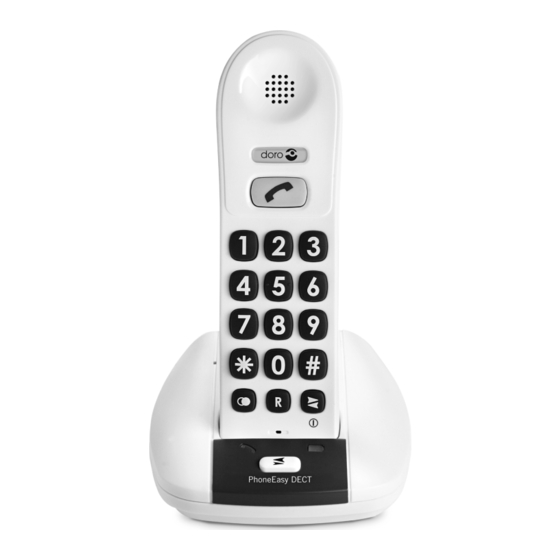
- Page 1 PhoneEasy DECT...
- Page 2 English Connection 1. Connect the mains adapter (9V AC) and the telephone cord to their wall sockets. 2. Place the battery into the handset and insert the cable as illustrated. 3. Charge the handset with the keypad facing outwards (for 24 hours the first time). Range The telephone’s range depends on whether or not the radio waves carrying the call are restricted by obstacles in their path, and is usually between 50 and 300 metres. Coverage can be improved by turning one’s head so that the handset is aligned with the base unit. Sound quality declines as the limit is reached until the call is finally interrupted. Battery Because batteries only have a certain lifespan it is quite normal that call time and standby time will decrease somewhat compared to the specifications when the telephone is used regularly. Fully charged batteries (10 hours) will last for approx. 70 hours on standby and approx. 5 hours on call. These operation times apply at normal room temperature.
-
Page 3: Base Unit Indicators
English Base unit indicators Illuminates when charging is in progress. Illuminated on standby and flashes during calls. Making a call 1. Press . Enter desired telephone number. 2. Press to end the call. Receiving a call 1. Wait for the handset to ring. 2. Press to answer. Press to end the call. Please note! The indicator on the handset lights up when the line is connected. When batteries are low or when there is too great a distance to the base unit the telephone will be unable to connect to a line. -
Page 4: Specific Absorption Rate (Sar)
English Turning the Handset Off/On The handset can be turned off by pressing for a few seconds. The handset can be switched on by pressing once. Paging The handset will ring when (on the base unit) is pressed. The signal will stop automatically after a while or if the button on the handset is pressed, or by pressing on the base unit. Expanded system (only +1…) The handset number used for internal calls is shown on a label on each handset. The base unit should be positioned centrally so that the coverage area is roughly equal for all handsets. It is not possible to add extra handsets at a later point. INT calls 1. Press 2. Enter the allocated number of the handset that you wish to call, A tone will be heard if an external call comes in while an internal call is in progress. You can terminate the internal call by pressing , and then receive the external call by pressing again. Transferring calls/Conference between handsets 1. An external call is connected. 2. Initiate an internal call as described above. 3. Press to transfer the call, or hold down for conference. -
Page 5: Troubleshooting
If you cannot resolve the fault using the faultfinder section, technical support is available by -email on tech@doro-uk.com -premium rate telephone number: 0905 895 0854, calls cost 50 pence per minute (prices correct at the time of publication). You can also contact us in writing (regarding any Spares or Technical query): Customer Services Doro UK Ltd 1 High Street Chalfont St Peter Buckinghamshire SL9 9QE. Further contact details are available on our website: www.doro-uk.com. -
Page 6: Australia And New Zealand
Furthermore, this guarantee shall not apply to a fault caused by a thunderstorm or lightning, excessive or any other voltage fluctuations or faults on the telephone line. (As a matter of precaution, we recommend disconnecting the telephone during a thunderstorm). This guarantee does not affect your statutory rights. AUSTRALIA NEW ZEALAND DORO Australia Pty Ltd Atlas Gentech (NZ) Limited PO Box 6760 Private Bag 14927 Baulkham Hills BC NSW 2153 Panmure Australia Auckland New Zealand Consumer Support... -
Page 7: All Products
English REN (RN for New Zealand) The REN (Ringer Equivalence Number) or (RN) is of significance only if you wish to connect more than 1 telephone to your telephone line. A standard telephone line has a maximum REN capacity of 3 (RN of 5). It is possible to connect 3 devices with a REN of 1 (RN of 1) with no degradation to the product’s performance. Exceeding this limit may cause the volume of the ringer in any phone to decrease or not ring at all. ALL PRODUCTS The grant of a Telepermit for any item of terminal equipment indicates only that Telecom has accepted that the item complies with the minimum conditions for connection to its network. It indicates no endorsement of the product by Telecom, nor does it provide any sort of warranty. Above all, it provides no assurance that any item will work correctly in all respects with another item of Telepermitted equipment of a different make or model, nor does it imply that any product is compatible with all of Telecom’s network services. This equipment shall not be set to make automatic calls to the Telecom “111“ Emergency Service. This equipment may not provide for the effective hand-over of a call to another device connected to the same line. This equipment should not be used under any circumstances that may constitute a nuisance to other Telecom Customers. CND PRODUCTS If a charge for local calls is unacceptable, the “DIAL’’ button should NOT be used for local calls. Only the 7 digits of the local number should be dialled from your telephone. DO NOT dial the area code... - Page 8 Ελληνικά Σύνδεση 1. Συνδέστε τον αντάπτορα (9V DC) και το καλώδιο τηλεφώνου στις πρίζες τοίχου. 2. Τοποθετήστε την μπαταρία στο ακουστικό και προσαρμόστε το καλώδιο με τον τρόπο που εικονίζεται. 3. Φορτίστε το ακουστικό με το πληκτρολόγιο στραμμένο προς τα έξω (την...
-
Page 9: Πραγματοποίηση Κλήσης
Ελληνικά Eνδείξεις βάσης συσκευής Φωτίζεται όταν η φόρτιση βρίσκεται σε εξέλιξη. Ανάβει στη λειτουργία αναμονής και αναβοσβήνει κατά τη διάρκεια των κλήσεων. Πραγματοποίηση κλήσης 1. Πιέστε . Εισάγετε τον επιθυμητό αριθμό τηλεφώνου. 2. Πιέστε για τερματισμό της κλήσης. Λήψη κλήσης 1. - Page 10 Ελληνικά Ηχητικό σήμα ακουστικού 1. Πιέστε 2. Πιέστε το αντίστοιχο ψηφιακό πλήκτρο για τον επιθυμητό τύπο ηχητικού σήματος 3. Πιέστε για μερικά δευτερόλεπτα για να αυξηθεί η ένταση του ηχητικού σήματος ή πιέστε για να μειωθεί. 4. Πιέστε για αποθήκευση. Paging (τηλεειδοποίηση) Το...
-
Page 11: Αντιμετώπιση Προβλημάτων
ξεχάσετε να προσκομίσετε την απόδειξη ή ένα αντίγραφο του τιμολογίου αγοράς. Δήλωση συμμόρφωσης Η εταιρία Doro δηλώνει ότι η συσκευή Doro PhoneEasy DECT 315 συμμορφώνεται με τις βασικές απαιτήσεις και άλλους σχετικούς κανονισμούς που περιλαμβάνονται στις Οδηγίες 1999/5/ΕΕ και 2002/95/ ΕΕ. - Page 12 Magyarul Csatlakoztatás 1. Csatlakoztassa a hálózati tápegységet (9 V AC) és a telefonzsinórt a megfelelő fali aljzathoz. 2. Helyezze be az akkumulátort a kézibeszélőbe, és csatlakoztassa a kábelt az ábra alapján. 3. Töltse a kézibeszélőt előre fordított billentyűzettel (első alkalommal 24 órán át). Hatótávolság A telefon hatótávolsága attól függ, hogy van-e akadály a beszélgetést szállító rádióhullámok útjában; normál esetben 50–300 méteres. A jelerősség javítható, ha úgy fordítjuk a fejünket, hogy a kézibeszélő...
-
Page 13: Hangerő-Szabályozás
Magyarul Hívás kezdeményezése 1. Nyomja meg a gombot. Írja be a kívánt telefonszámot. 2. A hívás befejezéséhez nyomja meg a gombot. Hívás fogadása 1. Várjon, amíg csengeni nem kezd a kézibeszélő. 2. A hívás fogadásához nyomja meg a gombot. A hívás befejezéséhez nyomja meg a gombot. - Page 14 Magyarul Személyhívó funkció A bázisegység gombjának megnyomásakor a kézibeszélő csengeni kezd. A jelzés a kézibeszélő gombjával vagy a bázisegység gombjával kapcsolható ki, illetve egy idő után automatikusan leáll. Bővített rendszer (+1...) Minden kézibeszélő címkéjén látható az adott kézibeszélő belső híváskor használt száma. A bázisegységet középre kell telepíteni, hogy valamennyi kézibeszélő...
-
Page 15: Megfelelőségi Nyilatkozat
Ellenőrizze a kézibeszélő akkumulátorának töltöttségi szintjét. Ha a telefon továbbra sem működik, forduljon a készüléket eladó szaküzlethez. Vigye magával a nyugtát vagy a számla másolatát. Megfelelőségi nyilatkozat A Doro kijelenti, hogy a Doro PhoneEasy DECT 315 készülék megfelel az alapvető követelményeknek, valamint az 1999/5/EK és a 2002/95/ EK irányelv vonatkozó rendelkezéseinek. A gyártó nyilatkozatának egy példánya megtalálható a www.doro.com/dofc címen. - Page 16 Česky Zapojení 1. Zapojte síťový adaptér (9 V DC) do el. zásuvky a telefonní kabel do konektoru tel. linky na zdi. 2. Vložte baterii do telefonu a připojte kabel způsobem uvedeným na obrázku. 3. Nechte telefon nabíjet s klávesnicí otočenou směrem ven (první nabíjení musí trvat 24 hodin). Dosah Dosah telefonu se obvykle pohybuje mezi 50 až...
-
Page 17: Ovládání Hlasitosti
Česky Indikátory základny Svítí během nabíjení. Svítí v pohotovostním režimu a bliká během hovoru. Volání 1. Stiskněte . Zadejte požadované telefonní číslo. 2. Stisknutím hovor ukončíte. Přijetí hovoru 1. Počkejte, až telefon začne vyzvánět. 2. Přijměte hovor stisknutím . Stisknutím hovor ukončíte. - Page 18 Česky Vyzváněcí signál telefonu 1. Stiskněte tlačítko 2. Stiskněte číslici odpovídající požadovanému typu vyzváněcího signálu 3. Hlasitost vyzváněcího signálu můžete zvýšit stisknutím tlačítka na několik sekund, nebo snížit stisknutím tlačítka 4. Stisknutím tlačítka nastavení uložíte. Vypnutí a zapnutí telefonu Telefon můžete vypnout stisknutím tlačítka na několik sekund.
-
Page 19: Řešení Problémů
Pokud telefon stále nefunguje , obraťte se na svého prodejce. Nezapomeňte s sebou vzít doklad o zaplacení nebo kopii faktury. Prohlášení o shodě Společnost Doro tímto prohlašuje, že výrobek Doro PhoneEasy DECT 315 vyhovuje základním požadavkům a dalším příslušným předpisům obsaženým ve Směrnici 1999/5/EC a 2002/95/EC. Kopie prohlášení... - Page 20 Deutsch Anschließen 1. Schließen Sie das Netzteil (9V AC) und das Telefonkabel an die jeweiligen Steckdosen an. 2. Legen Sie die Batterie in das Mobilteil. Vergewissern Sie sich, dass die Batterie korrekt eingelegt sind. 3. Laden Sie das Mobilteil mit der Tastatur nach vorn (24 Sunden). Reichweite Die Reichweite des Telefons beträgt zwischen 50 und 300 Meter, abhängig von evtl. Hindernissen, welche die Funkwellen beeinträchtigen. Die Reichweite kann verbessert werden, indem das Mobilteil immer in Richtung zur Basisstation zeigt. Die Gesprächsqualität verschlechtert sich bevor das Gespräch unterbrochen wird. Batterien Wie bei allen aufladbaren Batterien, kann die Leistung mit der Zeit nachlassen. Die Basisstation besitzt einen Überladungsschutz, so dass die Batterien nicht überladen werden können oder durch zu lange Ladung Schaden nehmen. Voll geladene Batterien (10 Sunden) reichen für eine Standby-Zeit von 70 Stunden oder 5 Stunden Gesprächszeit. Diese Betriebszeiten gelten bei normaler Zimmertemperatur. Die volle Batteriekapazität ist erreicht, wenn die Batterien 4-5 Mal geladen wurden. Wenn die Batterie fast leer ist, ein Warnsignal ertönt.
-
Page 21: Anruf Annehmen
Deutsch Anruf annehmen 1. Warten Sie, bis das Telefon klingelt. 2. Sie können den Anruf mit der Taste annehmen. 3. Beenden Sie die Verbindung mit Achtung! Die Anzeige auf dem Mobilteil beleuchtet, während des Gesprächs. Wenn Batterien niedrig sind, oder wenn einen zu großen Abstand zur basisstation gibt, ist das Telefon nicht imstande, an eine Linie anzuschließen. Stellen Sie die Basisstation nicht in die Nähe anderer elektrischer Geräte. Stellen Sie die Basisstation auch nicht direkt in die Sonne oder nahe an eine Wärmequelle! Damit minimieren Sie das Störungsrisiko durch solche Geräte.Wärmeentwicklung während des Ladevorgangs ist normal und ungefährlich.Benutzen Sie nur... -
Page 22: Specific Absorption Rate (Sar)
Deutsch Suchen Drücken Sie die Taste an der Basisstation, um das Paging-Signal zu aktivieren. Das Signal stoppt automatisch, oder wenn die Taste am Mobilteil gedrückt wird, oder wenn die Taste an der Basisstation gedrückt wird. Erweitertes System (+1...) Beim Kauf des Telefons ist dieses bei der mitgelieferten Basisstation angemeldet. Das Mobilteil hat z.B. die Rufnummer 1. Dies wird auf einem Aufkleber auf jedem Mobilteil gezeigt. Diese Nummer wird auch bei Interngesprächen zwischen den Mobilteilen verwendet. Wen Sie mehrere Mobilteile an einer Basisstation betreiben, achten Sie darauf, dass die Basisstation in der „Mitte“ platziert ist, so dass der Deckungsbereich für alle Telefone ungefähr gleich ist. Weitere Mobilteile können nicht nachträglich angeschlossen werden. Interngespräche 1. Drücken Sie 2. Geben Sie die Rufnummer des Mobilteils ein, das Sie anrufen möchten. Wenn ein externer Anruf während eines Interngesprächs ankommt, ertönt ein Signal. Beenden Sie das Interngespräch mit und nehmen Sie das externe Gespräch mit an. Interngespräche/Konferenz zwischen Mobilteilen 1. Ein externes Gespräch wird geführt. -
Page 23: Wenn Das Telefon Nicht Funktioniert
Verlängerungskabel und andere Telefone. Wenn das Gerät jetzt funktioniert, liegt der Fehler woanders. Versuchen Sie, das Telefon z.B. bei einem Nachbarn anzuschließen. Wenn das Gerät dort funktioniert, ist Ihr Telefonanschluss vielleicht gestört. Rufen Sie die Störungsstelle an. Die Batterie sind vielleicht schwach (stellen Sie das Mobilteil in das Ladegerät). Sollte das Telefon trotz der oben stehenden Maßnahmen nicht funktionieren, bringen Sie das Telefon zu Ihrem Händler. Vergessen Sie nicht die Einkaufsquittung/Rechnung. Declaration of Conformity Doro erklärt hiermit, dass das Produkt Doro PhoneEasy DECT 315 mit den wesentlichen Anforderungen und anderen relevanten Bestimmungen in der Richtlinie 1999/5/EC, 2002/95/EC übereinstimmt. Eine Kopie der Herstellerdeklaration finden Sie auf www.doro.com/dofc. Garantie Dieses Gerät hat die Warengarantiezeit von einem Jahr. Bei eventuellen Reklamationen wenden Sie sich bitte an Ihren Händler. Der Garantieservice wird nur mit gültiger Kaufquittung bzw. Rechnungskopie ausgeführt. - Page 24 Français Raccordement 1. Reliez le bloc d’alimentation (9V 300mA) et le câble téléphonique à leurs prises respectives. 2. Insérez la batterie dans le combiné et placez le câble conformément à l’illustration. Remettez la trappe en place. 3. Placez le combiné sur le chargeur, le clavier tourné vers l’extérieur et chargez-le 24 heures en continu avant la première utilisation. Portée En général, la portée du téléphone varie de 50 à 300 mètres en fonction des conditions ambiantes. Vous pouvez améliorer la portée en tournant la tête de façon à pointer le combiné vers la base. La qualité du son se détériore quand le combiné se rapproche de la limite de sa portée, puis la communication est coupée. Batterie Les batteries ayant une durée de vie limitée, l’autonomie en veille ou en communication peut varier par rapport aux spécifications données. Des batteries complètement chargées (charge de 10 heures) ont une autonomie d’environ 5 heures en communication et 70 heures en veille. Ces durées sont données pour une utilisation à l’intérieur à des températures normales. Les batteries sont complètement chargées au bout de 4 à 5 charges. La base intègre un système de recharge automatique qui évite de surcharger les batteries ou de les endommager par une recharge prolongée. Lorsque la batterie est presque déchargée, un signal sonore retentit en cours d’appel. Témoins de la base S’allume pendant la charge. S’allume en veille ou clignote en cours d’appel.
-
Page 25: Touche Secret
Vous pourrez observer un réchauffement de l'appareil pendant la charge ; ce phénomène est normal. Utilisez uniquement des batteries DORO d’origine. La garantie ne couvre pas les dommages causés par de mauvaises batteries. Réglage du volume En cours d’appel, appuyez pendant quelques secondes sur... -
Page 26: Recherche Du Combiné
Français Mettre le combiné en marche ou l’éteindre Eteignez le combiné en appuyant pendant quelques secondes sur Allumez le combiné en appuyant brièvement sur . Vous entendrez alors un beep sonore de confirmation. Recherche du combiné Appuyer sur la touche sur la touche de la base déclenche le signal de recherche du combiné. Celui-ci s’arrête automatiquement au bout de quelques secondes ou lorsqu’on appuie sur la touche du combiné ou sur la touche de la base. Système élargi (+1… uniquement) Généralités sur les systèmes élargis (+1...). A l’achat du téléphone, le combiné est déclaré sur la base qui l’accompagne. Pour utiliser plusieurs combinés sur la même base, placez la base à distance égale des combinés pour une portée répartie sur la zone à couvrir. Appels internes 1. Appuyez sur 2. Composez le numéro du combiné que vous voulez appeler, Si vous recevez un appel de l'extérieur pendant un appel interne, le combiné... -
Page 27: En Cas De Problèmes
DAS (Débit d’Absorption Spécifique) Cet appareil est conforme aux normes de sécurité concernant l’exposition aux fréquences radioélectriques. La valeur enregistrée pour ce téléphone est de 0,06 W/kg (mesurée sur un tissu de 10g). La limite applicable aux téléphones portables utilisés par le public fixée par l’OMS est de 2 W/kg en moyenne sur un tissu de dix grammes. Déclaration de conformité Doro certifie que cet appareil Doro PhoneEasy DECT 315 est compatible avec l’essentiel des spécifications requises et autres points des directives 1999/5/EC et 2002/95/EC. La déclaration de conformité peut être consultée à l’adresse suivante : www.doro.com/dofc... - Page 28 Service d’Assistance Téléphonique au 08 92 68 90 18 ( N° Audiotel - 0,34€ /min.). Pour la France Si cette section ne vous permet pas de résoudre le problème, contactez notre Service d’Assistance Téléphonique au 08 92 68 90 18 (N° Audiotel - 0,34€ / min.) ou à l’adresse suivante : contact@doro.fr Vous trouverez les coordonnées de contacts supplémentaires sur notre site Internet : www.doro.com...
- Page 29 Italiano Collegamento 1. Collegare l’adattatore di rete (9 Vca) e il cavo telefonico alle prese a muro. 2. Posizionare la batteria sul microtelefono e inserire il cavo come indicato. 3. Caricare il microtelefono per 24 ore la prima volta (la tastiera deve essere rivolta verso l’esterno). Portata La portata del telefono varia in base agli ostacoli eventualmente presenti lungo il percorso delle onde radio che trasportano il segnale della chiamata ed è normalmente compresa tra 50 e 300 metri. È possibile aumentare la copertura posizionandosi in modo che il microtelefono sia rivolto verso l’unità base. La qualità del suono si riduce progressivamente man mano che ci si avvicina alla portata massima, fino a quando la chiamata non si interrompe. Batteria Siccome le batterie hanno una durata limitata, è normale che il tempo di conversazione e di standby diminuisca rispetto a quello indicato nelle caratteristiche quando il telefono è usato regolarmente. Con le batterie completamente cariche (caricate per 10 ore), si ha un’autonomia di circa 70 ore in standby oppure 5 ore di conversazione. Questi tempi operativi si riferiscono all’uso con temperature ambiente normali. La capacità massima delle batterie sarà disponibile dopo che le stesse sono state caricate per 4-5 volte. L’unità base è dotata di un meccanismo di ricarica automatico che evita il sovraccarico o il danneggiamento delle batterie dovuto ad una ricarica prolungata. Se le batterie sono quasi scariche, verrà emesso un tono di avviso durante le chiamate.
- Page 30 Italiano Indicatori dell’unità base Acceso durante la carica. Acceso in standby e lampeggiante durante le chiamate. Esecuzione di una chiamata 1. Premere . Comporre il numero telefonico desiderato. 2. Premere per terminare la chiamata. Ricezione di una chiamata 1. Attendere lo squillo del microtelefono. 2. Premere per rispondere. Premere per terminare la chiamata. Attenzione! L’indicatore sul microtelefono si accende quando è in corso una chiamata. Quando le batterie sono scariche o se la distanza rispetto alla base è eccessiva, il telefono non può...
- Page 31 Italiano Suoneria del microtelefono 1. Premere 2. Premere il tasto numerico corrispondente alla suoneria desiderata 3. Tenere premuto per diversi secondi per aumentare il volume della suoneria o per ridurre il volume. 4. Premere per salvare le impostazioni. Ricerca unità Alla pressione di (sull’unità base), il microtelefono suona. Il segnale si interrompe automaticamente dopo alcuni istanti oppure premendo il tasto del microtelefono o il tasto dell’unità base. Estensione del sistema (solo +1... Il numero del microtelefono utilizzato per le chiamate interne è visualizzato su un’etichetta apposta su ciascun microtelefono. L’unità base deve essere posizionata centralmente in modo che l’area coperta risulti circa la stessa per tutti i microtelefoni. Non è possibile aggiungere microtelefoni supplementari in un secondo tempo. Chiamate interne 1. Premere 2. Inserire il numero assegnato al microtelefono che si desidera chiamare, Qualora sopraggiunga una chiamata esterna mentre quella interna è in corso, verrà emesso un segnale acustico. È possibile terminare la chiamata interna premendo e quindi ricevere una chiamata esterna premendo nuovamente Trasferimento di chiamata/conferenza tra microtelefoni...
-
Page 32: Dichiarazione Di Conformità
Ricerca e individuazione guasti Verificare che il cavo telefonico non sia danneggiato e sia correttamente inserito. Scollegare tutti gli apparecchi addizionali, le prolunghe e gli altri telefoni. Se il problema viene risolto, il difetto può essere attribuito all’altro apparecchio. Provare l’apparecchio con una linea del cui funzionamento si è certi (ad esempio quella di un vicino). Se il prodotto funziona, il difetto può essere attribuito alla linea telefonica. Informare la società telefonica. Controllare lo stato di carica delle batterie del microtelefono. Se il telefono continua a non funzionare, contattare il rivenditore. In questo caso è opportuno avere a portata di mano la ricevuta o una copia della fattura. Dichiarazione di conformità Con la presente, Doro dichiara che il prodotto Doro PhoneEasy DECT 315 è conforme ai requisiti essenziali e alle altre norme applicabili contenute nelle Direttive 1999/5/EC e 2002/95/EC. Una copia della dichiarazione del costruttore è disponibile al sito Internet www.doro. com/dofc Garanzia Il presente prodotto è garantito per un periodo di 12 mesi a decorrere dalla data di acquisto. Per avere diritto a qualsiasi servizio o assistenza durante il periodo di garanzia è necessario presentare il relativo documento di acquisto. La presente garanzia non si applica in caso di eventuali guasti dovuti a incidenti, o danni simili, penetrazione di liquidi, negligenza, uso anomalo, manutenzione inadeguata o altre circostanze simile imputabili all’acquirente. Inoltre, la presente garanzia non verrà applicata in caso di eventuali guasti provocati da temporali... - Page 33 Nederlands Aansluiten 1. Sluit de netstroomadapter (9V AC) en het telefoonsnoer aan op hun wandcontactdozen. 2. Plaats de batterij in de handset en sluit de kabel aan zoals aangegeven. 3. Laad de handset op met de toetsen naar buiten gericht (de eerste keer 24 uur). Bereik Het bereik van de telefoon hangt af van het feit of de radiogolven die de oproep dragen al dan niet worden beperkt door obstakels en bedraagt normaal tussen de 50 en 300 meter. U kunt de dekking verbeteren door uw hoofd zo te draaien dat de handset zich op een lijn met de basiseenheid bevindt. De geluidskwaliteit neemt af naarmate de limiet wordt bereikt, totdat de oproep uiteindelijk wordt afgebroken.
-
Page 34: Een Oproep Plaatsen
Nederlands Indicators op basiseenheid Brandt als telefoon wordt opgeladen. Brandt bij standby en knippert tijdens oproepen. Een oproep plaatsen 1. Druk op . Toets het gewenste telefoonnummer in. 2. Druk op om de oproep te beëindigen. Een oproep ontvangen 1. Wacht tot de handset overgaat. 2. Druk op om de oproep aan te nemen. Druk op om de oproep te beëindigen. Let op! De indicator op de handset gaat branden als er verbinding is. Als de batterijen bijna leeg zijn of als de afstand tot de basiseenheid te groot is, kan de telefoon geen verbinding maken. - Page 35 Nederlands Het belsignaal van de handset 1. Druk op 2. Druk voor het gewenste type belsignaal op de bijbehorende cijfertoets. 3. Druk enkele seconden op om het volume van het belsignaal te verhogen of druk op om het volume te verlagen. 4. Druk op om op te slaan. Paging De handset gaat over als u op (op de basiseenheid) drukt. Het signaal stopt automatisch na enige tijd of als u op de toets op de handset of op de toets op de basiseenheid drukt. Uitgebreid systeem (alleen +1…) Het handsetnummer dat wordt gebruikt voor interne oproepen staat op een label op elke handset.
-
Page 36: Problemen Oplossen
Controleer de oplaadstatus van de handsetbatterijen. Neem contact op met uw leverancier als de telefoon dan nog steeds niet werkt. Vergeet niet om uw aankoopbon of kopiefactuur mee te nemen. Verklaring van Conformiteit Doro verklaart hierbij dat het product Doro PhoneEasy DECT 315 voldoet aan de essentiële vereisten en andere relevante regelgeving vervat in de Richtlijnen 1999/5/EC en 2002/95/EC. Een exemplaar van de verklaring van de fabrikant is verkrijgbaar op www.doro.com/... - Page 37 Polski Podłączanie 1. Podłącz zasilacz sieciowy (9 V AC) i przewód telefoniczny do gniazdek ściennych i do jednostki bazowej. 2. Włóż akumulatorek do słuchawki i podłącz kabel, jak pokazano na rysunku. 3. Naładuj słuchawkę, umieszczając ją w bazie klawiaturą skierowaną do siebie (pierwszy raz przez 24 godziny).
- Page 38 Polski Wskaźniki bazy Świeci w czasie ładowania. Świeci w trybie gotowości i pulsuje podczas połączeń. Nawiązywanie połączenia 1. Naciśnij . Wpisz żądany numer telefonu. 2. Naciśnij , aby zakończyć połączenie. Odbieranie połączenia 1. Poczekaj, aż słuchawka zadzwoni. 2. Naciśnij , aby odebrać. Naciśnij , aby zakończyć...
- Page 39 Polski Sygnał dzwonka słuchawki 1. Naciśnij 2. Naciśnij odpowiedni klawisz numeryczny dla żądanego typu sygnału dzwonka 3. Wciskaj przycisk przez kilka sekund, aby zwiększyć głośność sygnału dzwonka lub wciskaj przycisk , aby zmniejszyć głośność. 4. Naciśnij , aby zapisać. Poszukiwanie słuchawki Słuchawka będzie dzwonić, jeśli zostanie naciśnięty przycisk (na bazie).
-
Page 40: Rozwiązywanie Problemów
Jeśli aparat nadal nie działa, skontaktuj się z serwisem. Konieczne będzie przedstawienie rachunku lub faktury zakupu oraz karty gwarancyjnej. Deklaracja zgodności Firma Doro oświadcza, że urządzenie Doro PhoneEasy DECT 315 spełnia podstawowe wymagania oraz inne istotne przepisy Dyrektyw 1999/5/EC i 2002/95/EC. Kopia deklaracji producenta jest dostępna pod adresem www.doro.com/dofc. -
Page 41: Karta Gwarancyjna
DEFINICJE odpowiada numerowi seryjnemu wpisanemu do Karty Gwarant: DORO Atlantel Sp. z o.o., ul. Zawiła Gwarancyjnej. 45, 30-442 Kraków, tel. (0-12) 415-45-57. 7. Ochrona gwarancyjna nie będzie udzielona jeżeli w Karcie Gwarancyjnej wystąpią jakiekolwiek zmiany, NUMER INFOLINII: wytarcia, zamazania lub numer seryjny umieszczony Numer telefoniczny służący do... - Page 42 żywiołowymi, ograniczeniami importowymi, d) urządzenie spadło, obudowa uległa uszkodzeniu itd. niepokojami społecznymi, DORO ATLANTEL Sp. z o.o. nie będzie ponosić odpowiedzialności wynikającej z DORO ATLANTEL Sp. z o.o. zastrzega sobie prawo do niniejszej gwarancji. błędów w druku oraz zmian 24. Gwarant nie odpowiada za straty i szkody...
- Page 43 ������������������������������������ ������������������������������� ������������������������������������ ������������������������������� ������ �������������� ��������� �� ������ ����������� �� ��������� ��� �� ���������� �������� �� ���� �������� ��� ������ �� ������� ������ ����������� ������ ���� � ������ �������� ������ �������������� ��������� �� ������ ����������� �� ������������ � ����������� ��������� ����� ���������� ����������� ���������...
- Page 44 PhoneEasy DECT 315...
- Page 48 English Czhech Greek Hungarian Italian Dutch Polish French German Version 2.1...
Need help?
Do you have a question about the PhoneEasy DECT 315 and is the answer not in the manual?
Questions and answers