Advertisement
Available languages
Available languages
Quick Links
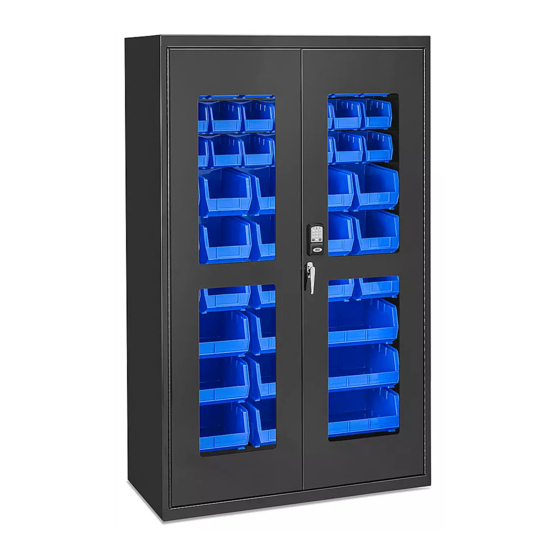
H-9015
ACCESS CONTROL
CABINET
TOOLS NEEDED
Laptop
Flash Drive
(Included)
NOTE: There are additional settings and
customization within the software that go
beyond what is explained in these instructions.
For additional information, click Help > Manuals
on the top left of the laptop screen for more
information once signed into the software.
NOTE: The following information is based on
LockView 5.6.0 Software. Newer software might
have updated screens and instructions.
The software downloaded will have the most
recent manuals and instructions by clicking
Help > Manuals on the top left of the screen
once signed in.
SOFTWARE INSTALLATION AND ACTIVATING
LICENSE
WARNING: Software license may only be
used with one laptop and cannot be moved
once activated. Choose a laptop that can be
moved within 6' of the cabinet to connect USB
cable for data sync.
NOTE: Keep flash drive after installing software
and activating license. Write down Crypkey S/N
located at the back of the flash drive and store
in a secure location. (See Figure 1)
Figure 1
PAGE 1 OF 18
1-800-295-5510
uline.com
USB Cable
(Included)
OPERATION
1.
2. Plug in flash drive and download LockView software
3. Double click LockView icon to open software.
4. To register software license, select Online Activation
5. Follow prompts to complete license activation.
Pour le français, consulter les pages 13-18.
For the quickest registration process, ensure laptop
is connected to WiFi.
to laptop.
on opening screen. (See Figure 2)
Figure 2
Para Español, vea páginas 7-12.
0221 IH-9015
Advertisement

Subscribe to Our Youtube Channel
Related Manuals for U-Line H-9015


Summary of Contents for U-Line H-9015
- Page 1 Para Español, vea páginas 7-12. Pour le français, consulter les pages 13-18. H-9015 1-800-295-5510 uline.com ACCESS CONTROL CABINET TOOLS NEEDED Laptop Flash Drive USB Cable (Included) (Included) OPERATION NOTE: There are additional settings and For the quickest registration process, ensure laptop customization within the software that go is connected to WiFi.
- Page 2 OPERATION CONTINUED 6. Open LockView software icon. For first-time login, 2. Select Add Operator. Enter the new operator name enter admin for both operator name and password. and create password. (See Figure 5) This is preset for first-time users. (See Figure 3) Figure 5 Figure 3 3.
- Page 3 OPERATION CONTINUED AUTOMATICALLY ADDING A LOCK 2. Select Add Lock. Enter a custom lock name for the lock. Enter the serial number and setup code found Select Wizards tab on the left-hand side of the on the green sticker that arrived with flash drive. screen.
- Page 4 OPERATION CONTINUED 6. Select 9 Volts for lock voltage. 2. Click Add User and fill out information on right side of screen. Bad Credential Lockout allows operator to restrict access to the lock if multiple invalid attempts are a. Credential Type for this cabinet is Pushbutton. entered.
- Page 5 OPERATION CONTINUED d. Time-based Restrictions / Groups allow the iii. Press the > button to assign lock to user. operator to set specific time frames for users to Lock will move to the green rectangle. enter the cabinet. (See Figure 10) All changes will automatically save to the software.
- Page 6 OPERATION CONTINUED b. Auto-Archive ON will automatically archive data 1. Operator has the option to create user database, with the indicated amount of days. The amount create lock database, or connect for reading and of days can be customized. writing locks. c.
-
Page 7: Herramientas Necesarias
H-9015 800-295-5510 uline.mx GABINETE CON CONTROL DE ACCESO HERRAMIENTAS NECESARIAS Laptop Memoria USB Cable USB (incluida) (incluido) FUNCIONAMIENTO Para un proceso de registro más rápido, asegúrese NOTA: Hay configuraciones y modificaciones personalizadas adicionales en el software que de que la laptop esté conectada a WiFi. - Page 8 CONTINUACIÓN DE FUNCIONAMIENTO 6. Abra el icono del software LockView. Para iniciar sesión 2. Seleccione Agregar Operador (Add Operator). por primera vez, ingrese admin como nombre del Ingrese el nuevo nombre del operador y cree la operador y la contraseña. Esto está preestablecido contraseña.
- Page 9 CONTINUACIÓN DE FUNCIONAMIENTO AGREGAR UN CANDADO AUTOMÁTICAMENTE 2. Seleccione Agregar Candado (Add Lock). Ingrese un nombre de candado personalizado para el Seleccione la pestaña Asistentes (Wizards) en el candado. Ingrese el número de serie y el código de lado izquierdo de la pantalla. (Vea Diagrama 6) configuración que se encuentran en la etiqueta verde que llegó...
- Page 10 CONTINUACIÓN DE FUNCIONAMIENTO 6. Seleccione 9 Voltios (9 Volts) para el voltaje de Diagrama 9 bloqueo. El Bloqueo por Credencial Incorrecto (Bad Credential Lockout) le permite al operador restringir el acceso al candado si se ingresan varios intentos no válidos. Personalice el número de intentos incorrectos y los minutos en los que se introdujeron intentos incorrectos y la duración que el usuario permaneció...
- Page 11 CONTINUACIÓN DE FUNCIONAMIENTO d. Las Restricciones Basadas en el Tiempo / Grupos b. El operador puede ordenar por nombre de (Time-based Restrictions / Groups) le permiten al candado o nombre de usuario o grupo. El operador establecer intervalos específicos para proceso es igual para cada método.
- Page 12 CONTINUACIÓN DE FUNCIONAMIENTO 2. Seleccione dentro del cuadro Lista Por (List By) para El operador tiene la opción de crear una base ver los seguimientos de auditoría de los candados o de datos de usuarios, crear una base de datos usuarios.
-
Page 13: Outils Requis
H-9015 1-800-295-5510 uline.ca ARMOIRE AVEC CONTRÔLE D'ACCÈS OUTILS REQUIS Ordinateur Clé USB Câble USB portable (inclus) (inclus) FONCTIONNEMENT Pour une procédure d'inscription rapide, assurez- REMARQUE : Le logiciel comporte des paramètres et des personnalisations vous que l'ordinateur portable est connecté au WiFi. - Page 14 FONCTIONNEMENT SUITE 6. Ouvrez l'icône du logiciel LockView. Lors de la 2. Sélectionnez Add Operator. Saisissez le nom du nouvel première connexion, saisissez admin pour le nom de opérateur et créez un mot de passe. (Voir Figure 5) l'opérateur et le mot de passe. Il s'agit d'un préréglage pour les nouveaux utilisateurs.
- Page 15 FONCTIONNEMENT SUITE AJOUT AUTOMATIQUE D'UN VERROU 2. Sélectionnez Ajouter un verrou (Add Lock). Saisissez un nom de verrou personnalisé pour le Sélectionnez l'onglet Wizards sur le côté gauche de verrou. Saisissez le numéro de série et le code de l'écran. (Voir Figure 6) configuration figurant sur l'autocollant vert livré...
- Page 16 FONCTIONNEMENT SUITE 6. Sélectionnez 9 volts (9 Volts) pour la tension de Figure 9 verrouillage. Verrouillage pour erreur d'identification (Bad Credential Lockout) permet à l'opérateur de restreindre l'accès au verrou si plusieurs tentatives non valides sont saisies. Personnalisez le nombre de mauvaises tentatives et la plage de temps en minutes où...
- Page 17 FONCTIONNEMENT SUITE d. Time-based Restrictions / Groups permettent à c. Tri par nom d'utilisateur/de groupe l'opérateur de déterminer des délais spécifiques i. Cliquez sur l'utilisateur à ajouter. pour l'accès des utilisateurs dans l'armoire. ii. Tous les verrous non attribués à l'utilisateur i.
- Page 18 FONCTIONNEMENT SUITE 2. Sélectionnez dans la fenêtre Liste par (List By) pour L'opérateur a la possibilité de créer une base voir les pistes d'audit des verrous ou des utilisateurs. de données d'utilisateurs, de créer une base de données de verrous, ou de se connecter pour lire et 3.
Need help?
Do you have a question about the H-9015 and is the answer not in the manual?
Questions and answers