
Subscribe to Our Youtube Channel
Related Manuals for Sensorex TX100

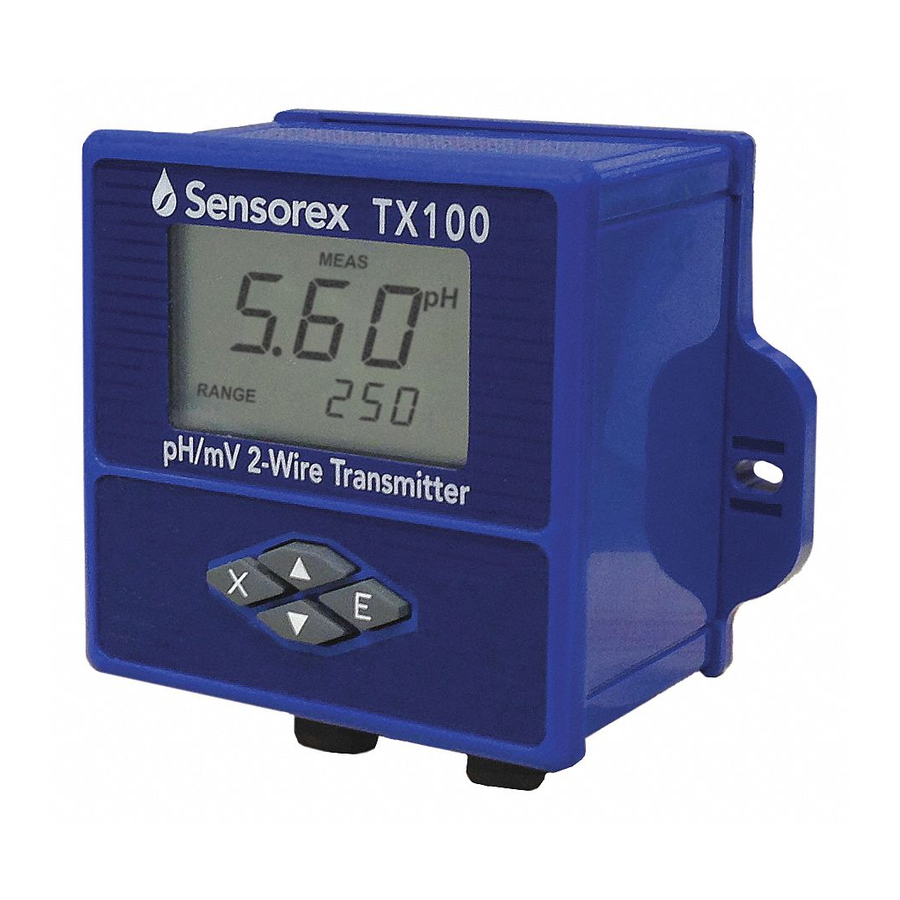
Summary of Contents for Sensorex TX100
- Page 1 PRODUCT INSTRUCTION MANUAL TX100 - pH/mV 2-Wire Loop-Powered Transmitter Form: INSTRTX100-Rev G ©2011 Sensorex Corporation...
- Page 3 • Please complete the WARRANTY REGISTRATION located at the back of this manual and fax to Sensorex at 714-894-4839 or scan and e-mail to TECHNICAL AT SENSOREX.COM About This Document This manual contains instructions for the installation, operation and care of the TX100 pH/mV transmitter. The following list provides notes concerning revisions of this document. Rev Level...
-
Page 4: Table Of Contents
PRODUCT INSTRUCTION MANUAL Table of Contents Part 1 Introduction General Features TX100 Specifications Quick Start Guide Part 2 Transmitter Mounting Cord Grip Installation Wall Mounting Panel Mounting DIN Rail Mounting Pipe Mounting Part 3 Sensor Mounting General Part 4 Transmitter Electrical Installation... - Page 5 PRODUCT INSTRUCTION MANUAL Table of Contents Part 9 Setup Functions Probe Select Menu Calibration Offset Range Menu Limit Menu Hold Menu Clean Probe Menu Factory Reset Manual Temperature Compensation (without ATC) Temperature Unit Menu Part 10 Troubleshooting 10.1 General 10.2 Troubleshooting Guidelines 10.3 Troubleshooting Chart...
- Page 6 PRODUCT INSTRUCTION MANUAL Diagrams and Illustrations Figure 2-1 Conduit port Knockout removal Figure 2-2 Cord grip Mounting Figure 2-3 Wall Mount Figure 2-4 Panel Mount Figure 2-5 DIN RAIL Mount Figure 2-6 3/4” Pipe Mount Figure 4-1 Power connections (schematic) Figure 4-1a 4-20mA loop wiring (schematic) Figure 5-1...
-
Page 7: Part 1 Introduction
“Quick Start” Instructions supplied with your transmitter. Features - The TX100 is designed to be a fully isolated, loop powered pH/mV instrument for two-wire DC applications. - Can be user-adjusted for specific application span from 0-14pH or -1999mV to + 1999mV. -
Page 8: Tx100 Specifications
PRODUCT INSTRUCTION MANUAL TX100 Specifications Measuring Range (pH) 0.00 to 14.00pH, 0.01 pH resolution, +/- 0.01 accuracy Measuring Range (ORP/mV) -1999mV to 1999mV, 1mV resolution, +/- 2mV accuracy Measuring Temperature Range -20 degC to 110 degC /-4 degF to 230degF, 0.1degC/F resolution... -
Page 9: Quick Start Guide
Connect a 12-24V DC, 8 amp maximum power supply as shown above. See page 6 for resistance load vs. voltage. d. Transmitter Programming/Setup The TX100 is supplied with the following preset programming: Factory Calibrated Values pH Manual Offset = 0... - Page 10 For pH, perform Two-Point pH calibration as outlined in Section 8.2. First buffer is pH 7.00 or 6.86 (NIST), second buffer choices are 4.01, 10.00 or 9.18 (NIST). A two-point calibration must be performed. Three-point calibration is not necessary with the TX100. Page 4 of 35...
-
Page 11: Part 2 Transmitter Mounting
PRODUCT INSTRUCTION MANUAL Part 2 Transmitter Mounting Cord Grip Installation Turn transmitter upside down with display facing you. Punch out either one or two conduit knockouts with a small hammer and punch as shown below for cord grip mounting. Ensure back cover is installed to provide mechanical support for the enclosure walls. -
Page 12: Wall Mounting
PRODUCT INSTRUCTION MANUAL Wall Mounting INCHES (MILLIMETERS) Figure 2.3 Page 6 of 35... -
Page 13: Panel Mounting
PRODUCT INSTRUCTION MANUAL Panel Mounting INCHES (MILLIMETERS) Figure 2.4 Page 7 of 35... -
Page 14: Din Rail Mounting
PRODUCT INSTRUCTION MANUAL DIN Rail Mounting INCHES (MILLIMETERS) Figure 2.5 Page 8 of 35... -
Page 15: Pipe Mounting
PRODUCT INSTRUCTION MANUAL Pipe Mounting INCHES (MILLIMETERS) Figure 2.6 Page 9 of 35... -
Page 16: Part 3 Sensor Mounting
PRODUCT INSTRUCTION MANUAL Part 3 Sensor Mounting General Select a location within the maximum sensor cable length (30 ft) for mounting of the sensor flow cell. If there is more than 30 ft distance from the electrode to the transmitter, you should purchase a battery- powered preamplifier model PHAMP-1, or use an amplified pH or ORP electrode. -
Page 17: Part 4 Transmitter Electrical Installation
Route signal cable away from AC power lines, adjustable frequency drives, motors, or other noisy electrical signal lines. Do not run sensor or signal cables in conduit that contains AC power lines or motor leads. The TX100 is supplied with a light- ning protective component. -
Page 18: 4-20Ma Loop Wiring
PRODUCT INSTRUCTION MANUAL Part 4 Transmitter Electrical Installation 4-20mA loop connection to PLC or other 4-20mA load device Install loop wiring as shown below in diagram 4.1A, paying particular attention to maximum resistance load shown in the chart. Note that PLC or 4-20mA device and power supply are customer supplied components. Supply Voltage( V DC) Max Resistance Load (Ohms) Figure 4.1A... -
Page 19: General
Electrode Electrical Connection General The electrode cable can be quickly connected to the TX100’s terminal strip by matching the wire colors on the cable conductors. Route signal cable away from AC power lines, adjustable frequency drives, motors, or other noisy electrical signal lines. Do not run sensor or signal cables in conduit that contains AC power lines or motor leads. -
Page 20: Keypad Function
PRODUCT INSTRUCTION MANUAL Part 6 Keypad Function and LCD Keypad The TX100 keypad is designed for ease-of-use. See graphic below for keypad function. Figure 6.1 Page 14 of 35... -
Page 21: Lcd Display
PRODUCT INSTRUCTION MANUAL LCD Screen The TX100’s LCD display contains a number of useful indicators which let the user know which mode is active. In addition, all values to be changed will flash. The silicone keypad is designed for ease-of-use. See graphic below for display features. -
Page 22: General
PRODUCT INSTRUCTION MANUAL Part 7 Programming Menu Menu The TX100 pH/ORP transmitter menu flow chart below shows a quick view of navigation basics. For detailed submenu programming, please refer to the appropriate menu subsection. Figure 6.3 Page 16 of 35... -
Page 23: Part 8 Calibration
25.0 degrees C or 77.0 degrees F. 2-Point pH Calibration The TX100 performs two-point calibrations using preprogrammed buffer choices. No mV calibration is re- quired. See Figure 8.1 for calibration programming. - Page 24 PRODUCT INSTRUCTION MANUAL Figure 8.1 Page 18 of 35...
-
Page 25: Temperature Calibration (With Atc)
PRODUCT INSTRUCTION MANUAL Temperature Calibration This menu allows the user to select temperature units of measure and to calibrate the temperature displayed on the T100’s screen to match another sensor or thermometer. This menu is only available in pH mode (See Probe Select menu for details) Figure 8.2 Page 19 of 35... -
Page 26: Probe Select Menu
PRODUCT INSTRUCTION MANUAL Probe Select Menu Allows for selection of pH or ORP (mV) sensor. Menu is preset to “pH” from factory. Figure 9.1 Page 20 of 35... -
Page 27: Calibration Offset
PRODUCT INSTRUCTION MANUAL Calibration Offset This mode allows the user to offset the current calibration by up to 2.00 pH units to make it equal to the calibration/reading of another meter. Figure 9.2 Page 21 of 35... -
Page 28: Range Menu
PRODUCT INSTRUCTION MANUAL Range Menu This calibration mode allows the user to define the pH values equal to 4.0 and 20.0mA. The factory preset Values are 0.0 pH for 4.0mA and 14.0pH for 20mA. Figure 9.3 Page 22 of 35... -
Page 29: Limit Menu
PRODUCT INSTRUCTION MANUAL Limit Menu This calibration mode allows the user to turn off or on the current output limit. Figure 9.4 Page 23 of 35... -
Page 30: Hold Menu
PRODUCT INSTRUCTION MANUAL Hold Menu Controls output during transmitter setup. Figure 9.5 Page 24 of 35... -
Page 31: Clean Probe Menu
PRODUCT INSTRUCTION MANUAL Clean Probe Menu This menu allows the user to set a visual reminder to clean the probe. The reminder can be set to within 1-250 days. Once the timer has expired the clean probe icon will flash on the screen. Flashing probe icon is disabled by setting clean probe menu OFF. -
Page 32: Factory Reset
PRODUCT INSTRUCTION MANUAL Factory Reset Menu This menu allows the user to reset all programmed settings back to the factory defaults. Factory Reset Values pH Slope and Offset values reset to Ideal Range Mode [ - ] OFF mV Slope and Offset values reset to Range Mode Lo mV reset to -999 mV Factory Calibrated Values Range Mode Hi mV reset to 999 mV... -
Page 33: Manual Temperature Compensation (Without Atc)
PRODUCT INSTRUCTION MANUAL Manual Temperature Compensation This menu allows the user to set the temperature displayed on the screen (when a temperature sensor is not attached) for temperature compensation. Figure 9.8 Page 27 of 35... -
Page 34: Temperature Unit Menu
PRODUCT INSTRUCTION MANUAL Temperature Unit Menu This menu permits selection of either deg C or deg F. Figure 9.9 Page 28 of 35... -
Page 35: Part 10 Troubleshooting
If readings are very erratic after wiring has been checked, check for a possible AC ground loop by temporarily moving the sensor to a sample of solution in a beaker or other container. 10.3 Troubleshooting Chart TX100 Figure 10.1 Page 29 of 35... -
Page 36: Part 11 Maintenance
To recalibrate the TX100 and electrode, see Part 8. 11.2 Replacement Parts Replacement parts for the TX100 are available as a kit. This is the same kit that is in the TX100 box. For indi- vidual parts, please contact the factory. - Page 37 PRODUCT INSTRUCTION MANUAL 11.2.2 Panel Mount Parts Figure 11.2 Location in Qty in kit Part Number Description Fig 11.1 Page 31 of 35...
- Page 38 PRODUCT INSTRUCTION MANUAL 11.2.3 DIN Rail Mount Parts Figure 11.3 Location in Qty in kit Part Number Description Fig 11.1 Page 32 of 35...
- Page 39 PRODUCT INSTRUCTION MANUAL 11.2.4 Pipe Mount Parts Figure 11.4 Location in Qty in kit Part Number Description Fig 11.1 Page 33 of 35...
-
Page 40: Part 12 Warranty And Product Returns
There are no implied warranties of merchantability or fitness for a particular purpose given in connection with the sale of any goods. In no event shall SENSOREX be liable for consequential, incidental or special damages. The buyer’s sole and exclusive remedy and the limit of SENSOREX’s liability for any loss whatsoever shall not exceed the purchase price paid by the purchaser for the product to which claim is made. - Page 41 There are no implied warranties of merchantability of fitness for a particular purpose given in connection with the sale of any goods. In no event shall SENSOREX be liable for con sequential, incidental or special damages.
- Page 43 NOTES: 11751 Markon Dr. Garden Grove, CA 92841 USA Tel: 714-895-4344 Fax: 714-894-4839 E-mail: info@sensorex.com Form: INSTRTX100-RevG www.sensorex.com ©2011 Sensorex Corporation...
Need help?
Do you have a question about the TX100 and is the answer not in the manual?
Questions and answers