Table of Contents
Advertisement
Available languages
Available languages
Quick Links
Istruzioni per l'uso
IT
EN
Italiano, 1
English, 16
Deutsch, 46
Česky, 60
Sommario
FR
Scheda prodotto, 2
Français, 31
Precauzioni, consigli e Assistenza, 3-4
Installazione, 5-6
Caricare i cesti, 8-9
Regolazione cesto superiore
Avvio e utilizzo, 10
Programmi, 11
Tabella dei programmi
Escludere acqua e corrente elettrica
Pulire la lavastoviglie
Evitare i cattivi odori
Pulire gli irroratori
Pulizia filtro entrata acqua
LAVASTOVIGLIE
Advertisement
Chapters
Table of Contents

Related Manuals for Hotpoint Ariston LFD 11M132


Summary of Contents for Hotpoint Ariston LFD 11M132
-
Page 1: Table Of Contents
Collegamenti idraulici ed elettrici Dati tecnici Avvertenze per il primo lavaggio Tasto impostazioni Scegliere la lingua Sicurezza bambini Descrizione dell’apparecchio, 7 LFD 11M132 Vista d’insieme Pannello comandi Caricare i cesti, 8-9 Cesto inferiore Cestino delle posate Cesto superiore Vassoio portaposate... - Page 2 Scheda prodotto Scheda prodotto HOTPOINT ARISTON Marchio LFD 11M132 Modello Capacità nominale in numero di coperti standard (1) A+++ Classe di efficienza energetica su una scala da A+++ (bassi consumi) a D (alti consumi) 237.0 Consumo energetico annuo in kWh (2) 0.83...
-
Page 3: Sicurezza Generale De Cs Smaltimento
Precauzioni, consigli e Assistenza • La porta non deve essere tenuta nella posizione L’apparecchio è stato progettato e costruito aperta perchè può rappresentare il pericolo di in conformità alle norme internazionali di sicurezza. inciampare. Queste avvertenze sono fornite per ragioni di • Tenere il detersivo e il brillantante fuori dalla sicurezza e devono essere lette attentamente. portata dei bambini. - Page 4 Assistenza Detersivi senza fosfati, senza cloro e contenenti enzimi • Si consiglia vivamente di usare i detersivi senza fosfati e senza cloro che sono i più indicati per Prima di contattare l’Assistenza: la tutela dell’ambiente. (vedi • Verificare se l’anomalia può essere risolta da soli • Gli enzimi sviluppano un’azione particolarmente Anomalie e Rimedi) efficace con temperature prossime ai 50°C, • Riavviare il programma per controllare se l’inconveniente per cui con i detersivi con enzimi si possono è...
-
Page 5: Installazione
Installazione Fare attenzione che nel tubo non ci siano né pieghe né In caso di trasloco tenere l’apparecchio in posizione strozzature. verticale; se fosse necessario, inclinarlo sul lato posteriore. Collegamento del tubo di scarico dell’acqua Posizionamento e livellamento Collegare il tubo di scarico, senza piegarlo, a una conduttura 1. Disimballare l’apparecchio e controllare che non abbia subìto di scarico con diametro minimo di 4 cm. -
Page 6: Dati Tecnici
Il pannello comandi è dotato di sistema “Touch Control”; una L’Azienda declina ogni responsabilità qualora queste norme leggera pressione delle dita sui simboli attiva il comando. non vengano rispettate. (secondo il La macchina, è dotata di segnali acustici/toni modello d lavastoviglie ) che avvisano dell’avvenuto comando: Striscia anticondensa accensione, fine ciclo ecc.. -
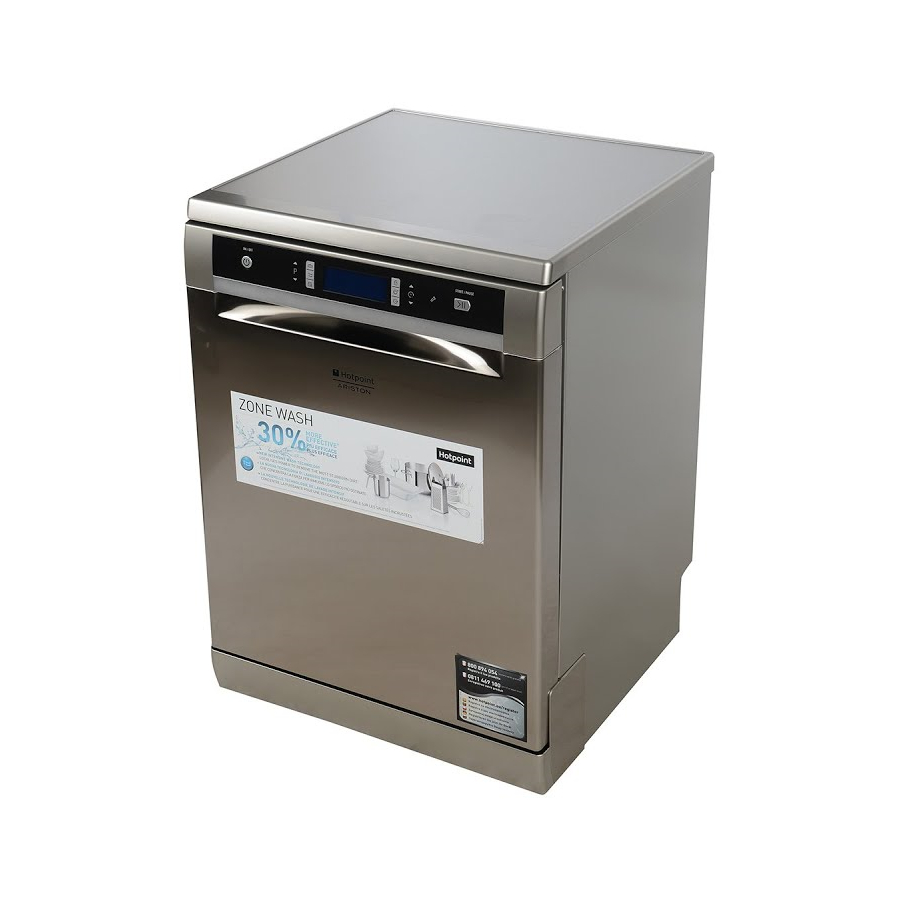
Page 7: Lfd 11M132 Descrizione Dell'apparecchio
Descrizione dell’apparecchio Vista d’insieme Cestello superiore Irroratore superiore Ribaltine Regolatore altezza cestello Cestello inferiore Irroratore inferiore Filtro lavaggio Serbatoio sale Vaschette detersivo, serbatoio brillantante e dispositivo Active Oxigen 10. Targhetta caratteristiche Pannello comandi Turbo Dry Pannello comandi Tasto opzione Extra asciugatura Tasto IMPOSTAZIONI Frecce Selezione Programma Tasto blocco tasti Tasto e spia Tasto e Spie Tasto Pastiglie multifunzione On-Off/Reset... -
Page 8: Caricare I Cesti
Caricare i cesti Suggerimenti Alcuni modelli di lavastoviglie, dispongono di settori reclinabili Prima di caricare i cesti, eliminare dalle stoviglie i residui di gli stessi si possono usare in posizione verticale per la cibo e vuotare bicchieri e i contenitori dei liquidi rimasti. Non è sistemazione dei piatti oppure in posizione orizzontale necessario un risciacquo preventivo sotto acqua corrente. -
Page 9: Vassoio Portaposate
Ribaltine a posizione variabile Il cesto superiore è regolabile in altezza a seconda della Le ribaltine laterali sono posizionabili su tre altezze differenti per necessità: in posizione alta quando nel cesto inferiore si vogliono ottimizzare la disposizione delle stoviglie nello spazio del cesto. sistemare stoviglie ingombranti;... -
Page 10: Avvio E Utilizzo
Avvio e utilizzo Avviare la lavastoviglie Caricare il detersivo Il buon risultato del lavaggio dipende anche dal 1. Aprire il rubinetto dell’acqua. corretto dosaggio del detersivo, eccedendo non si 2. Premere il tasto ON-OFF: il display e le spie sul pannello lava in modo più efficace e si inquina l’ambiente. comandi si illuminano. -
Page 11: Programmi
Programmi I dati dei programmi sono misurati in condizioni di laboratorio secondo Norma europea EN 50242. A seconda delle diverse condizioni di utilizzo, la durata e i dati dei programmi possono variare. Il numero e il tipo di programmi ed opzioni variano in base al modello di lavastoviglie. Consumo Durata dei Consumo Programma Asciugatura Opzioni energia programmi... -
Page 12: Programmi Speciali Ed Opzioni
Programmi speciali ed Opzioni Note: Opzione Partenza ritardata le migliori prestazioni dei programmi “Fast e Express 30’”, si È possibile posticipare da 1 a 24 ore l’avvio del ottengono preferibilmente rispettando il numero di coperti programma: specificati. 1. Selezionare il programma di lavaggio desiderato ed altre eventuali opzioni; premere le frecce della PARTENZA Per consumare di meno usa la lavastoviglie a pieno carico. -
Page 13: Brillantante E Sale Rigenerante
Brillantante e sale rigenerante Questa lavastoviglie, consente una regolazione che riduce Usare solo prodotti specifici per lavastoviglie. l’inquinamento ed ottimizza le prestazioni di lavaggio in funzione Non usare sale alimentare o industriale nè detersivi per il della durezza dell’acqua. Il dato è reperibile presso l’Ente lavaggio a mano. -
Page 14: Manutenzione E Cura
Manutenzione e cura Pulire i filtri Il gruppo filtrante è formato da tre filtri che puliscono l’acqua di lavaggio dai residui di cibo e la rimettono in circolo: per avere buoni risultati di lavaggio è necessario pulirli. Pulire i filtri con regolarità. La lavastoviglie non deve essere usata senza filtri o con filtro sganciato. -
Page 15: Anomalie E Rimedi
Anomalie e rimedi Qualora l’apparecchio presenti delle anomalie di funzionamento, controllare i seguenti punti prima di rivolgersi all’Assistenza. Anomalie: Possibili cause / Soluzione: La lavastoviglie non parte o non • Spegnere la macchina con il tasto ON/OFF, riaccendere dopo un minuto circa e reimpostare il programma. -
Page 16: English
Advice regarding the first wash cycle Technical data Switching the appliance on for the first time Selecting the language Settings button Child safety lock LFD 11M132 Description of the appliance, 22 Overall view Control panel Loading the racks, 23-24 Lower rack... -
Page 17: Product Fiche
Product Fiche Product Fiche HOTPOINT ARISTON Brand LFD 11M132 Model Rated capacity in standard place settings (1) A+++ Energy efficiency class on a scale from A+++ (low consumption) to D (high consumption) 237.0 Energy consumption per year in kWh (2) 0.83... -
Page 18: Precautions, Advice And Assistance
Precautions, advice and Assistance a dangerous obstacle. T h i s a p p l i a n c e w a s d e s i g n e d a n d • Keep detergent and rinse aid out of reach of manufactured in compliance with international children. - Page 19 Assistance Phosphate-free and chlorine-free detergents containing enzymes • We strongly recommend that you use detergents Before contacting Assistance: that do not contain phosphates or chlorine, as • Check whether the problem can be resolved using the these products are harmful to the environment. Troubleshooting guide (see Troubleshooting). • Enzymes provide a particularly effective action • Restart the programme to check whether the problem at temperatures around 50°C. As a result has ceased to exist.
-
Page 20: Installation
Installation Connecting the water outlet hose If the appliance must be moved at any time, keep it in an Connect the outlet hose (without bending it) to a drain duct with upright position; if absolutely necessary, it may be tilted onto its a minimum diameter of 4 cm. -
Page 21: Advice Regarding The First Wash Cycle
The control panel features a “Touch Control” system; Anti-condensation strip press the symbols lightly with your fingertips to activate After installing the dishwasher, open the door and stick the the command. adhesive transparent strip under the wooden shelf in order to protect it from any condensation which may form. -
Page 22: Description Of The Appliance
Description of the appliance Overall view Upper rack Upper sprayer arm Tip-up dispensers Rack height adjuster Lower rack Lower sprayer arm Washing filter Salt dispenser Detergent and rinse-aid dispensers and device Active Oxigen Data plate **** Control panel Turbo Dry Control panel Tabs option button Extra drying option button Select wash cycle arrows SETTINGS button... -
Page 23: Loading The Racks
Loading the racks Tips Several dishwasher models are fitted with tip-up sectors Before loading the racks, remove all food residues from the They can be used in a vertical position when arranging dishes crockery and empty liquids from glasses and containers. No or in a horizontal position (lower) to load pans and salad bowls preventive rinsing is needed under running water. -
Page 24: Cutlery Tray
Tip-up compartments with adjustable position The upper rack can be adjusted for height based on requirements: high position to place bulky crockery in the lower rack and low The side tip-up compartments can be positioned at three position to make the most of the tip-up compartments/sectors different heights to optimize the arrangement of crockery inside by creating more space upwards. the rack. Wine glasses can be placed safely in the tip-up compartments by inserting the stem of each glass into the corresponding slots. Adjusting the height of the upper rack In order to make it easier to arrange the crockery, the upper rack may be moved to a higher or lower position. -
Page 25: Start-Up And Use
Start-up and use Measuring out the detergent Starting the dishwasher A good wash result also depends on the correct 1. Turn the water tap on. amount of detergent being used. Exceeding the stated 2. Press the ON/OFF button: The ON/OFF indicator light and amount does not result in a more effective wash and increases environmental pollution. the display light up. -
Page 26: Wash Cycles
Wash cycles Wash-cycle data is measured under laboratory conditions according to European Standard EN 50242. Based on the different conditions of use, the wash-cycle duration and data can change. The number and type of wash cycles and options may vary depending on the dishwasher model. Wash cycle Approximate Water Energy which Wash cycle Options duration of wash consumption... -
Page 27: Special Wash Cycles And Options
Special wash cycles and Options Notes: Multi-functional tablets (Tabs) Optimum performance levels when using the “Fast" and "Express This option optimises washing and drying results. 30’” cycles can be achieved by respecting the specified number When using multi-functional tablets, press the MULTI- of place settings. FUNCTIONAL TABLETS button; the corresponding symbol will light up. If the button is pressed again, the option will To reduce consumption even further, only run the dishwasher be deselected. -
Page 28: Rinse Aid And Refined Salt
Rinse aid and refined salt and optimises washing performance in accordance with the Only use products which have been specifically designed water hardness level in your area. This information can be for dishwashers. obtained from your local water supplier. Do not use table/industrial salt or washing-up liquid. Switch on the dishwasher using the ON/OFF button, press the Follow the instructions given on the packaging. -
Page 29: Care And Maintenance
Care and maintenance Cleaning the filters The filter assembly consists of three filters which remove food residues from the washing water and then recirculate the water. They should be cleaned if you wish to achieve the best results in every wash. Clean the filters regularly. -
Page 30: Troubleshooting
Troubleshooting Whenever the appliance fails to work, check for a solution from the following list before calling for Assistance. Problem: Possible causes / Solutions: The dishwasher does not start or cannot be • Switch off the appliance by pressing the ON/OFF button, switch it back on after approximately one minute and reset the cycle. controlled. • The appliance has not been plugged in properly. •... -
Page 31: Français
Raccordements eau et électricité Conseils pour le premier lavage Caractéristiques techniques Première mise en service Touche SÉLECTIONS Sécurité enfants Description de l’appareil, 37 LFD 11M132 Vue d’ensemble Tableau de bord Charger les paniers, 38-39 Panier inférieur Panier à couverts Panier supérieur Clayettes rabattables Régler la hauteur du panier supérieur... -
Page 32: Fiche De Produit
Fiche de produit Fiche de produit HOTPOINT ARISTON Marque LFD 11M132 Modèle Capacité nominale dans un environnement standard (1) A+++ Classe énergétique sur une échelle de A+++ (faible consommation) à D (consommation élevée) 237.0 Consommation d''énergie par année en kWh (2) 0.83... -
Page 33: Précautions, Conseils Et Service
Précautions, conseils et Service • Garder les produits de lavage et de rinçage Cet appareil a été conçu et fabriqué hors de la portée des enfants. conformément aux normes internationales de • Les emballages ne sont pas des jouets pour enfants. sécurité. Ces consignes sont fournies pour des raisons de sécurité, il faut les lire attentivement. -
Page 34: Service
Service Produits de lavage sans phosphates, sans chlore et aux enzymes • Il est vivement conseillé d’utiliser des produits Avant d’appeler le service d’assistance de lavage sans phosphates et sans chlore, plus technique: indiqués pour la protection de l’environnement. • Vérifier s’il est possible de résoudre l’anomalie soi- • Les enzymes développent une action même (voir Anomalies et remèdes). -
Page 35: Installation
Installation et Service Raccordement du tuyau d’évacuation de l’eau En cas de déménagement, transporter l’appareil Raccorder le tuyau d’évacuation, sans le plier, à une conduite verticalement; si besoin est, l’incliner sur le dos. d’évacuation ayant au moins 4 cm de diamètre. Mise en place et mise à... -
Page 36: Conseils Pour Le Premier Lavage
Le bandeau de commande est équipé d’un système de Ruban anti-condensation commandes « Touch Control » ; une légère pression du Après avoir encastré le lave-vaisselle, ouvrir la porte et coller le doigt suffit pour activer la commande. ruban adhésif transparent sous le plan en bois pour le protéger contre la formation de condensation. -
Page 37: Description De L'appareil
Description de l’appareil Vue d’ensemble Panier supérieur Bras de lavage supérieur Clayettes rabattables Réglage hauteur du panier Panier inférieur Bras de lavage inférieur Filtre lavage Réservoir à sel Bacs à produit de lavage, réservoir à produit de rinçage et dispositif Oxygène Actif Plaque signalétique Bandeau de commandes Turbo Dry... -
Page 38: Charger Les Paniers
Charger les paniers Conseils Certains modèles de lave-vaisselle sont pourvus de secteurs Avant de charger les paniers, débarrasser la vaisselle des rabattables*, qui peuvent être utilisés en position verticale pour déchets plus importants et vider les verres et autres récipients. accueillir les assiettes ou en position horizontale (abaissés) pour Pas besoin de rincer préalablement à l'eau courante. pouvoir charger plus facilement les casseroles et les saladiers. -
Page 39: Régler La Hauteur Du Panier Supérieur
Clayettes rabattables à inclinaison variable Le panier supérieur est réglable en hauteur selon les besoins : en Les clayettes latérales peuvent être placées à trois hauteurs position haute, il permet de ranger de la vaisselle encombrante différentes afin d’optimiser la disposition de la vaisselle dans dans le panier inférieur ; en position basse, il permet d'exploiter le panier. -
Page 40: Mise En Marche Et Utilisation
Mise en marche et utilisation Mettre en marche le lave-vaisselle Charger le produit de lavage 1. Ouvrir l’arrivée d’eau. Un bon résultat de lavage dépend aussi d’un bon 2. Appuyer sur la touche ON-OFF : l'afficheur ainsi que les dosage du produit de lavage. Un excès de produit de voyants du tableau s'allument. -
Page 41: Programmes
Programmes Les données des programmes sont mesurées dans des conditions de laboratoire selon la norme européenne EN 50242. Selon les différentes conditions d’utilisation, la durée et les données des programmes peuvent être différentes. Le nombre ainsi que les types de programmes et d’options varient selon le modèle de lave-vaisselle. Consommation Consomation Durée du Programme Séchage Options d’eau (litre/ d’énergie (KWh/ programme... -
Page 42: Programmes Spéciaux Et Options
Programmes spéciaux et Options Remarque : Extra Dry pour obtenir des performances optimales avec les programmes Pour améliorer le séchage de la vaisselle, appuyer « Fast et Express 30' » il est conseillé de respecter le nombre sur la touche EXTRA DRY, le symbole correspondant de couverts indiqué. s’allume. Pour désactiver l’option appuyer une nouvelle fois. Une température plus élevée pendant le rinçage final et Pour consommer moins, utiliser le lave-vaisselle pleine charge. -
Page 43: Produit De Rinçage Et Sel Régénérant
Produit de rinçage et sel régénérant de l’eau. Se renseigner auprès de l’organisme distributeur de N’utiliser que des produits de lavage spéciaux lave- l’eau. vaisselle. Allumer le lave-vaisselle à l'aide de la touche ON/OFF, appuyer Ne pas utiliser de sel alimentaire ou industriel ni de produits sur la touche Sélections, utiliser les touches indiquées par les vaisselle pour lavage à... -
Page 44: Entretien Et Soin
Entretien et soin Nettoyer les filtres Les trois filtres qui composent le groupe filtrant débarrassent l’eau de lavage des résidus d’aliments avant de la remettre en circulation : pour obtenir de bons résultats de lavage, il faut les nettoyer. Nettoyer les filtres régulièrement. Ne pas utiliser le lave-vaisselle sans filtres ou avec filtre mal fixé. -
Page 45: Anomalies Et Remèdes
Anomalies et remèdes Si l’appareil présente des anomalies de fonctionnement, procéder aux contrôles suivants avant de prendre contact avec le service d’assistance technique. Anomalies : Causes / Solutions possibles : Le lave-vaisselle ne démarre pas ou • Eteindre l’appareil à l'aide de la touche ON-OFF, rallumer au bout d’une minute environ et resélectionner le programme. n’obéit pas aux commandes • La fiche n’est pas bien branchée dans la prise de courant. -
Page 46: Deutsch
Installation und Kundendienst, 49-50 Positionierung und Nivellierung Wasser- und Elektroanschlüsse Technische Daten Hinweise zur ersten Inbetriebnahme Kundendienst Taste Einstellungen Sprachauswahl Kindersicherung Beschreibung Ihres Geschirrspülers, 51 LFD 11M132 Geräteansicht Schalterblende Körbe beladen, 52-53 Geschirrspüler-Unterkorb Besteckkorb Geschirrspüler-Oberkorb Bestecktablett* Einstellung Oberkorb Starten und Gebrauch, 54 Starten des Geschirrspülers... -
Page 47: Datenblatt
Datenblatt Datenblatt HOTPOINT ARISTON Marke LFD 11M132 Modell Nennkapazität in Standardgedecken für den Standardreinigungszyklus (1) A+++ Energieeffizienzklasse (A+++ niedriger Verbrauch) bis D (hoher Verbrauch) 237.0 Energieverbrauch pro Jahr in kWh (2) 0.83 Energieverbrauch Standardreinigungszyklus in kWh Gewichtete Leistungsaufnahme im Aus-Zustand in W Gewichtete Leistungsaufnahme im unausgeschalteten Zustand in W 2520.0... -
Page 48: Vorsichtsmaßregeln Und Hinweise
Vorsichtsmaßregeln und Hinweise Entsorgung D a s G e r ä t w u r d e n a c h d e n s t r e n g s t e n • B e f o l g e n S i e d i e l o k a l e n V o r s c h r i f t e n ; internationalen Sicherheitsvorschriften entworfen und Verpackungsmaterial kann wiederverwertet werden. -
Page 49: Installation Und Kundendienst
Installation - Kundendienst Anschluss des Ablaufschlauchs Im Falle eines Umzugs sollte das Gerät möglichst in vertikaler Schließen Sie den Ablaufschlauch, ohne ihn zu krümmen, an eine Position transportiert werden, falls erforderlich, neigen Sie das Ablaufleitung mit Mindestdurchmesser von 4 cm an. Gerät zur Rückseite hin. -
Page 50: Hinweise Zur Ersten Inbetriebnahme
Kundendienst Technische Daten Breite 60 cm Abmessungen Höhe 85 cm Bevor Sie den Kundendienst anfordern: Tiefe 60 cm • sollten einige Kontrollen vorab selbst durchgeführt werden Fassungsvermögen 14 Maßgedecke (siehe Störungen und Abhilfe). 0,05 ÷ 1MPa (0,5 ÷10 bar) • Starten Sie das Programm erneut, um sicherzustellen, dass Wasserversorgungsdruck 7,25 – 145 psi die Störung behoben wurde. -
Page 51: Beschreibung Ihres Geschirrspülers
Beschreibung des Gerätes Geräteansicht Geschirrspüler-Oberkorb Oberer Sprüharm Hochklappbare Ablagen Einstellung der Korbhöhe Geschirrspüler-Unterkorb Unterer Sprüharm Spülsiebe Salzbehälter Spülmittelkammern, Klarspülerbehälter und Ozonvorrichtung Active Oxigen* Typenschild Schalterblende Turbo Dry Schalterblende Optionstaste Auswahlpfeile Programm Taste EINSTELLUNGEN Extratrocken Taste und Taste und Tastensperre Kontrollleuchte Taste Kontrollleuchten On-Off/Reset... -
Page 52: Körbe Beladen
Beladen der Körbe Einige Geschirrspülermodelle verfügen über klappbare Hinweise Bereiche*, die in senkrechter Stellung zum Einsortieren von Bevor Sie das Geschirr in den Geschirrspüler einräumen, Tellern oder in waagerechter Stellung (umgeklappt) für Töpfe befreien Sie es von Speiserückständen und entleeren Sie Gläser und Schüsseln verwendet werden können. - Page 53 Verstellbare Ablagen Der Oberkorb kann in der Höhe verstellt werden: stellen Sie ihn in Die seitlichen Ablagen können auf drei verschiedenen Höhen die oberste Position, wenn Sie großes Geschirr in den Unterkorb positioniert werden, um beim Einräumen des Geschirrs den Platz einräumen wollen.
-
Page 54: Starten Und Gebrauch
Inbetriebsetzung und Gebrauch Starten des Geschirrspülers Einfüllen des Spülmittels 1. Öffnen Sie den Wasserhahn. Ein gutes Spülergebnis hängt auch von einer 2. Drücken Sie die ON-OFF-Taste: das Display und die korrekten Spülmitteldosierung ab. Eine zu hohe Kontrollleuchten auf dem Bedienfeld leuchten auf. Dosierung ist nicht gleichzusetzen mit einem besseren 3. -
Page 55: Spülprogramme
Programme Die Programmdaten sind Labormessdaten, die gemäß der europäischen Vorschrift EN 50242 erfasst wurden. Je nach den unterschiedlichen Einsatzbedingungen können die Dauer und die Daten der Programme anders ausfallen. Die Anzahl und die Art der Spülprogramme und -optionen sind abhängig vom jeweiligen Geschirrspülermodell. Wasserverbrauch Energieverbrauch Programm Trocknen Optionen Programmdauer (l/Zyklus) (KWh/Zyklus) Startverzögerung – Tabs – 1. -
Page 56: Sonderprogramme Und Optionen
Sonderprogramme und Optionen Hinweis: Option Startzeitvorwahl Die optimale Leistung der Programme "Schnell und Express Der Start des Spülprogramms kann um 1 bis 24 Stunden 30´" ist dann gewährleistet, wenn die Anzahl der angegebenen verschoben werden: Maßgedecke eingehalten wird. 1 . A uswahl d es gew ünschten S pül prog ram ms und andere eventuelle Optionen;... -
Page 57: Klarspüler Und Regeneriersalz
Klarspüler und Regeneriersalz Dieser Geschirrspüler kann so eingestellt werden, dass Verwenden Sie bitte nur Spezialspülmittel für die Umweltbelastung reduziert und die Spülleistungen Geschirrspüler. Verwenden Sie bitte kein Koch- oder entsprechend der Wasserhärte optimiert werden. Angaben zur Industriesalz und auch keine Handspülmittel. Bitte befolgen Wasserhärte erhalten Sie bei Ihrem Wasserwerk. -
Page 58: Reinigung Und Pflege
Reinigung und Pflege Die Filter reinigen Die Siebgruppe setzt sich aus drei Filtern zusammen, die Spülwasser reinigen, von Speiseresten befreien und wieder in Umlauf bringen. Um optimale Spülergebnisse zu gewährleisten, müssen diese gereinigt werden. Reinigen Sie die Filtersiebe regelmäßig. Der Geschirrspüler darf nie ohne Filtersiebe oder mit ausgehängten Filtern in Betrieb genommen werden. -
Page 59: Störungen Und Abhilfe
Störungen und Abhilfe Sollten Betriebsstörungen auftreten, kontrollieren Sie bitte folgende Punkte, bevor Sie sich an den Kundendienst wenden. Störungen: Mögliche Ursachen/Lösung : Die Spülmaschine startet nicht oder • Schalten Sie das Gerät durch Drücken der ON/OFF-Taste aus und nach etwa einer reagiert nicht auf die Bedienungseingaben. - Page 60 Připojení k elektrické síti a k rozvodu vody Technické údaje Upozornění pro první mytí Tlačítko NASTAVENÍ Volba jazyka Dětská pojistka Servisní služba Popis zařízení, 66 LFD 11M132 Celkový pohled Ovládací panel Plnění košů, 67-68 Spodní koš Košík na příbory Horní koš Spuštění a použití, 69 Uvedení...
-
Page 61: Informační List Výrobku
Informační list výrobku Informační list výrobku HOTPOINT ARISTON Značka LFD 11M132 Model Kapacita počtu standardních sad nádobí (1) A+++ Třída energetické účinnosti na stupnici A+++ (nejnižší spotřeba) až D (vysoká spotřeba) 237.0 Roční spotřeba energie v kWh (2) 0.83 Spotřeba energie standardního mycího cyklu v kWh Spotřeba energie ve vypnutém stavu ve W... -
Page 62: Opatření A Rady
Opatření a rady připomenout povinnosti spojené se separovaným Zařízení bylo navrženo a vyrobeno v souladu sběrem. s platnými mezinárodními bezpečnostními předpisy. Tato upozornění jsou uváděna z bezpečnostních Podrobnější informace týkající se správného důvodů a je třeba si je pozorně přečíst. způsobu vyřazení... -
Page 63: Instalace, Servisní Služba
Instalace - Servisní služba Připojení hadice pro přívod vody Je velmi důležité tento návod uschovat, aby jej bylo možné • K rozvodu studené vody: Řádně zašroubujte přívodní hadici ke kdykoli dle potřeby konzultovat. V případě prodeje, darování nebo kohoutku s hrdlem se závitem 3/4 plyn; před zašroubováním přestěhování... -
Page 64: Technické Údaje
Připojení k elektrickému rozvodu Pás proti tvorbě kondenzátu Před zasunutím zástrčky do zásuvky elektrického rozvodu se Po vestavění myčky otevřete dvířka a přilepte pod dřevěnou ujistěte, že: polici průsvitný samolepicí pás, který bude polici chránit před • Je zásuvka uzemněna a že vyhovuje normám; případným kondenzátem. -
Page 65: Servisní Služba
Servisní služba Před přivoláním servisní služby: • Zkontrolujte, zda nejste schopni poruchu odstranit sami (viz Poruchy a způsob jejich odstranění). • Znovu uveďte do chodu mycí program s cílem ověřit, zda byla porucha odstraněna. • V případě negativního výsledku se obraťte na Autorizovanou servisní... -
Page 66: Popis Zařízení
Popis zařízení Celkový pohled Horní koš Horní ostřikovací rameno Sklopné držáky Mechanismus nastavení výšky koše Spodní koš Spodní ostřikovací rameno Mycí filtr Nádržka na sůl Vanička na mycí prostředek, nádržka na leštidlo a zařízení Active Oxigen Štítek s parametry Ovládací panel Turbo Dry Ovládací... -
Page 67: Plnění Košů
Plnění košů Doporučení: Některé modely myček nádobí disponují naklonitelnými částmi Před plněním košů odstraňte z nádobí zbytky jídla a vylijte které lze použít ve svislé poloze k uložení talířů nebo ve ze sklenic a pohárů tekutiny, které v nich zůstaly. Není třeba vodorovné... - Page 68 Sklopné držáky s proměnlivou polohou Horní koš je výškově nastavitelný dle potřeby: do horní polohy kvůli umístění neskladného nádobí; do spodní polohy kvůli využití Boční sklopné držáky lze umístit do tří odlišných výšek kvůli prostorů sklopných nebo naklonitelných držáků a vytvoření optimalizaci umístění...
-
Page 69: Spuštění A Použití
Uvedení do činnosti a použití Dávkování mycího prostředku Uvedení myčky do činnosti Dobrý výsledek mytí závisí také na správném dávkování 1. Otevřete kohoutek přívodu vody. mycího prostředku, přičemž platí, že při překročení 2. Stiskněte tlačítko ZAP.-VYP.: Dojde k rozsvícení displeje a doporučeného množství... -
Page 70: Programy
Programy Údaje programů jsou naměřeny v laboratorních podmínkách v souladu s evropskou normou EN 50242. V závislosti na různých podmínkách použití může docházet ke změnám doby trvání a dat programů. Počet a druh programů a volitelných funkcí se mění v závislosti na modelu myčky. Doba trvání... -
Page 71: Speciální Programy A Volitelné Funkce
Speciální programy a Volitelné funkce Volitelná funkce Short Time Poznámky: Nejlepších výsledků s programy „Rychlé mytí“ a „Express 30’“ Tato volitelná funkce umožňuje snížit dobu trvání hlavních je možné dosáhnout, když bude dle možností dodržen počet programů při zachování stejných výsledků mytí a sušení. uvedených souprav. -
Page 72: Leštidlo A Regenerační Sůl
Leštidlo a regenerační sůl optimalizuje výkon mytí v závislosti na tvrdosti vody. Údaj lze zjistit Používejte pouze specifické mycí prostředky pro myčky u organizace zabývající se dodávkou pitné vody. nádobí. Zapněte myčku tlačítkem ZAP./VYP., stiskněte tlačítko Nastavení Nepoužívejte kuchyňskou ani průmyslovou sůl ani mycí a tlačítky označenými šipkami zobrazte menu „Tvrdost vody“. -
Page 73: Údržba A Péče
Údržba a péče Čištění filtrů Filtrační jednotka je tvořena dvěma filtry, které čistí vodu použitou k mytí od zbytků jídla a opětovně ji uvádějí do oběhu: K zabezpečení trvale dobrých výsledků mytí je třeba filtry čistit. Pravidelně čistěte filtry. Myčka nádobí se nesmí používat bez filtrů nebo s odpojeným filtrem. -
Page 74: Poruchy A Způsob Jejich Odstranění
Poruchy a způsob jejich odstranění Když se na zařízení vyskytnou poruchy v činnosti, zkontrolujte dříve, než se obrátíte na Servisní službu, následující body. Poruchy: Možné příčiny / Řešení: Nedochází k uvedení myčky do chodu • Vypněte zařízení tlačítkem ZAPNOU/VYPNOUT, opět jej zapněte po uplynutí přibližně... - Page 76 195108281.03 04/2014 jk - Xerox Fabriano...