Advertisement
Quick Links
WARNING
• Use product on carpet or apply optional felt pads to help protect floors.
• Do not pull or push product across the floor.
PARTS INCLUDED
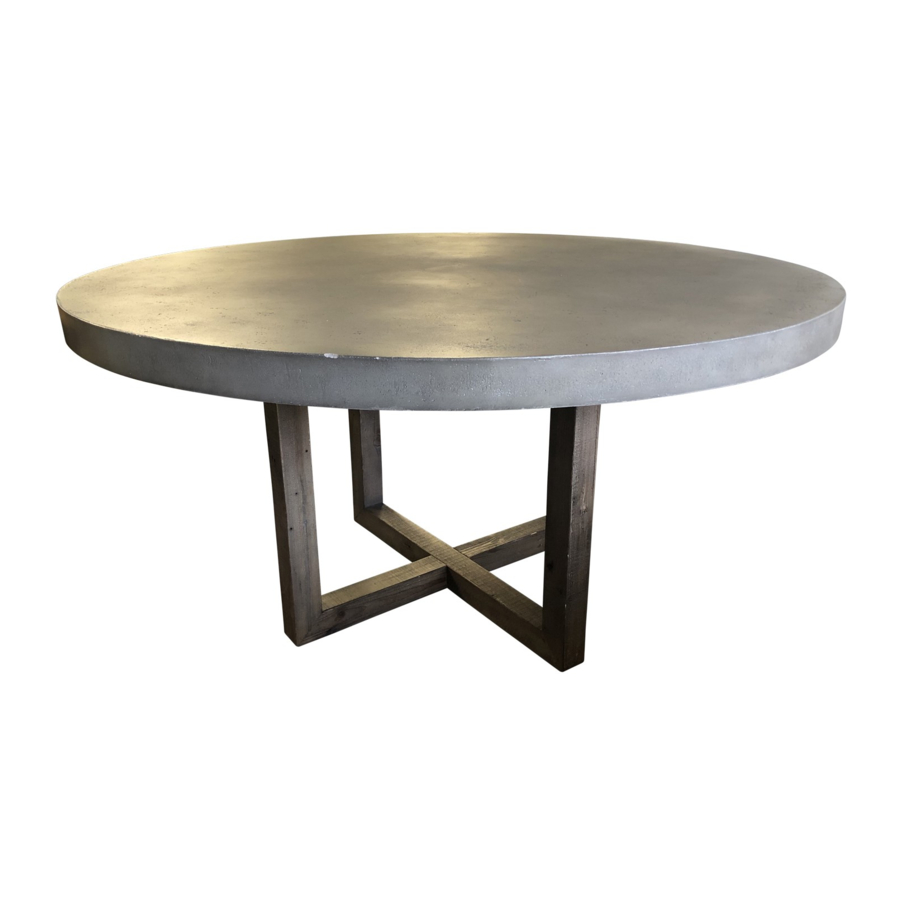
A [1] TOP
B [1] BASE #1
C [2] BASE #2
ASSEMBLY INSTRUCTIONS
1. Place Base #1 (B) upright on a non-abrasive flat surface.
2. Secure the threaded rod (1) to the fixed nut in the base by simply turning it
manually. Refer to FIGURE 1.
3. Raise one section of Base #2 (C) and place the rod (1) to align with the
holes on the end of the base (C). Position the section of Base #2 (C)
against Base #1 (B) so the threaded rods (1) go through the holes. Insert
the curved washer (2) and lock washer (3) and place hex nuts (4) on
threaded rod (1) as illustrated in FIGURE 2. Tighten the hex nuts (4) with
the wrench (5).
4. Repeat the above procedure with the other section of Base #2 (C) to
attach it to Base #1 (B).
FIGURE 2
10/1/18
HESTON ROUND DINING TABLE INSTRUCTIONS
A
C
B
HARDWARE INCLUDED
NO.
ITEM
1
2
C
3
4
5
6
7
8
9
FIGURE 1
DESCRIPTION
QTY.
Threaded rod
4 pcs.
Curved washer
4 pcs.
8 pcs.
Lock washer
4 pcs.
Hex nut
Wrench
1 pc.
Allen bolt
4 pcs.
Flat washer
4 pcs.
Allen wrench
1 pc.
4 pcs.
Felt pad
Page 1 of 2
Advertisement

Related Manuals for RH HESTON ROUND DINING TABLE


Summary of Contents for RH HESTON ROUND DINING TABLE
- Page 1 HESTON ROUND DINING TABLE INSTRUCTIONS WARNING HARDWARE INCLUDED • Use product on carpet or apply optional felt pads to help protect floors. ITEM DESCRIPTION QTY. • Do not pull or push product across the floor. Threaded rod 4 pcs. PARTS INCLUDED Curved washer 4 pcs.
- Page 2 HESTON ROUND DINING TABLE INSTRUCTIONS Set the assembled base upside down on a flat, non-abrasive surface. Insert the curved washer (2) FIGURE 3 and lock washer (3) and place hex nuts (4) on threaded rod (1). Tighten the hex nuts (4) with the wrench (5), as illustrated in FIGURE 3.
Need help?
Do you have a question about the HESTON ROUND DINING TABLE and is the answer not in the manual?
Questions and answers