Advertisement
®
Technaxx
* User Manual
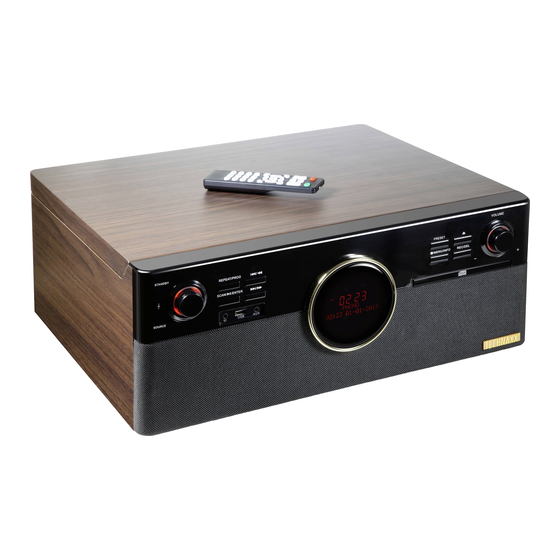
DAB Bluetooth Record-Player TX-137
The manufacturer Technaxx Deutschland GmbH & Co.KG hereby declares that this device,
to which this user manual belongs, complies with the essential requirements of the
standards referred to the Directive RED 2014/53/EU. The Declaration of Conformity you
find here: www.technaxx.de/ (in bar at the bottom "Konformitätserklärung"). Before using
the device the first time, read the user manual carefully.
Service phone No. for technical support: 01805 012643 (14 cent/minute from German
fixed-line and 42 cent/minute from mobile networks).
Free Email: support@technaxx.de
Keep this user manual for future reference or product sharing carefully. Do the same with
the original accessories for this product. In case of warranty, please contact the dealer or
the store where you bought this product. Warranty 2 years
Features
⚫ Digitizing vinyl records/cassette/CD/BT or AUX–IN to USB ⚫ Music
playback & recording via Bluetooth 5.0 ⚫ Playback of MP3/WMA music
files from USB/CD/Bluetooth devices ⚫ Recording of MP3 music files on
USB up to 32GB ⚫ No computer/notebook required ⚫ RCA output for
connection to HiFi systems ⚫ Record player with automatic/manual stop &
3 speeds: 33, 45, 78rpm ⚫ Built-in stereo loudspeakers ⚫ Built-in cassette
& CD players ⚫ Built-in DAB / FM radio ⚫ 3.5mm AUX–IN & 3.5mm
headphone jack ⚫ High quality design with functional handling
1
Advertisement
Table of Contents

Subscribe to Our Youtube Channel
Related Manuals for Technaxx TX-137


Summary of Contents for Technaxx TX-137
-
Page 1: Features
* User Manual DAB Bluetooth Record-Player TX-137 The manufacturer Technaxx Deutschland GmbH & Co.KG hereby declares that this device, to which this user manual belongs, complies with the essential requirements of the standards referred to the Directive RED 2014/53/EU. The Declaration of Conformity you find here: www.technaxx.de/ (in bar at the bottom “Konformitätserklärung”). -
Page 2: Table Of Contents
Contents FEATURES ....................................1 TECHNICAL SPECIFICATIONS ............................... 3 PRODUCT OVERVIEW ................................. 5 FIRST START ....................................8 SETTING THE DISPLAY SYSTEM ..............................8 PHONO MODE (VINYL) ................................9 CD MODE....................................12 USB MODE....................................14 BLUETOOTH MODE ................................... 15 TAPE MODE ....................................16 AUX MODE .................................... -
Page 3: Technical Specifications
Technical specifications Bluetooth V5.0; profil A2DP & HFP; distance ~10m open areas Bluetooth transmitting frequency 2.4GHz Radiated output power max. 2.5mW Phono, Cassette, CD, USB, Bluetooth, AUX-IN, FM- / DAB Mode radio 2x 9W stereo loudspeakers (8x8x2cm), Speakers input ≦60mV/30kΩ, impedance 4Ω, frequency range 90Hz–16kHz FM: 87.5-108MHz;... - Page 4 Recording time Use of 4GB memory equals ~65 hours recording time Package contents DAB Bluetooth Record-Player TX-137, 45rpm single puck adapter, power adapter, user manual, remote control, batteries (2x AAA) Hints for Environment Protection: Packages materials are raw materials and can be recycled. Do not disposal old devices or batteries into the domestic waste.
-
Page 5: Product Overview
Product overview Front view and top view Back view... - Page 6 Power / source REPEAT/PROG Previous / skip Scan / play / pause / enter Next /skip Stereo speaker 3.5mm Headphone jack USB port 3.5mm AUX-IN jack 10 LCD Display 11 Preset 12 OPEN/CLOSE 13 Stop / menu / info 14 REC/DEL 15 Compact disc tray 16 Volume knob 17 Needle...
- Page 7 Remote Control ON / OFF switch CD tray open/close button Record (REC) button Delete (DEL) button Mode button Stop button Volume up Volume down Play / Pause button 10 SCAN button 11 EQ button 12 Skip– / Rewind button 13 Skip+ / Fast forward button 14 Numeric keyboard 15 + 10 16 Enter...
-
Page 8: First Start
First start Carefully read the manual. Plug the power adapter into a 100-240V AC outlet and the other end into the TX-137 (30). Be reminded: “Non- connected devices always work faulty”. Power on the device by pressing the Power button (1). After that start the mode you like to playback. Use the turning knob to change the source (1). -
Page 9: Phono Mode (Vinyl)
all setting after select factory reset (yes). 11. If setting the SW version, press the previous or next button to select SW Version and press ENTER button to confirm. the system will be showed the production message. Phono mode (Vinyl) Open the Turntable Cover ⚫... - Page 10 Playing a vinyl record ( ! IMPORTANT ! ) When using the turntable, make sure to remove the stylus protector (2). It should easily slide off the cartridge stylus assembly (1). Furthermore, make sure to unclip the tone arm lock before use and to secure it again after use. ⚫...
- Page 11 NOTE: Should your record stop before the last track finishes, set the Stop switch to OFF. Your record will now play to the end, but you will have to stop the turntable rotation manually. 1. Tone Arm / 2. Cue-lever Replacing the Stylus It is recommended that the stylus is replaced as soon as you notice a change in the sound quality.
-
Page 12: Cd Mode
CD mode Compact disc hints ⚫ This Turntable is compatible with conventional audio CDs and properly finalized CD-R and CD-RW discs. ⚫ Always place the disc in the disc tray with the label side facing up. (Compact discs can be played or recorded on one side only.) ⚫... - Page 13 Playing a CD ⚫ Turn the unit ON by pressing the Power button. Set the function knob to CD. ⚫ Place a disc on the tray with the printed label facing up. ⚫ Press the OPEN/CLOSE button (▲) to close the tray.
-
Page 14: Usb Mode
Repeat Function Press the REPEAT/PROG to activate this function. All the tracks can be played in difference mode as follow: ⚫ Repeat all: you can listen the desired tracks or folder repeatedly by this function. ⚫ Repeat one: you can listen the desired track repeatedly by this function. ⚫... -
Page 15: Bluetooth Mode
Bluetooth searching function, receive carrier will receive the Bluetooth identification number for: “Technaxx TX-137”, when your Bluetooth device is connected, the speaker will beep. Select the ▶▶, ◀◀, ▶‖ or ■ buttons, which can make you pause/play, interrupt or stop the songs. -
Page 16: Tape Mode
Attention: If you reboot the machine, you should repeat those steps to get the Bluetooth function restarted. Under the Bluetooth function situation, it’s not available for the hands-free function. The last connected device connects automatically. Tape mode Cassette Tape hints ⚫... -
Page 17: Aux Mode
⚫ Plug one end of the Red and White RCA jacks into the LINE OUT ports (29) at the back of the TX-137 and the other end into R (red) and L (white) sockets at the back of the amplifier or external speakers. - Page 18 Automatic tuning of FM ⚫ During FM working mode press the MENU BUTTON, then press the SCAN button until select the “scanning” or press and hold the previous or next key.⚫ Press the SCAN button and the device scans all of the FM stations.
-
Page 19: Stand-By Function
Stand-by function ⚫ Press the POWER button to enter instant the standby mode. ⚫ The unit will enter standby mode automatically after 15 minutes when it is not playing any music. Press the POWER button (1) and it will power on again. Press any other button and the display lights up for a few seconds. - Page 20 Important Hints ⚫ Unpacking and handling: Open the carton carefully and remove the packing. Remove the poly-bag and retain all packaging for future use. Keep all packaging away from small children and animals. ⚫ Positioning the music centre: Place the equipment on a stable surface, away from any heat sources, and ensuring adequate ventilation around the music centre.
Need help?
Do you have a question about the TX-137 and is the answer not in the manual?
Questions and answers
Can't connect to Bluetooth
To troubleshoot Bluetooth connection issues with the Technaxx TX-137:
1. Set the source switch to “Bluetooth”.
2. On your phone or media device, enable Bluetooth and search for devices.
3. Select “Technaxx TX-137” from the list.
4. Wait for the speaker to beep, confirming the connection.
5. If not connecting:
- Restart the TX-137 and repeat the steps.
- Ensure Bluetooth is enabled on your device.
- Make sure no other device is already connected.
6. Note: Hands-free calling is not supported in Bluetooth mode.
7. The last connected device should reconnect automatically when Bluetooth is active.
This answer is automatically generated