Table of Contents
Advertisement
Quick Links
Quick Start Guide
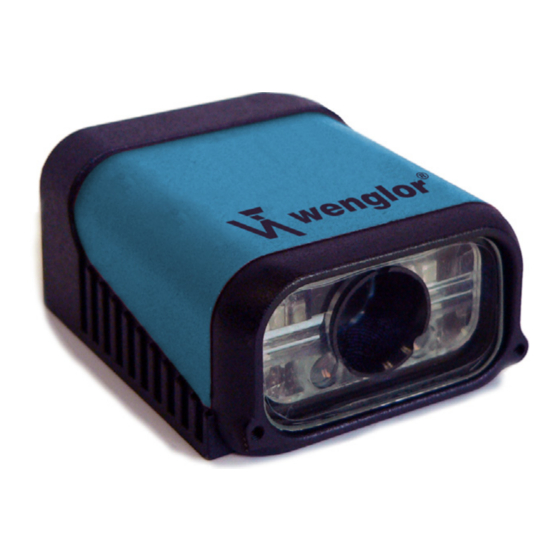
FIS-6300 Imager
Step 3 — Position Imager
• Position the Imager at a focal distance between 2" and 6".
• Tip the Imager relative to the symbol to avoid the glare of direct (specular)
reflection. The case parting line should be perpendicular to the plane of the
symbol by either pitching the symbol or the Imager as shown.
• Position the Imager in a place with as little ambient light as possible.
• Symbols can be rotated (tilted) at any angle; however, for best results
symbols should be aligned with the FOV (field of view).
• In the case of linear symbols, aligning the bars in the direction of their
movement ("ladder" orientation) will minimize the chances of blurring,
and will produce better reads.
• Avoid excessive skew or pitch. Maximum skew is ±30°; maximum pitch is ±30°.
±30°
Imager / Symbol Positioning
Note: For instant setup and validation, the FIS-6300 can be hand-held or
placed on its side. For accuracy, however, a mounting arm adapter kit is
recommended.
Copyright © 2005 wenglor sensoric gmbh
Step 1 — Check Hardware
Caution:
Be sure that all cables are connected BEFORE applying power
to the system. Always power down BEFORE disconnecting any cables.
Item
Description
1
FIS-6300 Imager
2
IC-332 Adapter
3
IB-131 Interface Box
4
Power Supply
5
wenglor Sensor
P/N 83-736300 Rev A
6
Host Cable
Step 4 — Install ESP
(ESP stands for Easy Setup Program.)
Once your Imager is connected to a host computer with Windows™ operating
system (98 or above), you can use ESP (Easy Setup Program) for configuration
and control.
To install ESP from a CD:
• Insert your wenglor CD ROM (ZUB-FIS-GB) in your computer's CD drive.
• Select the "Configuration Software" file, launch
ESP", and follow the prompts.
To download ESP from the Web:
• Go to http://www.wenglor.de.
• Navigate through the following sequence: Download > Software > Barcode
Scanner
• Click the
Download
choice on your hard drive.
• Extract the wenglor ESP WinZip files to a directory of your choice. Remember
where your ESP.exe file is stored on your hard drive!
• At the end of the install process, copy a shortcut ESP icon onto your desktop.
• Click the ESP icon to run the program.
1
2
Scanner
6
3
4
5
Hardware Required
Part Number
FIS-6300-XXXX
SD15SD15U
AB1120
NT06US (110V); NT06 (220V)
BD25BD9V01-2M
Setup.exe
under "wenglor
button and store the ESP.zip file to the location of your
Step 2 — Connect the System
Connecting by RS-232 / RS-422 / RS-485
• Connect the Imager (1) to the IB-131/IC-332 interface (2) and (3).
• Connect the host cable (6) to the host and to the host port on the IB-131 (3).
• Connect the object detector (5) to the IB-131 (3).
• Connect the power supply (4) to the IB-131 (3).
• Apply power to the Imager.
1
2
Scanner
6
3
4
5
Hardware Configuration
Caution:
Be sure that all cables are connected BEFORE applying power
to the system. Always power down BEFORE disconnecting any cables.
Step 5 — Select Model
When you start ESP, this menu will appear:
• Select the FIS-6300 from the menu and click OK. If you do not want to
make this selection every time you start ESP, uncheck "Show This Window
at Startup".
• Click
Yes
when this dialog appears:
Note: If you need to select
another reader model later,
click the
near the top of the screen.
Important: The Imager is in Continuous Read Mode by default. For best
connection results, be sure that no symbols are within the Imager's field of
view while attempting to connect.
Switch Model
button
Advertisement
Table of Contents

Subscribe to Our Youtube Channel
Related Manuals for Wenglor FIS-6300

Summary of Contents for Wenglor FIS-6300
- Page 1 ESP.exe file is stored on your hard drive! • Select the FIS-6300 from the menu and click OK. If you do not want to • At the end of the install process, copy a shortcut ESP icon onto your desktop.
- Page 2 This test will let you know the percent of good reads per images captured. Testing by EZ Button To make setup changes to the FIS-6300, click the App Mode button. To make changes to a configuration setting: 1. To start the read rate test,...
Need help?
Do you have a question about the FIS-6300 and is the answer not in the manual?
Questions and answers