
Summary of Contents for SOLE AIRSOL
- Page 1 AIR COLLECTORS ’’AIRSOL’’ INSTALLATION AND USER MANUAL MODELS: AIRSOL 10, AIRSOL 20 & AIRSOL 35...
-
Page 2: Table Of Contents
INDEX PAGE 1. Presentation …………………………………………………………………….. 2. Introduction ....................3. Parts Included …………………………………………………………………… 3.1. Solar Collectors ……………………………………………………………. 4. Installation ……………………………………………………......4.1. Flat roof vertical installation..............4.2 Flat roof horizontal installation ………………………......4.3 Wall mounting installation…………............. 5. Recirculation ……………………………………………........ 6. Air Filter ………………………………………………………………....7. -
Page 3: Presentation
(see drawing 1, 1a &1b) or on a terrace (see drawings 2& 3) or on a tile roof (see drawing 4). For the AIRSOL 10 & 20 you will need a duct of Ø100 diameter of proportional length and similar grille, for the AIRSOL 35 a duct of Ø200 diameter will be needed. - Page 4 DRAWING 2 DRAWING 3 DRAWING 4...
-
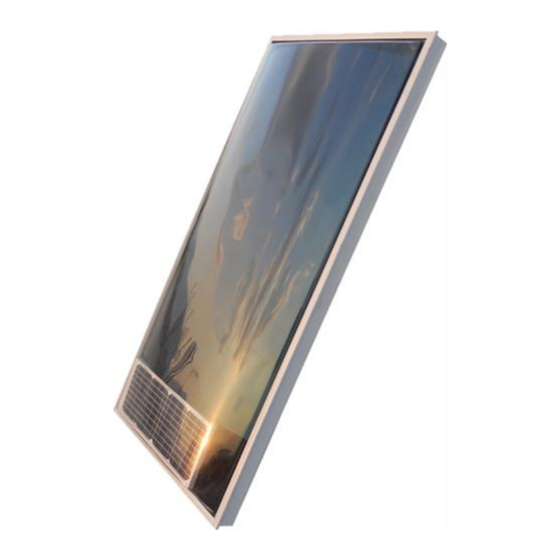
Page 5: Introduction
One or more fitting and accessories. 3.1. Solar Collectors 3.1.1. Models DIMENSIONS (mm) m² TYPE SURFACE NOMINAL VALUE** RECOMMENDED FOR ROOM AREA AIRSOL 10 1545x700x178 1,08 700Wp 10 to 40 m² AIRSOL 20 2050x1040x195 2,13 1500Wp 20 to 60 m²... -
Page 6: Installation
Installation The support frames sets are composed of elements that are shown in Figures 1 & 2. Figure 1 Figure 2... -
Page 7: Flat Roof Vertical Installation
4.1. Flat Roof Horizontal Installation Take off the cover of the carton box and remove the polystyrene protections (see pictures no. 1 & 2).The support frame consists of two triangles frames, partly preassembled. Screw the profiles A and C with the bolts and nuts provided and tighten.(see picture no. 4). Fix part B of the triangle frame on the corresponding nuts on the collector (see picture 5) and tighten with bolts M6. -
Page 8: Flat Roof Horizontal Installation
4.2. Flat Roof Vertical Installation The assembly of solar air collectors on a flat roof in vertical position is done in a manner similar to that described above; with different size of the support triangles frame placed vertically in a parallel manner on the back of the collector (see picture 9). -
Page 9: Wall Mounting Installation
4.3. Wall Mounting Installation Take off the cover the carton box and remove the polystyrene protections (see picture no.1).The support frame consists of 4 stainless steel mounting brackets. Fix the 4 mounting brackets on the corresponding nuts on the collector (see picture no.13) and tighten with bolts M6 (see picture no. 14 &... -
Page 10: Recirculation
5. Recirculation In case of installation with recirculation (see drawing 1b), the sliding entrance door of ‘’COLD AIR IN’’ must be ‘’INSIDE’’. SLIDING DOOR ‘’INSIDE’’ For a 100% fresh air the sliding door must be ‘’OUT’’. SLIDING DOOR ‘’OUT’’ For recirculation 50% and fresh air 50% the sliding door of ‘’COLD AIR IN’’ must be in the ‘’MIDDLE’’. -
Page 11: Air Filter
6. Air Filter At regular intervals depending on the purity of the environment but not more than 6 months, remove by hand the sliding filter, wash it with cold water to the tap by turning it from both sides and when it dries put it in its place. -
Page 12: Room Thermostat
8. Room Thermostat Optionally a thermostat can be connected on the AIRSOL in order to control the device from the room. In case you want to connect the thermostat follow the procedure below: Step 1 Open the cover of the electrical box at the back side of the collector. -
Page 13: General Instructions
For cottage house or warehouse the main target is to maintain the room slightly warm and dry while the air is renewed so that we avoid the smell of closure and mold. In this case the AIRSOL 10 is sufficient for a room up to 30-40m² and the AIRSOL 20 is sufficinet for a room of 40-60m² and the AIRSOL 35 is sufficient for a room of 50-80m². - Page 14 Published: February 2013 Version 3 SOLE S.A. SOLAR DOMESTIC APPLIANCES MANUFACTURER Lefktron & Laikon Agonon, 136 71 Acharnai – Athens – Greece Tel.: (+30210) 2389500 • Fax: (30210) 2389502 Email: export@sole.gr • www.eurostar-solar.com...
Need help?
Do you have a question about the AIRSOL and is the answer not in the manual?
Questions and answers