Table of Contents

Subscribe to Our Youtube Channel
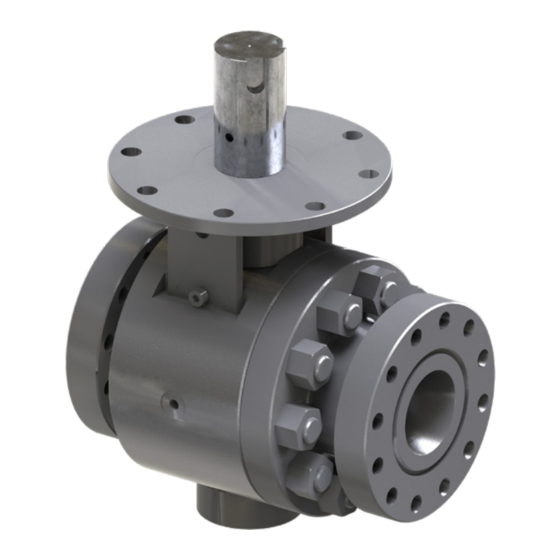
Related Manuals for MOGAS T Series


Summary of Contents for MOGAS T Series
- Page 1 Installation, Operation and Maintenance Manual for the MOGAS T-Series (Trunnion) Ball Valve PREPARE THE VALVE FOR INSTALLATION ACTUATE THE VALVE INSTALL THE VALVE PROPERLY MAINTAIN THE VALVE FOR OPTIMAL OPERATION AND PERFORMANCE...
- Page 2 Read Before Installing Valve All MOGAS valves operate counter-clockwise to open, clockwise to close. MOGAS valves are supplied in a variety of operator configurations based upon customer requirements, and may be operated by • pneumatic actuation • manual operation (handlever / handwheel) •...
-
Page 3: Table Of Contents
SERVICE CONTACT ..........51 ESI-6148, Rev A © Copyright 07/31/2019 MOGAS Industries, Inc. www.mogas.com... -
Page 4: Valve Item Reference Number
Valve Item Reference Number ESI-6148, Rev A © Copyright 07/31/2019 MOGAS Industries, Inc. www.mogas.com... - Page 5 O-ring or spiral wound gasket Bonnet & Trunnion Capscrews bonnet fastners not shown Hoist Ring Bonnet Bonnet Seal O-ring or spiral wound gasket Trunnion Bearing Trunnion Thrust Bearing Anti-Static Device ESI-6148, Rev A © Copyright 07/31/2019 MOGAS Industries, Inc. www.mogas.com...
- Page 6 Valve Item Reference Number Actuator Adaption ESI-6148, Rev A © Copyright 07/31/2019 MOGAS Industries, Inc. www.mogas.com...
- Page 7 Actuator Key Stem Adaptor Actuator Mounting Bolts Actuator Mounting Flange Nut Actuator Mounting Flange Actuator Mounting Flange Bolts Stem Adaptor Keys Note: Actuator adaptation kit may vary depending on the actuator. ESI-6148, Rev A © Copyright 07/31/2019 MOGAS Industries, Inc. www.mogas.com...
-
Page 8: Transport And Storage
It is recommended to place desiccant dryer bags inside the valve before storage. The valve should be stored in the vertical position, out of the weather (inside), until repairs can be made. ESI-6148, Rev A © Copyright 07/31/2019 MOGAS Industries, Inc. www.mogas.com... -
Page 9: Pre-Installation
Place the valve and actuator in the full open position to validate stop adjustment and proper operation. Return the valve to the full open position for installation. ESI-6148, Rev A © Copyright 07/31/2019 MOGAS Industries, Inc. www.mogas.com... -
Page 10: Install Operator
When the valve is open, the keyway nearest the Stem shown in OPEN position. stamped should face 90° counter-clockwise from the end connection 3, or bolting side of the valve. ESI-6148, Rev A © Copyright 07/31/2019 MOGAS Industries, Inc. www.mogas.com... - Page 11 ACTUATOR MOUNTING FLANGE Lower the actuator mounting flange over the stem adaptor and onto the valve mounting flange. ESI-6148, Rev A © Copyright 07/31/2019 MOGAS Industries, Inc. www.mogas.com...
- Page 12 Do not force actuator onto stem adaptor. Proper alignment is critical to ensure the actuator slides gently into position. If stem is forced into valve, severe damage could occur. THIS WILL AFFECT THE VALVE WARRANTY. ESI-6148, Rev A © Copyright 07/31/2019 MOGAS Industries, Inc. www.mogas.com...
- Page 13 Install the actuator mounting bolts and torque as required. CAUTION! If the actuator is supplied by MOGAS, refer to the torque values in the test certificate provided for each individual valve serial number. Otherwise, refer to the manufacturer’s specifications. THIS WILL AFFECT THE VALVE WARRANTY.
- Page 14 Set stop positions. the stem and gland flange should match. CAUTION! Misalignment can result in valve under- or over- stroke, creating a potential leak path. THIS WILL AFFECT THE VALVE WARRANTY. ESI-6148, Rev A © Copyright 07/31/2019 MOGAS Industries, Inc. www.mogas.com...
-
Page 15: Installation
Refer to Rotate Operator – Actuator Adaption (page 19) for proper procedures to rotate the actuator. THIS WILL AFFECT THE VALVE WARRANTY. ESI-6148, Rev A © Copyright 07/31/2019 MOGAS Industries, Inc. www.mogas.com... - Page 16 SECURE VALVE IN PLACE Install flange gaskets and bolting per customer requirements. Note: MOGAS valve flanges are supplied in the customary “straddle centerline” hole orientation, unless otherwise specified. Straddle centerline hole orientation These procedures are for raised-face flange connections. When securing other end types, please contact MOGAS Service for proper procedures.
- Page 17 VERIFY OPERATION After installation, open and close several times to ensure smooth operation. OPEN / CLOSE All MOGAS ball valves are designed for on / off services only. To operate, turn counter-clockwise to open and clockwise to close. Fully OPEN position.
-
Page 18: Maintenance
ACTUATOR LUBRICATION Keep hydraulic, pneumatic and worm gear actuators fully lubricated according to actuator manufacturer’s specifications. ESI-6148, Rev A © Copyright 07/31/2019 MOGAS Industries, Inc. www.mogas.com... -
Page 19: Actuator Adaption
(See page 38, step 2 for matching clarification.) Seat leakage may occur when the ball and seat surfaces are not matched per the engineered design). THIS WILL AFFECT THE VALVE WARRANTY. ESI-6148, Rev A © Copyright 07/31/2019 MOGAS Industries, Inc. www.mogas.com... - Page 20 Actuator Adaption ROTATE ACTUATOR After the actuator is removed, rotate the actuator to the desired position. Note: As a standard practice, MOGAS adaption is designed to be rotated in 90° increments. REMOVE KEY Remove the actuator key STEM ADAPTOR POSITION Verify the position of the stem adaptor , if present.
- Page 21 Rotate the stem adaptor to the position that matches the corresponding slot or keyways in the actuator. If necessary, insert the stem adapter keys into keyway and slide stem adaptor onto stem ESI-6148, Rev A © Copyright 07/31/2019 MOGAS Industries, Inc. www.mogas.com...
- Page 22 Do not force actuator onto stem adaptor. Proper alignment is critical to ensure the actuator slides gently into position. If stem is forced into valve, severe damage could occur. THIS WILL AFFECT THE VALVE WARRANTY. ESI-6148, Rev A © Copyright 07/31/2019 MOGAS Industries, Inc. www.mogas.com...
- Page 23 Install the actuator mounting bolts , and torque as required. CAUTION! If the actuator is supplied by MOGAS, refer to the torque values in the test certificate provided for each individual valve serial number. Otherwise, refer to the manufacturer’s specifications.
- Page 24 Set stop positions. the stem and gland flange should match. CAUTION! Misalignment can result in valve under- or over- stroke, creating a potential leak path. THIS WILL AFFECT THE VALVE WARRANTY. ESI-6148, Rev A © Copyright 07/31/2019 MOGAS Industries, Inc. www.mogas.com...
-
Page 25: Remove Operator
, using a hammer and brass or aluminum rod if necessary. REMOVE GLAND NUTS Remove the packing gland nuts REMOVE GLAND FLANGE Remove the packing gland flange ESI-6148, Rev A © Copyright 07/31/2019 MOGAS Industries, Inc. www.mogas.com... - Page 26 Skive Cut Skive Cut done to prevent formation of a possible leak path. THIS WILL AFFECT THE VALVE WARRANTY. Skive Cut Skive Cut Correct staggered or alternating skive cut positioning. ESI-6148, Rev A © Copyright 07/31/2019 MOGAS Industries, Inc. www.mogas.com...
- Page 27 Make sure scribe line of stem is lined up with scribe line of packing gland. CHECK POCKET DEPTH Before installing the second anti-extrusion ring ensure there is enough depth for the anti-extrusion ring to fit flush in the pocket. ESI-6148, Rev A © Copyright 07/31/2019 MOGAS Industries, Inc. www.mogas.com...
- Page 28 Tightening all nuts evenly until there is enough depth for the second anti-extrusion ring to fit flush into the pocket. Then, remove the gland nuts and the gland flange Install the second anti-extrusion ring ESI-6148, Rev A © Copyright 07/31/2019 MOGAS Industries, Inc. www.mogas.com...
- Page 29 If necessary, tap into place using a hammer and a brass or aluminum rod or wooden block. INSTALL OPERATOR Install Operator – Actuator Adaption (page 10) as required. ESI-6148, Rev A © Copyright 07/31/2019 MOGAS Industries, Inc. www.mogas.com...
-
Page 30: Disassembly
Note: Observe the orientation of the scribe line on the gland flange. The scribe line can be viewed through the viewing hole on the leg of the actuator platform. ESI-6148, Rev A © Copyright 07/31/2019 MOGAS Industries, Inc. www.mogas.com... - Page 31 Disassembly CLOSE VALVE Rotate the ball to the CLOSED position. Note: All MOGAS valves operate counter-clockwise to open, clockwise to close. CLOSED REMOVE BOLTS Remove actuator mounting flange bolts that hold the actuator to the valve mounting flange Note: Support or lift as required.
- Page 32 (if present) by lifting straight up and off the stem , taking care to remove keys if necessary. REMOVE BUSHING Remove the mounting flange bushing bearing CAUTION! Do not damage seat pocket. ESI-6148, Rev A © Copyright 07/31/2019 MOGAS Industries, Inc. www.mogas.com...
- Page 33 Do not scratch the stem or the packing bore in the body. Scratches could cause a leak. REMOVE BODY NUTS Remove body nuts in rotation. Note: Do not bind the end connection in the valve body. ESI-6148, Rev A © Copyright 07/31/2019 MOGAS Industries, Inc. www.mogas.com...
- Page 34 Do not allow the downstream seat to fall out of the end connect. Ensure that the body seal areas are not damaged during removal. END CONNECTION ASSEMBLY End connect seal Spring disc Seat ring REMOVE BODY SEAL Remove body seal ESI-6148, Rev A © Copyright 07/31/2019 MOGAS Industries, Inc. www.mogas.com...
- Page 35 Remove seat o-ring from seat ring in bi-directional configuration. REMOVE BALL Remove ball by lifting straight up. CAUTION! Use nylon straps for large valves to prevent damage to the ball coating. ESI-6148, Rev A © Copyright 07/31/2019 MOGAS Industries, Inc. www.mogas.com...
- Page 36 Disassembly BODY SPRING AND SEAT ASSEMBLY Spring disc Seat ring REMOVE SEAT RING Remove seat ring REMOVE DISC SPRING Remove disc spring ESI-6148, Rev A © Copyright 07/31/2019 MOGAS Industries, Inc. www.mogas.com...
-
Page 37: Rework Components
Ball reworking and ball / seat lapping should only be performed by MOGAS or a MOGAS authorized repair facility. CAUTION! Only MOGAS approved components should be used in re-assembled valves. ESI-6148, Rev A © Copyright 07/31/2019 MOGAS Industries, Inc. www.mogas.com... - Page 38 Note: Refer to Valve Item Reference Number drawings (pages 4–7) for identification of all seals, gaskets, spring(s) and packing. ESI-6148, Rev A © Copyright 07/31/2019 MOGAS Industries, Inc. www.mogas.com...
-
Page 39: Re-Assembly
ASSEMBLE DOWNSTREAM SEAT Place disc spring onto the largest seat shoulder of downstream or non-pressure end seat ring followed by the seat o-ring ESI-6148, Rev A © Copyright 07/31/2019 MOGAS Industries, Inc. www.mogas.com... - Page 40 Seat ring identification is also provided inside the stem slot of the ball to ensure correct assembly. POSITION VALVE BODY Place inlet flange of body on a protective surface giving access to the valve bore. ESI-6148, Rev A © Copyright 07/31/2019 MOGAS Industries, Inc. www.mogas.com...
- Page 41 INSERT Insert plug thrust bearing into the ball. INSERT BEARING Insert trunnion bearing into the bottom of the ball. Note: Take care not to distort or warp trunnion bearing. ESI-6148, Rev A © Copyright 07/31/2019 MOGAS Industries, Inc. www.mogas.com...
- Page 42 Ensure that the drive pin and trunnion plug locating holes in the ball are lined up with the corresponding stem and trunnion plug bores in the body. INSERT STEM THRUST BEARING Insert the stem thrust bearing into the valve body. ESI-6148, Rev A © Copyright 07/31/2019 MOGAS Industries, Inc. www.mogas.com...
- Page 43 Refer to step 20 on page 44. ESI-6148, Rev A © Copyright 07/31/2019 MOGAS Industries, Inc. www.mogas.com...
- Page 44 Note: MOGAS valve flanges are supplied in the customary “straddle centerline” hole orientation, unless otherwise specified. Lower end connection onto body face. Watch that seat ring does not fall out or crush body seal...
- Page 45 Using an aluminum or brass rod or a wooden block, ‘drive’ the stem with a hammer until the contact is made. You will hear a distinct tone when contact is made. ESI-6148, Rev A © Copyright 07/31/2019 MOGAS Industries, Inc. www.mogas.com...
- Page 46 Bolting torque should be applied to the specified values in three equal steps utilizing a ‘star’ pattern, followed by one last check applying the specified torque to each fastener sequentially in a clockwise pattern. ESI-6148, Rev A © Copyright 07/31/2019 MOGAS Industries, Inc. www.mogas.com...
- Page 47 Seat leakage may occur when the ball and seat surfaces are not matched.) THIS WILL AFFECT THE VALVE WARRANTY. ESI-6148, Rev A © Copyright 07/31/2019 MOGAS Industries, Inc. www.mogas.com...
- Page 48 Note: Support or lift as required. CAUTION! If the actuator is supplied by MOGAS, refer to the torque values in the test certificate provided for each individual valve serial number. Otherwise, refer to the manufacturer’s specifications. Bolting torque should be applied to the specified values in three equal steps utilizing a ‘star’...
- Page 49 THIS WILL AFFECT THE VALVE WARRANTY. FIELD HYDROSTATIC TEST Refer to MOGAS test certificate for pressures or allowable leak rates. INSTALL VALVE Install valve in piping as required. Refer to Installation (page 15). ESI-6148, Rev A © Copyright 07/31/2019 MOGAS Industries, Inc. www.mogas.com...
-
Page 50: Locate Valve Information
HEAT NUMBER SERIAL NUMBER MAX. TEMPERATURE BODY PART NUMBER END CONNECTION PART NUMBER Additional information may also be provided on MATERIAL identification tags per customer request. HEAT NUMBER SIZE PRESSURE CLASS ESI-6148, Rev A © Copyright 07/31/2019 MOGAS Industries, Inc. www.mogas.com... -
Page 51: Return Merchandise Authorizations (Rma)
Service page of our website (www.mogas.com). Service Contact MOGAS Service may be reached 24 hours per day / 7 days per week. Telephone: +1 281.449.0291 Email: service@mogas.com ESI-6148, Rev A © Copyright 07/31/2019 MOGAS Industries, Inc. www.mogas.com... - Page 52 • Viscous sludge CHINA • Critical plant safety applications Phone: +86 (0)10.8454.9478 EUROPE Phone: +44 (0)1162.793367 To locate a sales and service center in your area, visit us online at www.mogas.com. ESI-6148, Rev A © Copyright 07/31/2019 MOGAS Industries, Inc. www.mogas.com...
Need help?
Do you have a question about the T Series and is the answer not in the manual?
Questions and answers