Advertisement
Quick Links
Assembly Instructions
A
WOOD PARTS
Neck (A)
Soundboard (with hole) (B)
Back (no hole) (C)
Tailpiece (D)
Internal Brace (E)
Bridge
2 Sides (F)
4 Lining Strips (G)
Medium Donut for rosette
STRUMBLY KIT
B
D
E
C
F
G
HARDWARE
Medium Fretwire (20")
Thick First Fret (1-1/2")
3 geared tuners with tiny screws
Set of 3 Strings
Plastic Nut (1/8" X 3/8" X 1-1/2")
Choice of Medium Rosette
Flat Pick
Assembly Instructions
Songbook
Advertisement

Subscribe to Our Youtube Channel
Related Manuals for Musicmakers STRUMBLY KIT


Summary of Contents for Musicmakers STRUMBLY KIT
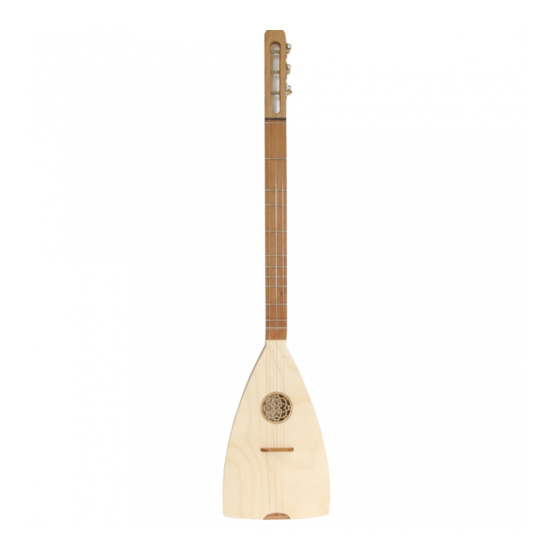
- Page 1 STRUMBLY KIT Assembly Instructions WOOD PARTS HARDWARE Neck (A) Medium Fretwire (20”) Soundboard (with hole) (B) Thick First Fret (1-1/2”) Back (no hole) (C) 3 geared tuners with tiny screws Tailpiece (D) Set of 3 Strings Internal Brace (E) Plastic Nut (1/8” X 3/8” X 1-1/2”)
-
Page 2: Before You Begin
BEFORE YOU BEGIN _____A. Inventory and inspect all your parts carefull. If anything is miss- 651-439-9120 ing or defective, please call us right away. _____B. It is a good idea to read through the entire assembly instructions before you start, just to get an overview of the project. - Page 3 INSTALLING THE FRETS ____4. Once you have sanded the neck to your satisfaction you can begin to install the frets. Place the NECK on a good fi rm surface for this operation. A fl imsy table top will not do. Better to work on a concrete fl...
- Page 4 File (or sand) the ragged ends of the frets down ____9. FIG. 6 until they are smooth and flush with the sides of the NECK. If you happen to have access to a belt sander, you’ll find it very helpful for this part of the project.
- Page 5 FIG. 11 ____13. When satisfi ed with the fi t of these parts, and making sure Use a nail to smear they are all facing up, use a nail to smear some glue into glue in the slots in the NECK the slots of the NECK.
- Page 6 PREPARING THE FRONT ____17. Draw a centerline lengthwise on the inside of the SOUNDBOARD (choose the lesser quality FIG. 16 face to show inside). This centerline will help you to keep Strumbly square and straight. Also draw a line on the inside of the SOUNDBOARD that is 7 1/2 inches below the top edge and is perpendicular to your center- 7-1/2”...
- Page 7 INSTALL THE FRONT FIG. 19 ____20. After the BRACE and DONUT have dried, you can test fi t the SOUNDBOARD to the frame without glue. Centering the SOUNDBOARD is not diffi cult if you proceed carefully. Begin by clamping the narrow end to the front of the frame and then turning the frame so you can see the center lines inside.
-
Page 8: Installing The Back
____21. It is easier to trim off the excess overhang of the FIG. 23 FRONT before installing the BACK. You can do this by hand with a fi ne-tooth coping saw, though you must be careful to install the blade with the teeth cut- ting toward the handle. -
Page 9: Sanding And Finishing
SANDING AND FINISHING ____24. Give Strumbly a fi nal sanding before applying a fi nish. Take your time to do a nice job -- it will pay huge dividends toward the cosmetic appearance of the instrument when it is fi nished. Start with 180 grit sandpaper and sand off all the machine marks left by our equipment, as well as any glue spots you might have added during construction. -
Page 10: Installing Hardware
INSTALLING HARDWARE ____25. Once your fi nish has dried you can install the hardware. Begin by installing the GEARED TUNERS. Please note that we drill some pegheads for right-mounted gears and some for left-mounted gears, in order to make balanced use of our inventory. You should orient these on the PEGHEAD with the handles pointing down. - Page 11 ____30. Proceed to install the remaining two strings FIG. 29 according to the diagram. (fi g. 29) Notice that you String # 1 can direct the wraps of wire toward one side of the Note: D4 NECK or the other, depending on how you’d like .012”...
- Page 12 Strumbly as a to use Strumbly as a canoe paddle only as a last resort. Musicmakers 14525 61st ST CT N Stillwater, MN 55082...
Need help?
Do you have a question about the STRUMBLY KIT and is the answer not in the manual?
Questions and answers