Advertisement
Quick Links
Advertisement

Subscribe to Our Youtube Channel
Related Manuals for Pro's Kit MT-7901


Summary of Contents for Pro's Kit MT-7901
- Page 1 USER'S GUIDE OPTICAL FIBER IDENTIFIER MT-7901 MT-7901 English English...
-
Page 2: Precautions For Use
WARNING WARNING You are cautioned that changes or modifications not espressly approved in this document could void yout authority to operate this equipment. To reduce the risk of fire or electric shock,do not expose this apparatus to rain or moisture. To avoid damage, do not open the cabinet. - Page 3 First check the accessories (If any accessory is short please relate with the dealer ASAP) Standard Portable package Host USER'S GUIDE OPTICAL FIBER IDENTIFIER MT-7901 English English Hood Manual...
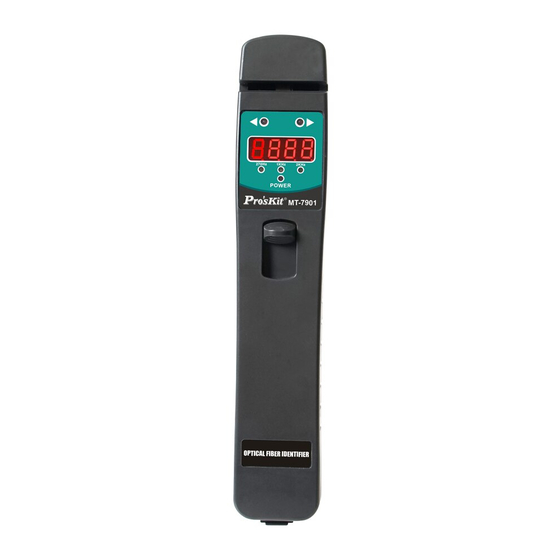
- Page 4 Description 1-Fiber location 2-Left indicative led 3-Trigger of the fiber identifier 4-Hood 5-Right indicative led 6-Frequency indicative led 7-power indicative led...
- Page 5 Battery set Warning:At the same time, can not use different style and different capacitance batteries. 1.Push the tip 2.Open the battery slot 3.Replace the batteries 4.Close the battery slot...
- Page 6 Availaber for different Fiber 1.Available for 800nm~1700nm laser signal 2.Based on non-destructive technology 3.No need to replace the clamp block for different fiber 250um bare fiber 900um fiber 2.0mm patch cord 3.0mm patch cord Availaber for different Fiber Tip line When measuring 2.0mm and 3.0mm fiber jumper,you must see the prompt line to ensure the correct measurement.
-
Page 7: Operation
Operation Use a hood under strong light Put the fiber into the fiber location and push down the trigger to begin testing. After 1~3 seconds, it output the results. The data in the LCD means the signal intensity, if too weak,it will be "NO". - Page 8 Direction and tone Right to left Left to right It is the main function to test the direction of the signal in the fiber. The corresponding indicative led will be on. And if the signal carrys different frequency--270Hz, 1kHz, 2KHz, the indicative led will be on also.
- Page 9 Low power indicate Low power indicate When the equipment is operated,the"POWER" led is always on,it means the battery is fully charged and you can keep using it. When the "POWER" led flash, it means low battery energy,please replace the batteries.
-
Page 10: Maintenance And Calibration
Maintenance and calibration Routine attention 1.Fiber-optical adapter should keep clean. 2.Please store the device in dry and ventilated place. 3.The long period no use , please take out the batteries. Common malfunction Handle way Handle way Described Described Malfunction cause Malfunction cause No battery Check battery setting... - Page 11 Detailed parameter 250um fiber @1550nm=-30dBm 250um fiber @1310nm=-25dBm 900um fiber @1550nm=-30dBm 900um fiber@1310nm=-25dBm Sensitivity 2.0mm fiber @1550nm=-30dBm 2.0mm fiber@1310nm=-25dBm 3.0mm fiber @1550nm=-25dBm 3.0mm fiber@1310nm=-20dBm +5dBm Max. Input 800nm~1700nm Wave respond <2.5dB Typical Clamp loss AA size Alkaline cell or Ni-MH cell Power Supply >6000 times Battery life...
Need help?
Do you have a question about the MT-7901 and is the answer not in the manual?
Questions and answers