Table of Contents
Advertisement
CONTENTS
SAFETY CONSIDERATIONS . . . . . . . . . . . . . . . . . . . 1
GENERAL . . . . . . . . . . . . . . . . . . . . . . . . . . . . . . . . . . . 2
Step 1 - Complete Pre-Installation Checks . . . . . . . 2
Step 2 - Rig and Place Unit . . . . . . . . . . . . . . . . . . 13
(if required) . . . . . . . . . . . . . . . . . . . . . . . . . . . . . . 13
Step 4 - Install Ductwork . . . . . . . . . . . . . . . . . . . . 13
Step 5 - Install Condensate Drain Line . . . . . . . . . 16
Step 6 - Complete Electrical Connections . . . . . . 16
Step 7 - Install Plenums (if required) . . . . . . . . . . 18
START-UP . . . . . . . . . . . . . . . . . . . . . . . . . . . . . . . . . 21
General . . . . . . . . . . . . . . . . . . . . . . . . . . . . . . . . . . . . 21
Compressor Rotation . . . . . . . . . . . . . . . . . . . . . . . . 32
Operating Sequence . . . . . . . . . . . . . . . . . . . . . . . . . 32
Low Ambient Operation (Factory Installed) . . . . . . 33
2-Speed Fan Operation Sequence . . . . . . . . . . . . . . 33
(Field Installation) . . . . . . . . . . . . . . . . . . . . . . . . . 33
SERVICE . . . . . . . . . . . . . . . . . . . . . . . . . . . . . . . . . . 34
Cleaning Evaporator and Condenser Coils . . . . . . 34
Lubrication . . . . . . . . . . . . . . . . . . . . . . . . . . . . . . . . . 34
Condenser Fan Adjustment . . . . . . . . . . . . . . . . . . . 34
Pulley Alignment . . . . . . . . . . . . . . . . . . . . . . . . . . . . 34
Belt Tension Adjustment . . . . . . . . . . . . . . . . . . . . . 35
Changing Fan Wheel . . . . . . . . . . . . . . . . . . . . . . . . . 35
Manufacturer reserves the right to discontinue, or change at any time, specifications or designs without notice and without incurring obligations.
Catalog No. 04-53500277-01
Installation, Start-Up and
Service Instructions
Printed in U.S.A.
Indoor Self-Contained Systems
Fan Bearing Replacement . . . . . . . . . . . . . . . . . . . . .35
Concentric Alignment . . . . . . . . . . . . . . . . . . . . . . . .35
Page
(after Lockout/Tagout) . . . . . . . . . . . . . . . . . . . . . 35
MAINTENANCE . . . . . . . . . . . . . . . . . . . . . . . . . . . . .36
Cleaning . . . . . . . . . . . . . . . . . . . . . . . . . . . . . . . . . . . 36
Inspection . . . . . . . . . . . . . . . . . . . . . . . . . . . . . . . . . .36
Air Filters . . . . . . . . . . . . . . . . . . . . . . . . . . . . . . . . . . 36
Condensate Drain . . . . . . . . . . . . . . . . . . . . . . . . . . .36
Checking System Charge . . . . . . . . . . . . . . . . . . . . . 36
Access Panel Removal . . . . . . . . . . . . . . . . . . . . . . .36
Evaporator-Fan Motor Removal . . . . . . . . . . . . . . . .36
Pressure Relief Device . . . . . . . . . . . . . . . . . . . . . . .37
Current Protection Device . . . . . . . . . . . . . . . . . . . . .37
High and Low-Pressure Switch . . . . . . . . . . . . . . . .37
Oil Charge . . . . . . . . . . . . . . . . . . . . . . . . . . . . . . . . . .37
TROUBLESHOOTING . . . . . . . . . . . . . . . . . . . . . . . .38
START-UP CHECKLIST . . . . . . . . . . . . . . . .CL-1, CL-2
SAFETY CONSIDERATIONS
Installing, starting up, and servicing air-conditioning components
and equipment can be dangerous. Only trained, qualified installers
and service mechanics should install, start-up, and service this
equipment.
When working on the equipment, observe precautions in the liter-
ature and on the tags, stickers, and labels attached to the equip-
ment. Follow all safety codes. Wear safety glasses and work
gloves.
Electrical shock can cause personal injury and death. Shut off
all power to this equipment during installation. There may be
more than one disconnect switch. Tag all disconnect locations
to alert others not to restore power until work is completed.
Use care in handling, rigging, and setting bulky equipment.
Personal injury could result.
Form 50XCA-9SI
Pg 1
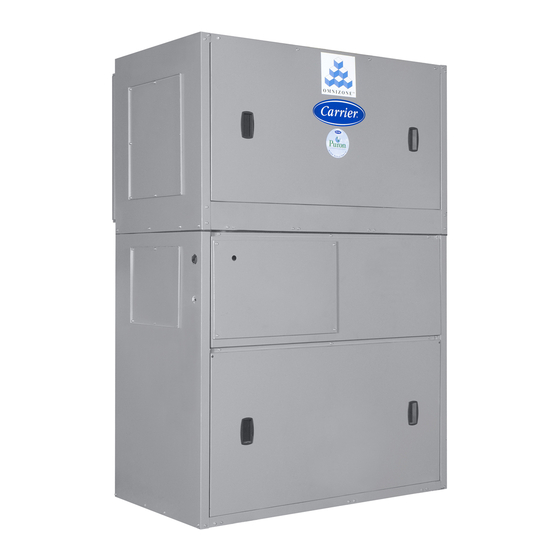
Omnizone™
50XCA06-24
Air-Cooled
WARNING
CAUTION
2-2020
Replaces: 50XCA-8SI
Advertisement
Table of Contents

Related Manuals for Carrier Omnizone 50XCA06


Summary of Contents for Carrier Omnizone 50XCA06
-
Page 1: Table Of Contents
Omnizone™ 50XCA06-24 Air-Cooled Indoor Self-Contained Systems Installation, Start-Up and Service Instructions CONTENTS Fan Bearing Replacement .....35 Concentric Alignment ......35 Page Evaporator and Condenser Motor Starter Setting SAFETY CONSIDERATIONS . -
Page 2: General
GENERAL DANGER Omnizone™ indoor packaged units are designed to provide the flexibility required in replacement, renovation, and new construc- DO NOT USE TORCH to remove any component. System tion. Units are available in 6 sizes from 5 tons to 20 tons. Belt- contains oil and refrigerant under pressure. - Page 3 EVAP ACCESS PANEL DISCONNECT (OPT) TOP VIEW SIZE 06 CONTROL BOX CONDENSER ACCESS PANEL FRONT VIEW TOP VIEW SIZE 08 5.1 (1"-2" FLTR) 6.8 (4" FLTR) INDOOR SUPPLY AIR FLOW INDOOR RTN AIR FLOW FILTER ACCESS (BOTH SIDES) 1.75 POWER ENTRY (OPP SIDE) 1.25 CONDENSER...
- Page 4 EVAP ACCESS PANEL CONTROL TOP VIEW CONDENSER ACCESS PANEL DISCONNECT (OPT) FRONT VIEW 5.1 (1"-2" FLTR) 6.8 (4" FLTR) INDOOR SUPPLY AIR FLOW INDOOR RTN AIR FLOW FILTER ACCESS (BOTH SIDES) CONDENSER DISCHARGE 1.25 (POWER ENTRY) 1.25 (CONTROL ENTRY) COND VFD (OPT) OUTDOOR RTN AIR FLOW...
- Page 5 5.1 (1"-2" FLTR) 6.8 (4" FLTR) EVAP ACCESS PANEL (BOTH SIDES) INDOOR RTN AIR FLOW FILTER ACCESS CONDENSER DISCHARGE 1.25 CONTROL ENTRY 1.25 COND VFD POWER ENTRY (OPT) TOP VIEW 3/4" MPT DRAIN 1.17 OUTDOOR RTN AIR FLOW 23.5 RIGHT VIEW DISCONNECT CONDENSER (OPT)
- Page 6 TOP VIEW CONTROL CONDENSER ACCESS PANEL DISCONNECT (OPT) FRONT VIEW 5.1 (1"-2" FLTR) 6.8 (4" FLTR) INDOOR SUPPLY AIR FLOW EVAP ACCESS INDOOR RTN PANEL AIR FLOW FILTER ACCESS (BOTH SIDES) CONDENSER DISCHARGE COND VFD 1.25 POWER ENTRY (OPT) OUTDOOR RTN AIR FLOW 3/4"...
- Page 7 TOP VIEW CONTROL CONDENSER ACCESS PANEL DISCONNECT (OPT) 5.1 (1"-2" FLTR) FRONT VIEW 6.8 (4" FLTR) EVAP ACCESS PANEL (BOTH SIDES) INDOOR RTN AIR FLOW FILTER ACCESS CONDENSER DISCHARGE COND VFD 1.25 POWER ENTRY (OPT) OUTDOOR RTN AIR FLOW 3/4" MPT DRAIN 1.25 CONTROL ENTRY 23.5...
- Page 8 EVAP ACCESS PANEL 5.1 (1"-2" FLTR) 6.8 (4" FLTR) INDOOR RTN AIR FLOW DISCONNECT (OPT) CONDENSER ACCESS FILTER ACCESS CONTROL PANEL (BOTH SIDES) FRONT VIEW CONDENSER DISCHARGE CONTROL ENTRY POWER ENTRY COND VFD (OPT) 3/4" MPT DRAIN OUTDOOR RTN AIR FLOW 23.5 TOP VIEW RIGHT VIEW...
- Page 9 5.1 (1"-2" FLTR) 6.8 (4" FLTR) EVAP ACCESS PANEL (BOTH SIDES) INDOOR RTN AIR FLOW FILTER ACCESS CONDENSER DISCHARGE CONTROL ENTRY COND VFD POWER ENTRY (OPT) CONTROL 3/4" MPT DRAIN CONDENSER ACCESS OUTDOOR RTN PANEL 1.17 AIR FLOW DISCONNECT (OPT) 23.5 FRONT VIEW RIGHT VIEW...
- Page 10 5.1 (1"-2" FLTR) 6.8 (4" FLTR) INDOOR RTN AIR FLOW FILTER ACCESS CONTROL (BOTH SIDES) CONDENSER ACCESS PANEL DISCONNECT (OPT) CONDENSER DISCHARGE FRONT VIEW COND VFD POWER ENTRY (OPT) OUTDOOR RTN AIR FLOW 3/4" MPT DRAIN CONTROL ENTRY 23.5 RIGHT VIEW TOP VIEW INDOOR SUPPLY...
- Page 11 5.1 (1"-2" FLTR) 6.8 (4" FLTR) EVAP ACCESS PANEL (BOTH SIDES) INDOOR RTN AIR FLOW FILTER ACCESS CONDENSER DISCHARGE COND VFD POWER ENTRY (OPT) CONTROL OUTDOOR RTN CONDENSER AIR FLOW ACCESS 3/4" MPT DRAIN PANEL DISCONNECT CONTROL ENTRY (OPT) 23.5 FRONT VIEW RIGHT VIEW 13.2...
- Page 12 Table 1 — Physical Data UNIT 50XCA NOMINAL CAPACITY (tons) BASE UNIT OPERATING WEIGHT (lb) 1153 1352 1380 1645 2041 COMPRESSOR Scroll Compressor Model ZPS60 ZPS67 ZP54/ZP49 ZP61/ZP57 ZP91/ZP67 ZP122/ZP91 Quantity Steps of Control Operating Charge R410-A (lb) 19.1 19.2 32.8 42.4 34.1...
-
Page 13: Step 2 - Rig And Place Unit
The units should use a “pair of pants” configuration as shown in er coils for cleaning and maintenance. Units located on the same Fig. 14. Refer to the Carrier System Design Manual or ASHRAE floor should have a minimum of 6 ft of clearance between con- standards for the recommended duct connection to unit with 2 or denser air openings. - Page 14 DISCHARGE LOUVER 50XCA 50XCA DIMENSIONS (in.) UNIT 50XCA 4 16 4 16 4 20 4 20 4 20 4 20 1" 4 3/4" INLET LOUVER *Access panel for condenser coil cleaning. INLET LOUVER DETAIL DISCHARGE LOUVER DETAIL 5" 14 GAGE ALUMINUM OR 18 GAGE GALVANIZED STEEL 4"...
- Page 15 *Provide access for cleaning condenser coil. Fig. 13 — 50XCA Installation Options NOTE: A = min. straight duct length * Preferred for condenser discharge ductwork. Fig. 14 — Typical Fan Discharge Connections for Multiple Fan Units...
-
Page 16: Step 5 - Install Condensate Drain Line
NOTE Unit operation on improper line voltage or excessive phase imbal- ance may be considered abuse and any resulting damage may not be covered by Carrier warranty. DRAIN All wiring must be in accordance with local or NEC (National PLUG Electrical Code) regulations. - Page 17 Table 2 — Electrical Data VOLTAGE COMPRESSOR COMPRESSOR UNIT RANGE NO. 1 NO. 2 V-PH-Hz 50XCA 208/230-3-60 18.3 — — 460-3-60 — — 575-3-60 — — 208/230-3-60 23.0 — — 460-3-60 11.0 — — 575-3-60 — — 208/230-3-60 15.6 15.9 460-3-60 575-3-60 208/230-3-60...
-
Page 18: Step 7 - Install Plenums (If Required)
50XC (12 SIZE UNIT AND LARGER) UNIT GROUND WIRE NUT SHIELD (CUT AND TAPE BACK) RS+5 REMOTE ROOM SENSOR (P/N ZONECCORRS01) RS GND 33CS250-01 NOTE: Remote sensor is field-installed option. Fig. 16 — Typical Thermostat Wiring Connections Step 7 — Install Plenums (if required) The installation of 50XCA plenums is applicable to all vertical discharge 50XCA units. -
Page 19: Step 8 - Check Fan Sheave And Belt Alignment
Factory-supplied drives are pre-aligned and tensioned, however, necessary. Periodically check belt tension throughout the run-in Carrier recommends checking the belt tension and alignment be- period, which is normally the initial 72 hours of operation. fore starting the unit. Always check the drive alignment after ad- justing belt tension. - Page 20 DEFLECTION FORCE (lb) SMALL BELT SHEAVE Steel Cable CROSS Super Belts Notch Belts PD RANGE Belts SECTION (in.) 3.0- 3.6 3.8- 4.8 5.0- 7.0 3.4- 4.2 4.4- 5.6 5.8- 8.6 7.0- 9.4 9.6-16.0 4.4- 6.7 — — — — 7.1-10.9 —...
-
Page 21: Start-Up
main power and switch any 2 leads on the load side of the dis- START-UP connect switch. CAUTION Adjust fan speed. Units are belt-driven and allow for a wide range of static and airflow requirements. It may be necessary To prevent injury, ensure that ducting or wire fan guards are to adjust the condenser airflow to account for these inlet con- installed on the condenser fan before starting the unit. - Page 22 Table 5 — Condenser Fan Performance — 50XCA08 Units ESP (in. wg) 0.00 0.10 0.20 0.30 0.40 0.50 0.60 0.70 2500 0.36 0.46 0.57 0.70 0.83 0.97 1.12 1.27 2650 0.42 0.53 0.65 0.78 0.92 1.06 1.21 1.37 2800 0.50 0.61 0.74 0.87...
- Page 23 Table 6 — Condenser Fan Performance — 50XCA12 Units ESP (in. wg) 0.00 0.10 0.20 0.30 0.40 0.50 0.60 0.70 4100 0.41 0.53 0.66 0.80 0.94 1.10 1.26 1.43 4300 0.47 0.60 0.73 0.87 1.02 1.18 1.35 1.53 4500 0.54 0.67 0.81 0.96...
- Page 24 Table 7 — Condenser Fan Performance — 50XCA14 Units ESP (in. wg) 0.00 0.10 0.20 0.30 0.40 0.50 0.60 0.70 6000 1.03 1.17 1.36 1.58 1.82 2.06 2.31 2.56 6250 1.17 1.31 1.50 1.72 1.97 2.22 2.48 2.74 6500 1.31 1.46 1.65 1.88...
- Page 25 Table 8 — Condenser Fan Performance — 50XCA16 Units ESP (in. wg) 0.00 0.10 0.20 0.30 0.40 0.50 0.60 0.70 0.80 0.90 Rpm Bhp Rpm Bhp Rpm Bhp Rpm Bhp Rpm Bhp Rpm Bhp Rpm Bhp Rpm Bhp Rpm Bhp Rpm Bhp 6250 1.16 1.37...
- Page 26 Table 9 — Condenser Fan Performance — 50XCA24 Units ESP (in. wg) 0.00 0.10 0.20 0.30 0.40 0.50 0.60 0.70 8500 2.20 2.54 2.87 3.22 3.56 3.91 4.27 4.63 8800 2.45 2.79 3.14 3.49 3.85 4.21 4.58 4.95 9100 2.70 3.06 3.42 3.78...
- Page 27 Table 10 — Evaporator Fan Performance — 50XCA06 Units ESP (in. wg) 0.00 0.10 0.20 0.30 0.40 0.50 0.60 0.70 0.80 0.90 Rpm Bhp Rpm Bhp Rpm Bhp Rpm Bhp Rpm Bhp Rpm Bhp Rpm Bhp Rpm Bhp Rpm Bhp Rpm Bhp 1500 0.19 0.24...
- Page 28 Table 11 — Evaporator Fan Performance — 50XCA08 Units ESP (in. wg) 0.00 0.10 0.20 0.30 0.40 0.50 0.60 0.70 0.80 0.90 Rpm Bhp Rpm Bhp Rpm Bhp Rpm Bhp Rpm Bhp Rpm Bhp Rpm Bhp Rpm Bhp Rpm Bhp Rpm Bhp 2200 0.27 0.39...
- Page 29 Table 12 — Evaporator Fan Performance — 50XCA12 Units ESP (in. wg) 0.00 0.10 0.20 0.30 0.40 0.50 0.60 0.70 0.80 0.90 Rpm Bhp Rpm Bhp Rpm Bhp Rpm Bhp Rpm Bhp Rpm Bhp Rpm Bhp Rpm Bhp Rpm Bhp Rpm Bhp 3000 0.26 0.33...
- Page 30 Table 13 — Evaporator Fan Performance — 50XCA14 Units ESP (in. wg) 0.00 0.10 0.20 0.30 0.40 0.50 0.60 0.70 0.80 0.90 Bhp Rpm Bhp Rpm Bhp Rpm Bhp Bhp Rpm Bhp Rpm Bhp Rpm Bhp 3500 0.30 0.46 0.56 0.65 0.76 0.89...
- Page 31 Table 14 — Evaporator Fan Performance — 50XCA16 Units ESP (in. wg) 0.00 0.10 0.20 0.30 0.40 0.50 0.60 0.70 0.80 0.90 Rpm Bhp Rpm Bhp Rpm Bhp Rpm Bhp Rpm Bhp Rpm Bhp Rpm Bhp Rpm Bhp Rpm Bhp Rpm Bhp 4500 0.53 0.69...
-
Page 32: Compressor Rotation
Table 15 — Evaporator Fan Performance — 50XCA24 Units ESP (in. wg) 0.00 0.10 0.20 0.30 0.40 0.50 0.60 0.70 0.80 0.90 Rpm Bhp Rpm Bhp Rpm Bhp Rpm Bhp Rpm Bhp Rpm Bhp Rpm Bhp Rpm Bhp Rpm Bhp Rpm Bhp 6,000 1.77 1.99... -
Page 33: Cooling
FAN CIRCULATION 14. Press EXIT until the status menu is visible (HZ, PSI). The indoor-fan motor is energized through G on the thermostat Table 16 — VFD Parameters and the indoor-fan contactor is energized. This starts the indoor- fan motor (IFM). The fan will operate to provide continuous air CHANGES FROM PARAMETER PARAMETER... -
Page 34: Service
When the drive first starts, system will prompt to run the Car- Table 19 — Motor FLA Values (208/230-v, 460-v) rier Configuration Assistant. Exit this option. 208/230V 460V Configure the drive parameters by pressing the menu button 0.50 and using the arrow keys to select “Parameters,” then press 0.75 the enter key. -
Page 35: Belt Tension Adjustment
Fig. 22 — Concentric Alignment Shaft bearings are supports by bearing supports (Fig. 23). If shaft Fig. 21 — Fan Pulley Adjustments and wheels are concentrically misaligned from shipping shock, it Belt Tension Adjustment is possible to re-bend the bearing support arms to the original posi- tions. -
Page 36: Maintenance
Connect refrigerant pressure gage to discharge line near com- MOTOR OVERLOAD RESET WHEEL pressor. OVERLOAD SETPOINT WHEEL After unit condition have stabilized, read head pressure on discharge line gage. NOTE: Operate unit a minimum of 15 minutes before check- ing charge. From standard Pressure-Temperature chart for R-410A, find CLASS 20 equivalent saturated condensing temperature. -
Page 37: Pressure Relief Device
Shut off unit main power supply. Lock out power supply and Current Protection Device tag disconnect locations. All units are equipped with a current-sensing lockout relay on Loosen bolts on mounting bracket so that fan belt can be each circuit. This device will lock out the compressor after any removed. -
Page 38: Troubleshooting
TROUBLESHOOTING Refer to Table 23 to determine the possible cause of the problem and the associated procedure necessary to correct it. See Fig. 25- 30 for typical wiring schematics. Table 23 — Troubleshooting Procedure PROBLEM POSSIBLE CAUSE CORRECTION PROCEDURE Check power source. Loss of unit power Check fuses, circuit breakers, disconnect switch. - Page 39 Table 23 — Troubleshooting Procedure (cont) PROBLEM POSSIBLE CAUSE CORRECTION PROCEDURE Outdoor temperature too low Install low-ambient control. Condenser airflow too high Check and adjust. Discharge Pressure too Low charge Check for and repair leaks and add refrigerant as necessary. Compressor fault Check suction and discharge pressure.
- Page 40 DISC1 IFC/IFR 208/230V 100/BLK 103/BLK 106/BLK 101/BLK 104/YEL 107/YEL 109/GRN 60 Hz 102/BLK 105/BLU 108/BLU OFC/OFR 111/BLK 114BLK 112/YEL 115/YEL 117/GRN 113/BLU 116/BLU CLO1-Loop COMP1 118/BLK 121/BLK 119/YEL 122/YEL 124/GRN 120/BLU 123/BLU 125/BLK 126/BLK CLO2-Loop COMP2 127/BLK 130/BLK 128/YEL 131/YEL 133/GRN 129/BLU 132/BLU...
- Page 41 Continued on Line Voltage Diagram 504/RED 601/RED REMOVE 509/BRN JUMPER BLK/600 604/BRN WHEN 510/BLK CONNECTING AIR-SIDE 602/BLU ECONOMIZER 608/PNK OCCUPANCY 507/ORN CONTROL 550/BLK 603/YEL ECON WHEN FIELD INSTALLED, THE ECONOMIZER HARNESS 609/PNK REPLACES THE 608/PNK FACTORY SHORTING PLUG. 605/BLU 604/BRN FIELD INSTALLED 603/YEL SAT SENSOR...
- Page 42 DISC1* IF VFD 460V 100/BLK 103/BLK 106/BLK 101/BLK 104/YEL 107/YEL 60 Hz 102/BLK 105/BLU 108/BLU 140/GRN 109/GRN 140/GRN OFC/OFR 111/BLK 114BLK 112/YEL 115/YEL 117/GRN USE COPPER 113/BLU 116/BLU SUPPLY WIRES. CLO1-Loop Phase rotation 118/BLK 121/BLK sequence is 119/YEL 122/YEL COMP1 BAC (L2-L1-L3).
- Page 43 705/RED PRES 2 704/WHT 711/VIO 703/BLK Note: PRES1, PRES2, and OFR are 710/BRN connected with shielded wire. 710/BRN The drain wire is connected to 702/RED 713/BLU OF VFD terminal 1. The remote PRES 1 701/WHT end of the drain wire shall be 714/YEL 700/BLK insulated.
- Page 44 Continued on Line Voltage Diagram 504/RED 601/RED REMOVE 509/BRN JUMPER BLK/600 604/BRN WHEN 510/BLK CONNECTING AIR-SIDE 602/BLU ECONOMIZER 608/PNK OCCUPANCY 507/ORN CONTROL 550/BLK 603/YEL ECON WHEN FIELD INSTALLED, THE ECONOMIZER HARNESS 609/PNK REPLACES THE 608/PNK FACTORY SHORTING PLUG. 605/BLU 604/BRN FIELD INSTALLED 603/YEL SAT SENSOR...
- Page 45 NOTE: See legend and notes on page 40. Fig. 29 — Typical Wiring Schematic for Low Ambient Option (50XCA06,08 Units)
- Page 46 NOTE: See legend and notes on page 40. Fig. 30 — Typical Wiring Schematic for Low Ambient Option (50XCA12-24 Units) © 2020 Carrier Corporation Manufacturer reserves the right to discontinue, or change at any time, specifications or designs without notice and without incurring obligations.
-
Page 47: Start-Up Checklist
START-UP CHECKLIST (Fill out this form on Start-Up and file in job folder) NOTE: To avoid injury to personnel and damage to equipment or property when completing the procedures listed in this start-up checklist, use good judgment, follow safe practices, and adhere to the safety considerations/information as outlined in preced- ing sections of this Installation, Start-Up and Service document. - Page 48 SUPPLY FAN AMPS: NOTES: _______________________________________________________________________________________ _______________________________________________________________________________________________ _______________________________________________________________________________________________ _______________________________________________________________________________________________ © 2020 Carrier Corporation Manufacturer reserves the right to discontinue, or change at any time, specifications or designs without notice and without incurring obligations. Catalog No. 04-53500277-01 Printed in U.S.A. Form 50XCA-9SI...
Need help?
Do you have a question about the Omnizone 50XCA06 and is the answer not in the manual?
Questions and answers