Advertisement
Quick Links
Advertisement

Related Manuals for Majacraft Pioneer


Summary of Contents for Majacraft Pioneer
- Page 1 Your new Pioneer spinning wheel majacraft all you need to spin your dreams... majacraft...
- Page 2 Thank you for choosing Majacraft, it is your belief in us that drive our innovation and creativity in building captivating tools for you.
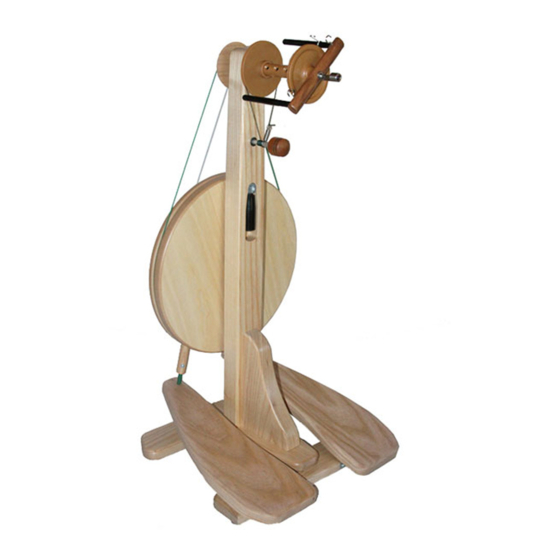
- Page 3 Assembling a Majacraft Pioneer These instructions demonstrate how to assemble your Majacraft Pioneer spinning wheel. 1. Prepare the components We recommend that you find a clear work area where you can lay out all the components for working on them.
- Page 4 Do not tighten the bolts fully yet. Repeat this with the remaining two JCB bolts. When they all in place then tighten bolts securing the stem onto the base assembly. 3. Attach drive wheel to stem Required: 5mm allen key (in the hardware bag) Base/Stem assembly Drive Wheel majacraft...
- Page 5 When located correctly, use the 5mm allen key to screw the axle bolt into the stem. Tighten it firmly The drive wheel is now attached to the base/stem assembly. 4. Head assembly on to stem Required: Head Assembly Base/Stem Assembly Hex Lock Bolt majacraft...
- Page 6 Slide the pulley onto the flyer shaft. Align the grub screw over the flat on the flyer shaft. Then use the 2mm allen key to tighten the grub screw and secure the whorl on to the flyer shaft. majacraft...
-
Page 7: Crank Assembly
This will reduce your chances of possibly scratching your drive wheel. Similar to the base/stem assembly process, do not fully tighten the centre screw until you have aligned and started screwing in the two screws on the sides. majacraft... - Page 8 When the rod end is aligned correctly - parallel with the face of the drive wheel - screw the 25mm screw back into place. The screw should only be tightened until the head just touches the side of the pedal. DO NOT OVERTIGHTEN! CORRECT INCORRECT majacraft...
- Page 9 1 - Flyer 1 - Tension knob, spring and string assembly If you have some petroleum jelly or vaseline, rub a small smear onto the flyer shaft. This has already been done at the factory so is not essential. majacraft...
- Page 10 You can now turn the tension knob to wind the string on to the shaft until the tension only just takes up. Refer to the Majacraft Spinning Manual for a more thorough description on setting the tension. majacraft...
- Page 11 Pioneer looking great into the future. Your Majacraft Pioneer is now assembled and you are ready to start on a new spinning adventure! From the team at Majacraft, we wish you great spinning in the future.
Need help?
Do you have a question about the Pioneer and is the answer not in the manual?
Questions and answers