Table of Contents
Advertisement
Quick Links
12.
Delikatnie wsuwamy spód szuflady (rysunek 8)
PL
Carefully slide the bottom of the drawer (figure 8).
GB
Sanft schieben wir Unterseite der Schublade (Zeichnung 8)
D
Insérez doucement le fond du tirroir (image n° 8)
F
13.
Przedni panel szuflady uzbrajamy w śruby, w bocznych częściach szuflady w górnym i dolnym otworze powinny znaleźć się kołki stabilizujące.
PL
Tighten the screws on the front panel of the drawer. In the sides of the drawer in the top and bottom of the hole should be at stabilizing pins.
GB
Frontplatte der Schublade sttaten wir mit der Schrauben aus, in den Seiten der Schublade in der oberen und der unteren Öffnung sollte
D
Stabilisierungsstifte sein.
Renforcez le panneau avant en vis, aux côtes du tiroir dans l' o eillet en bas et en haut doivent être les tourillons stabilisants.
F
14.
Dociskamy przedni panel szuflady do boków, spód powinien wejść w szczelinę w dolnej części przedniego panelu.
PL
Push the front panel of the drawer sides, the bottom should enter the slot in the bottom of the front panel.
GB
Drücken wir die Frontplatte an den Seiten der Schublade, die Unterseite des Schranks sollte im unteren Teil der Platte in den Spalt zu kommen.
D
Serrez le panneau frontale du tiroir à ses côtes, le fond doit entrer dans la crevasse dans la partie basse du panneau.
F
15.
Zabezpieczamy połączenie poprzez dokręcenie bolców kontrujących po wewnętrznej stronie szuflady.
PL
Secure the connectors by tightening the eccentrics on the inside of the drawer.
GB
Sichern wir die Verbindung durch anziehen Exzenterverbindungen
D
Protégez le lien en vissant der ferrures d'assemblage excentrique à l'interièur du tiroir.
F
16.
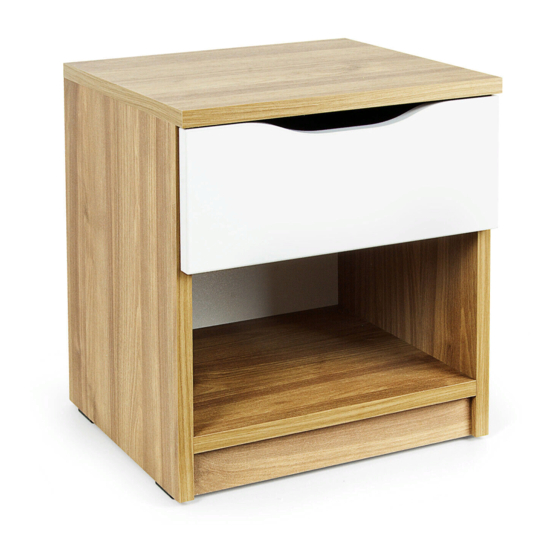
Twoja szafka jest już gotowa.
PL
Your bedside table is ready.
GB
Ihr Schrank ist fertig.
D
Ta table de chevet est prête !ww
F
Krakpol
Przemysłowa 26
32-083 Balice
12 290 44 44
www.leomark.pl
8
9
10
GB. Manual Assembling Bedside cabinet with drawer
D. Montageanleitung Schränkchen mit der Schublade
Szanowni Państwo, bardzo dziękujemy za zakup naszego produktu, prosimy o zapoznanie się z niniejszą instrukcją oraz zmontowanie Szafki
PL
zgodnie z zaleceniami Instrukcji. Do zmontowania szafki będą potrzebne narzędzia tj. śrubokręt, ew. wkrętarka oraz młotek
Dear Customer, thank you very much for purchasing our product, please read these instructions and assemble the furniture as recommended
GB
by the manual. To assemble cabinets tools will be required: screwdriver, screwdriver and hammer.
Sehr geehrte Damen und Herren, Wir bedanken uns bei Ihnen für den Einkauf von unserem Produkt. Wir bitten mit der vorliegenden Montag-
D
eanleitung bekannt zu machen und das Schränkchen nach ihren Empfehlungen zusammenzubauen. Um das Schränkchen zusammenzubauen,
braucht man eine Werkzeuge: Schraubenzieh er, eventuell Schraubmaschine und Hammer.
Chers clients, Nous vous remercions d'avoir fait acheter notre produit, s'il vous plaît faire la connaissance des conseils ci-dessus et prendre dont
F
compte pendant le montage. Vous aurez besoin de quelques outils c-à-d tournevis (soit visseuse) et marteau.
1.
Ostrożnie rozpakuj wszystkie elementy
PL
Carefully unpack all items.
GB
Packen Sie vorsichtig alle Elemente aus.
D
Déballez tous les éléments avec prudence
F
2.
Ustaw je na równej powierzchni, sprawdź czy posiadasz wszystkie elementy i czy nie są one uszkodzone
PL
Place it on a level surface, check you have all the elements and that they are not damaged.
GB
Platzieren Sie diese Teile auf einer flachen Fläche, überprufen Sie bitte, ob Sie alle Elemente besitzen und ob sie nicht beschädigt sind.
D
Mettez-les sur la surface stable, vérifiez si vous avez reçu le colis avec tout contenu et si rien n'a pas arrivé endommagé.
F
3.
Do boków szafki zamontuj prowadnice szuflady, każdą 3
PL
wkrętami (patrz rysunek1).
The sides of the cabinet, mount drawer guides, each 3 screws
GB
(see figure 1).
Zu den Seiten des Schranks montieren Sie bitte die Schublad-
D
enfurüngen, 3 Schaftschraube (siehe Zeichnung 1)
Aux côtes de la table accrochez les coulisses pour tiroir, cha-
F
cune avec 3 vis. (regardez image n°1).
1
leomark.pl
PL. Instrukcja Montażu Szafka z szufladą
F. Notice de montage Table de chevet
102/246028
4.
Boki szafki należ uzbroić przez wkręcenie śrub (patrz rys 2),
PL
do płyty konstrukcyjnej spodu szafki montujemy kołki oraz bolce
kontrujące
The sides of the cabinet tighten the screws (see figure 2), and
GB
the bottom plate design cabinet mount connector pins and con-
nectors eccentric.
Die Seiten des Schranks soll man verstärken durch ziehen die
D
Schrauben an (siehe Zeichnung 2), bis Unterseite des Schranks
montieren Sie bitte die Pflöcke und Exzenterverbindungen.
Il faut renforcer les côtes en vissant tout les boulons, vis et
F
des ferrures d'assemblage excentrique à la plaque de construction
située au fond de meuble.
2
Advertisement
Table of Contents

Subscribe to Our Youtube Channel
Related Manuals for krakpol 102/246028


Summary of Contents for krakpol 102/246028
- Page 1 Tighten the screws on the front panel of the drawer. In the sides of the drawer in the top and bottom of the hole should be at stabilizing pins. Frontplatte der Schublade sttaten wir mit der Schrauben aus, in den Seiten der Schublade in der oberen und der unteren Öffnung sollte 102/246028 Stabilisierungsstifte sein.
- Page 2 Dociskamy bok szafki do spodu, po zespoleniu dokręcamy bolce Do bocznych części szuflady przykręcamy wewnętrzne części kontrujące od spodniej części podstawy, to samo z drugim bokiem prowadnicy (rysunek 6) (patrz rys. 3) To the side of the drawer tighten the inner portion of the track Push down on the side of the cabinet to the bottom, then (figure 6).
Need help?
Do you have a question about the 102/246028 and is the answer not in the manual?
Questions and answers