Table of Contents
Advertisement
Quick Links
Advertisement
Table of Contents

Related Manuals for Q Experience Q DISPLAY 2 Series

Summary of Contents for Q Experience Q DISPLAY 2 Series
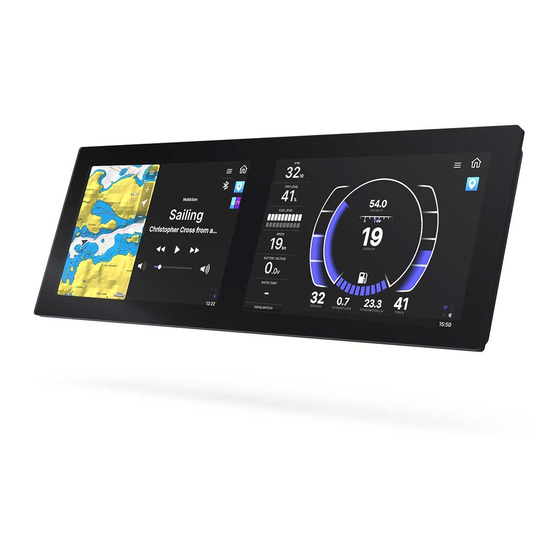
- Page 1 Q DISPLAY 2 SERIES User guide...
-
Page 2: Table Of Contents
Welcome to the Q Experience 2.0....................4 Important information ......................... 5 Introduction ............................6 1 Sidebar .............................. 6 Home button ........................... 7 Pinned views ........................... 7 Notification centre and Notifications .................... 8 System updates ..........................8 System status area ......................... 8 2 View .............................. - Page 3 11 Weather ............................33 12 Info ............................... 34 13 Settings ............................34 13.1 System settings ........................35 13.2 Users ............................. 36 13.3 Display settings........................37 13.4 Navigation settings ......................39 13.5 Wi-Fi ............................39 13.6 Bluetooth ..........................40 13.7 Mobile Data Settings ......................41 13.8 Boat settings .........................
-
Page 4: Welcome To The Q Experience 2.0
The Q Experience also focuses on safety. The Q Display’s bright screen will keep you on the map, wherever you are going. It also has automatic weather warnings to give you a heads up on approaching bad weather. -
Page 5: Important Information
Important information FCC Compliance statement Changes or modifications not expressly approved by Nextfour Solutions Oy could void the user's authority to operate the equipment. This device complies with Part 15 of FCC Rules. Operation is subject to the following two conditions: This device may not cause harmful interference. -
Page 6: Introduction
Introduction The user interface of the Q Experience consists of three main components: Sidebar, View and Application. Whenever you are unsure about where to find the information you are looking for, see the 1 Sidebar Glossary alphabetically ordered for keywords at the end of this guide. -
Page 7: Home Button
Home button Home menu The Home button opens the . In the Home menu you will find all the available views and utilities – everything essential to control and adjust your device. Home icon Pinned views Pinned views Beneath the Home button are . -
Page 8: Notification Centre And Notifications
Notification centre and Notifications Notification centre Beneath Pinned views you will find the . Here you can view and manage all the notifications that you have received. Open the Notification centre from the Notification button (notification icon) in the Sidebar. Notification icon Every notification will first appear on the screen. -
Page 9: View
Bluetooth 2 View View is an instance of one or more applications, shown on the screen at the same time. A view may consist of a single application (Fullscreen view) or two applications (Split view). Most of the application settings are view specific. For example, you may have two individual Map views with different settings for different scenarios. -
Page 10: Home Menu
Application menu See the application specific sections for more detailed instructions, starting from Chapter 5 4 Home menu Home menu is where you will find all the available views and utilities – everything essential to control and adjust your device. Open the Home menu from the Home button in the Sidebar. -
Page 11: Views
Home menu 4.1 Views The topmost section of the home menu features all the default and custom views for the applications available to you. The available applications depend on your boat configuration and installed peripherals, such as speakers, radar, or sounder/Fishfinder. Dashboard applications will always be available, with respective full-screen views. - Page 12 Add new view Available templates for custom views are: Fullscreen view Vertical split view Horizontal split view Picture-in-Picture...
- Page 13 4.1.1 Manage views If you would like to pin, launch or remove default or custom views: 1. Open View properties by pressing the three dots (…) on the desired view View properties 2. Select the desired action: a. Pin to Sidebar / Unpin from Sidebar b.
- Page 14 4.1.2 Reset views If at some point you would like to go back to the factory set default views: 1. Open Home menu Settings 2. Select System reset 3. Select NOTE, that this action is irreversible, and all your data and custom views will be removed. 4.1.3 Split view When the view is split into two, it is called a “split view”.
-
Page 15: Utilities
4.2 Utilities Utilities Under , you will find all the utility applications, like Settings, Weather, and Info. Utility applications are opened on top of your current view, instead of a dedicated view. Press the close button (X) in the top right corner, to close the utility application, and return to your main view. -
Page 16: Map Basics
Chart/Map app In Map controls, top right corner of the application you will find: Map menu button • (+) Increase zoom button • (-) Decrease zoom button • Center map button • 5.1 Map basics 5.1.1 Panning Pan the Map by dragging it in the desired direction with your finger. 5.1.2 Centering Center the view back to your position by pressing the button in Map controls. - Page 17 Zoom in Zoom out 5.1.4 Measure distance Measure distance by placing two fingertips on the screen at the same time, one on the start point and other at the end of the distance you wish to measure. 5.1.5 View location information Press long on the map area with one fingertip to view location information and open the Location menu Location properties...
-
Page 18: Location Properties
5.2 Location properties Location properties is where you will see the coordinates and distance information for the selected position, as well as access location specific functions. Location properties Open by long pressing on a desired location on the chart with your finger. My places You can also open the location properties by choosing a location from , found from... -
Page 19: Navigation/ Set A Destination
5.3 Navigation/ Set a destination The Q Experience provides robust auto-routing and navigation capabilities and is compatible with Navionics marine charts. To start navigating, just set the destination or select an existing route to use for navigating. To set a destination, do one of the below: A. - Page 20 Map menu (found through the Map’s application menu 5.4.1 Stop and pause Stop or pause an active navigation. 5.4.2 Search The Search function allows you to explore and find places. 5.4.3 Chart settings Chart settings Find detailed settings to use for navigation from the .
-
Page 21: Widgets
New route Select (+) to start creating a new route. Select an existing route to open Route properties and view route information. 5.4.6 Log View and manage previous trips and trip information. 5.4.7 Place here Place here place here instantly creates a place in your current location. By pressing the My places button the current location is instantly saved to This is especially useful when you are required to instantly mark a location on the go, like... -
Page 22: Chart Settings
By long-pressing the fuel tank icon you’ll see how far your current fuel situation will be able to take you. 5.5 Chart settings Chart settings provide various preferences for adjusting the chart view to your needs. Open Chart settings from the Map’s application menu, from the settings icon with the text Chart settings . - Page 23 SonarChart™ SonarChart™ is a Navionics exclusive feature that provides much more detailed depth contours, with adjustable line density. The shading option allows you to see the depth contours in 3D like shaded shapes and forms. You can choose the density of the chart. 2D shading This feature adds a 2D shading to your chart view to better see the depths of water.
-
Page 24: Location And Route Properties
Reset chart settings Here you can reset all the chart settings you have selected. Note, that it will only reset the settings for this chart view. 5.6 Location and route properties Location properties My places The location properties can be opened from or by long-pressing a place on the Chapter 5.2 Location chart view. -
Page 25: Dashboard Application
5.6.5 Edit route Edit route launches the route editor, which allows you to edit the route points, route color and name. 5.6.6 Center to Center to function centers the route and zooms out so that the entire route will become visible in the application. -
Page 26: Dashboard Settings
Dashboard app application controls include measures such as RPM, trim level, fuel level, depth, battery voltage etc. To re-order the application controls on dashboard, press and hold on an application control, wait for the re-order mode to activate (changes to blue color) and then simply drag and drop the selected instrument into the desired space. -
Page 27: Compact Dashboard Widget
Dashboard Settings/Menu 7 Compact dashboard widget This chapter is about the Compact dashboard widget. For info on Dashboard application, see Dashboard Application Chapter 6 Compact dashboard is the dashboard widget, that can be found in selected applications. Currently we support Compact dashboard in Map, Fishfinder and Radar. You can add and remove the info shown on the compact dashboard by going to the Dashboard application menu (for example Map’s application menu) and selecting... -
Page 28: Fishfinder
To activate more Application packages, see Chapter 13.8.5 Extra packages. 8 Fishfinder Q Experience is compatible with Raymarine’s super sharp Fishfinder and Quantum Radar. For more information on their qualities and how to use them, visit www.raymarine.com. Fishfinder Launch the Fishfinder application by opening the Home menu and selecting . -
Page 29: Radar
9 Radar Q Experience is compatible with Raymarine’s super sharp Fishfinder and Quantum Radar. For more information on their qualities, visit www.raymarine.com.. Radar Launch the Radar application by opening the Home menu and selecting . The Radar application consists of a Display area in the center, Radar controls in the top right corner and optional Compact dashboard on the top left. -
Page 30: Music Player Area
Music Launch the Music application by opening the Home menu and selecting . The Music application consists of a Player area in the center and Music application controls in the top right. Music app From the Music controls in the top right corner of the viewport you will find: Music menu button •... -
Page 31: Radio Input And Favourites
AUX input • Equalizer • 10.3 Radio input and Favourites Radio To listen to radio, open the Music menu and select from the input list. By default, Music application will start with Radio input selected. When listening to the radio, press the “previous” and “next” buttons to auto-scan to other radio stations. -
Page 32: Aux Input
Bluetooth 10.5 AUX input AUX in To use AUX input, open the Music menu and select from the input list. Connect the external device to Q Display via AUX cable and start playing music or other media from the external device. Using AUX, audio volume is the only possible adjustment you can do from Q Display. -
Page 33: Weather
11 Weather The Weather App provides real time weather forecasts for the next 24 hours, based on AccuWeather’s weather data. Weather Launch the Weather application by opening the Home menu and selecting . The Weather application consists of a tab list on the left and a content area on the right. Weather is a utility application, that opens on top of your current view. -
Page 34: Info
12 Info Info utility application features all the essential guides for your boat, engine, and Q Display – including this guide. It also includes useful links, release notes, software licenses and support information. Info Launch the Info application by opening the Home menu and selecting . -
Page 35: System Settings
Settings is a utility application, that opens on top of your current view. To close Settings application and return to your previous view, press the (X) close button in the top right corner. Settings app The Tab list on the left features all the available Settings categories. Press to select a category you wish to view from the Tab list. -
Page 36: Users
13.1.4 Demonstration mode Demonstration mode is only meant for showcasing the Q Display. Demonstration mode uses pre-set GPS and engine data, to demonstrate what Q Experience looks like in use. 13.1.5 Display QR code Here you can find the QR code you need to connect your mobile phone with the Q App to your Q Display. -
Page 37: Display Settings
• active user Removing a user will remove all the associated views and settings • If you remove the last existing user, it will be replaced by the default Q Experience • user, with factory settings and views. Users 13.2.1 Change user... - Page 38 Manual display brightness Choose to adjust the brightness yourself with a toggle bar. 13.3.3 Theme Choose the color theme for your Q Display from the Display settings. Q Experience provides various colour themes for the user interface: Manufacturer specific •...
-
Page 39: Navigation Settings
13.4 Navigation settings Navigation settings include everything related to GPS and navigation information. Navigation settings 13.4.1 GPS information Inspect your GPS information, satellite SNR and position info from Navigation settings. 13.4.2 GPS source You can choose your GPS source from the Navigation settings. Select your GPS source to be either Internal or NMEA. -
Page 40: Bluetooth
Wi-Fi settings 13.5.1 Wi-Fi ON/OFF Turn the Wi-Fi ON/OFF with a toggle bar in Wi-Fi settings. When Wi-Fi is ON, you will be able to see available networks and you will automatically connect to a secure network that you have connected to before. 13.5.2 Networks Inspect and connect to available networks from Wi-Fi settings. -
Page 41: Mobile Data Settings
Bluetooth settings 13.6.1 Bluetooth toggle Turn Bluetooth ON/OFF with a toggle bar from the Bluetooth settings. 13.6.2 Devices Devices Inspect and connect to available devices with Bluetooth. By pressing on the you can see all the devices that have been connected to the Q Display previously. 13.6.3 Device name Device name is the name other devices see for your Q Display, when scanning for devices via Bluetooth. - Page 42 Boat settings 13.8.1 Engine count Set the number of engines in your boat from the Boat settings. Select one or two engines. 13.8.2 Boat draft Boat draft shows how shallow your boat's hull can go. Set the correct draft with the toggle bar for safer boating.
-
Page 43: Unit Settings
13.8.7 Fuel sensor 1 & 2 input Select the correct fuel sensor inputs from the Boat settings: None • • • NMEA • 13.8.8 Trim calibration & Speed update interval Here you can adjust your engine to lowest position with trim calibration. You can also adjust your speed update interval to: Very slow •... -
Page 44: Audio Settings
13.9.2 Distance Select the format for distance units: Metric (m, km) • Nautical (NM) • 13.9.3 Speed Select the format for speed units: Knots (kn) • Miles per hour (Mph) • Kilometres per hour (Km/h) • Meter per second (m/s) •... -
Page 45: System Reset
Audio settings 13.10.1 Volume Adjust audio output volume. 13.10.2 Zone 1 & 2 volumes You can adjust the volume in two different zones. 13.10.3 Equalizer Adjust equalizer to fine tune the audio profile to match your listening preferences. 13.10.4 Radio mode Select FM or DAB mode for the radio. - Page 46 Q Mobile App is a free mobile application that takes your Q Experience to the next level with added features and boating info. Download the Q Experience Mobile App from your phone’s app store. With the Q Mobile App you get: The Guard -feature that keeps our boat safe in the docks •...
-
Page 47: Glossary
15 Glossary Active user ..........36 Forecast ............. 32 Add to Favourites ........30 Fuel level stabilization ........ 41 Application ............ 8 Fuel sensor ..........42 Application menu button ......8 Fuel tank capacity ........41 Audio settings ..........43 Fullscreen view .......... - Page 48 Remove user ..........36 Text size ............37 Reorder Dashboard ........25 Theme ............37 Reset views ..........13 Time and date ..........35 Route editor ..........21 Trail length ..........38 Route information ........23 Unit settings ..........42 Unpin from Sidebar Route properties ........
Need help?
Do you have a question about the Q DISPLAY 2 Series and is the answer not in the manual?
Questions and answers