Advertisement
Available languages
Available languages
Quick Links
trale la terra del motore con la terra dell'impianto elettrico
come illustrato nello schema di collegamento
Per un corretto funzionamento della parte radio riceven-
te,in caso di utilizzo di due o più centrali, si consigli all'in-
stallazione ad una distanza di almeno 3 metri l'una dall'al-
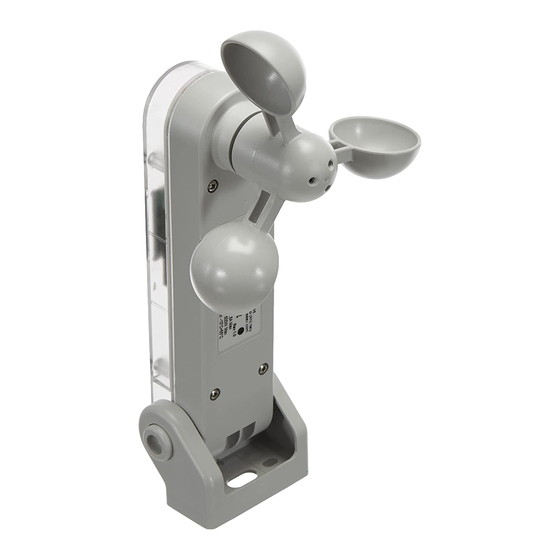
BeWeather Electronic Control Unit
tra.
I
'
MPORTANTE PER L
UTENTE
- Il dispositivo non deve essere utilizzato da bambini o da per-
sone con ridotte capacità psico-fisiche, almeno che non siano
supervisionati o istruiti sul funzionamento e le modalità di uti-
lizzo.
Installazione del prodotto:
4
Rev. 3.0
05/09/2016
Advertisement

Subscribe to Our Youtube Channel
Related Manuals for Seav BeWeather


Summary of Contents for Seav BeWeather
- Page 1 Per un corretto funzionamento della parte radio riceven- te,in caso di utilizzo di due o più centrali, si consigli all’in- stallazione ad una distanza di almeno 3 metri l’una dall’al- BeWeather Electronic Control Unit tra. ’ MPORTANTE PER L...
- Page 2 Product installation...
- Page 3 ’ importante per l installatore - ATTENZIONE: conservare questo manuale La centrale BeWeather deve essere col- d’istruzioni e rispettare le importanti pre- legata permanentemente alla rete di ali-...
- Page 4 mentazione e non presenta nessun tipo assicurandosi di aver assemblato corret- di dispositivo di sezionamento della linea tamente le parti che lo compongono. Pre- elettrica 230 Vac, sarà quindi cura dell’in- stare attenzione in particolare al piastrino stallatore prevedere nell’impianto un ceramico ed al flat di collegamento.
- Page 5 Utilizzando il radiocomando con un solo tasto, si ottiene il seguente funzionamento: il primo impulso comanda la Salita fino allo scadere del tempo motore. Il secondo impulso Serie BeWeather comanda la Discesa del serramento; se un impulso perviene prima dello scadere del tem- po motore, la centrale effettua l’arresto del serramento, un ulteriore impulso effettua la...
- Page 6 per lo Stop ed il terzo per la Discesa. UNZIONAMENTO DEL ENSORE IOGGIA Funzionamento con radiocomando 1 Tasto : La centrale elettronica comanderà la salita della tenda non ap- Utilizzando il radiocomando con un solo tasto, si ottiene il se- pena la parte sensibile del sensore pioggia viene bagnata dal- guente funzionamento: il primo impulso comanda la Salita fino l’acqua, segnalata tramite l’accensione del LED RAIN.
- Page 7 centrale comanderà l’accensione del LED SUN e la discesa per un tempo pari a 5 sec. Ruotare il la centrale esce dalla fase di programmazione, selezionando il funzionamento con un solo trimmer VR1 in senso antiorario ( nella posizione - ), nello stesso istante la centrale comanderà lo tasto del radiocomando.
- Page 8 Selezione della soglia di Sicurezza vento da 5 a 40 Km/h MENU’ ESTESO La centrale è fornita con la soglia d’intervento della Sicurezza vento pari a 25 Km/h (LED La centrale è fornita dal costruttore con la possibilità di selezionare solamente le funzioni WIND OFF).
- Page 9 matici disabilitato, se si desidera abilitare la funzione, procedere nel seguente modo: assi- curarsi di aver abilitato il menù esteso (evidenziato dal lampeggio dei Led SUN, Led RAIN e Led R. HEAT), posizionarsi con il tasto SEL sul lampeggio del LED T. MOT. poi premere il tasto SET;...
- Page 10 – for the installer important - CAUTION: Keep this instruction manual The BeWeather control unit must be per- in a safe place and adhere to the impor- manently connected to the power supply...
- Page 11 network and is not equipped with any the ceramic plate and the flat connec- type of 230 V a/c electric line section- tion cable. When closing the box again, ing device. The installer is responsible it must fold back on itself normally. for installing a sectioning device in the - It is very important to establish an exact system.
- Page 12 The following type of operation is obtained using a radio control with a single button: the first press controls the upward movement of the shutter until the motor timer stops. The BeWeather Series second press controls the downward movement of the shutter. If the button is pressed...
- Page 13 UNZIONAMENTO DEL ENSORE IOGGIA Funzionamento con radiocomando 1 Tasto : La centrale elettronica comanderà la salita della tenda non ap- Utilizzando il radiocomando con un solo tasto, si ottiene il se- pena la parte sensibile del sensore pioggia viene bagnata dal- guente funzionamento: il primo impulso comanda la Salita fino l’acqua, segnalata tramite l’accensione del LED RAIN.
- Page 14 time, the control unit will cause the SUN LED to light up and there will be a downward movement radio control at the same time; when the CODE LED begins to flash rapidly send the second lasting 5 seconds. Turn the VR1 trimmer in an anticlockwise direction (in the – position); at the code to be stored.
-
Page 15: Extended Menu
Wind safety threshold selection from 5 to 40 km/h —————————— EXTENDED MENU ———————————— The control unit comes with a default wind safety threshold setting of 25 km/h (WIND Reference LED LED Off LED On LED OFF). A) CODE remote PGM = OFF remote PGM = ON The wind safety threshold may be programmed in the following way: use the SEL key to B) T. - Page 16 movement, proceed as follows: check that the extended menu is enabled (SUN, RAIN and R. HEAT LEDs flash), using the “SEL” key navigate to WIND LED when flashing and press the “SET” key: the WIND LED lights up permanently and programming is completed. Repeat the operation to restore the previous configuration.
- Page 17 - Mod. (BeWeather 418): 418 MHz - Mod. BeWeather 433: 433,92 MHz pour détecter tout signe de dommage. - Mod. BeWeather 433 SET: “Narrow Band” 433,92 MHz Ne pas utiliser ce dispositif s’il néces- - Mod. BeWeather 868: “Narrow Band” 868,3 MHz ( ) Produit destiné...
- Page 18 ’ - Lors de l’installation, manipuler la centrale important pour l installateur La centrale BeWeather doit être raccor- avec la plus grande attention et contrôler si tous les éléments qui la composent ont dée en permanence au réseau électrique. bien été assemblés. Accorder une atten- Il ne présente aucun dispositif de section-...
- Page 19 La deuxième impulsion commande la descente ; si une impulsion arrive avant expiration du temps Série BeWeather moteur, la centrale stoppe le mouvement, une autre impulsion le fait repartir mais dans sont conformes aux spécifications des Directives...
- Page 20 per lo Stop ed il terzo per la Discesa. UNZIONAMENTO DEL ENSORE IOGGIA Funzionamento con radiocomando 1 Tasto : La centrale elettronica comanderà la salita della tenda non ap- Utilizzando il radiocomando con un solo tasto, si ottiene il se- pena la parte sensibile del sensore pioggia viene bagnata dal- guente funzionamento: il primo impulso comanda la Salita fino l’acqua, segnalata tramite l’accensione del LED RAIN.
- Page 21 centrale va alors commander l’allumage du témoin SUN et la descente pendant 5 sec. Tourner le codes ont été mémorisés, toute autre tentative d’opération de programmation entraîne le trimmer VR1 dans le sens contraire des aiguilles d’une montre (dans la position -). La centrale va clignotement très rapide de tous les témoins de signalisation pour indiquer qu’aucune autre alors commander l’extinction du témoin SUN ainsi que la montée pendant 5 sec.
-
Page 22: Menu Avancé
Sélection du seuil de sécurité du vent de 5 à 40 Km/h MENU AVANCÉ La centrale est livrée avec un seuil de sécurité du vent égal à 25 Km/h (témoin WIND La centrale fournie par le fabricant ne permet de sélectionner que les fonctions du menu éteint). - Page 23 avec le blocage des mouvements automatique désactivé, pour activer la fonction, procé- der comme suit : s’assurer d’avoir bien activé le menu avancé (signalé par le clignotement alterné des témoins SUN, RAIN et R. HEAT). Se positionner à l’aide de la touche SEL sur le témoin T.
- Page 24 - Mod. (BeWeather 418): 418 MHz - Mod. BeWeather 433: 433,92 MHz Unfälle verursachen. - Mod. BeWeather 433 SET: “Narrow Band” 433,92 MHz - Kontrollieren Sie die Anlage regelmäßig - Mod. BeWeather 868: “Narrow Band” 868,3 MHz und in kurzen Zeitabständen auf Zeichen ( ) Das Produkt ist für die Länder bestimmt, in denen sein Einsatz zulässig ist.
- Page 25 Produkt beigelegte Kabelschelle anzubringen. wichtige hinweise für den monteur - Die Steuereinheit ist bei der Installation Die Steuereinheit BeWeather muss mit Vorsicht zu handhaben. Dabei ist dauerhaft an das Stromnetz ange- sicherzustellen. Dass die Komponenten schlossen werden, und verfügt über...
-
Page 26: Technische Merkmale
- Die Oberfläche der Steuereinheit darf Die Produkte: nicht angestrichen oder lackiert werden. Serie BeWeather - Schmutzablagerungen auf der Oberfläche den Bestimmungen den RED 2014/53/EU, EMC 2014/30/EU, des Regenfühlers beeinträchtigen seine LVD 2014/35/EU (Niederspannung) entspricht. Empfindlichkeit. Die Oberfläche sollte dem- TECHNISCHE MERKMALE: nach ein oder zweimal jährlich mit einem... - Page 27 È possibile inoltre inserire codici ( tasti ) uguali di un radioco- 1: Terra. mando a tutte le centrali o ad un gruppo, che si trovino ad una 2: Ingresso linea 230V~ ( Fase ). distanza non superiore a 20 metri dal punto di comando, in 3: Ingresso linea 230V~ ( Neutro ).
- Page 28 1) Schrittbetrieb (Dip 1 und 2 OFF) Taste SET: Über diese Taste wird die mittels der Taste SEL ausgewählte Funktion pro- grammiert. Die Steuereinheit hat die zyklische Betriebslogik “Schrittbetrieb” deren Funktionsweise von der kombinierten Funksteuerung abhängt ( siehe Funktionsweise mit Funksteuerung 1-2-3 Tasten ). Anzeige-LEDs: LED eingeschaltet: Option gespeichert.
-
Page 29: Erweitertes Menü
Löschen gespeichert und die LED WINDE leuchtet dauerhaft. (Beispiel: fünfmaliges Doppelblinken Zum Löschen aller gespeicherten Codes wie folgt vorgehen: Die Taste „SEL“ drücken, des LED WIND = 25 km/h) woraufhin die LED „CODE“ zu blinken beginnt. Nun die Taste „SET“ betätigen. Die LED Der Vorgang kann im Falle einer falschen Programmierung wiederholt werden. - Page 30 ———————————— ERWEITERTES MENÜ ———————————— C) WIND ( Sichherheitsschaltung ) : Bezugs-LED LED ausgeschaltet LED eingeschaltet Die Steuereinheit wird werkseitig mit ausgeschalteter Sicherheitsschaltung geliefert; soll diese Funktion (d. h. nach 12 Stunden ohne Aktivität des Windsensors führt die Steuer- A) CODE PGM Fernsteuerung = OFF PGM Fernsteuerung = ON einheit automatisch die Sicherheits-Aufwärtsbewegung aus) aktiviert werden, ist wie...
- Page 31 - Mod. (BeWeather 418): 418 MHz - Mod. BeWeather 433: 433,92 MHz dispositivo si es necesario realizar una - Mod. BeWeather 433 SET: “Narrow Band” 433,92 MHz reparación. - Mod. BeWeather 868: “Narrow Band” 868,3 MHz ( ) Producto destinado a los países en los cuales está permitido su uso.
- Page 32 La central BeWeather debe estar conec- interior del producto. tada a la red de alimentación y no posee - Cuando se instala la central debe mane- ningún tipo de dispositivo de secciona- jarse con cuidado, asegurándose de...
- Page 33 Stop y el tercero para el Descenso. Funcionamiento con radiocontrol con 1 Botón : Serie BeWeather Utilizando el radiocontrol con un sólo botón se obtiene el siguiente funcionamiento: El primer impulso comanda la Subida hasta que se cumple el tiempo motor. El segundo está...
- Page 34 UNZIONAMENTO CON DIFFERENTI MODELLI DI ADIOCOMANDI comanderà la salita della tenda dopo 5 minuti di luminosità infe- È possibile la programmazione di differenti modelli di radioco- riore alla soglia selezionata. mandi, memorizzando un codice ( 1 tasto ) si ottiene un funzio- Regolazione della sensibilità...
- Page 35 4) Test Sensores (Dip 1 y 2 ON) ———————————— MENU’ PRINCIPALE ————————————— La central permite comprobar el funcionamiento de los Sensores y el correcto sentido de Referencia Led Led Apagado Led Encendido rotación cuando se realiza la instalación, se aconseja colocar el toldo en posición inter- 1) CODE Ningún código Código TX Pgm.
-
Page 36: Menú Secundario
La programación del tiempo del motor se debe realizar con el cerramiento bajo, del Habilitación del Sensor Sol con radiocontrol de 3 botones (BeFree x3 - X6): siguiente modo: La habilitación del Sensor Sol se puede realizar del siguiente modo: Pulsar de modo con- Utilizando el botón SEL colocarse sobre el LED T.MOT. - Page 37 La programación del código de transmisión a distancia se realiza del siguiente modo: sobre el LED SUN SENSOR centelleante, luego pulsar el botón SET, en ese momento el Enviar, de forma continua, el código de un radiocontrol antes memorizado durante un LED SUN SENSOR se encenderá...
- Page 38 - Mod. (BeWeather 418): 418 MHz - Mod. BeWeather 433: 433,92 MHz - Examine frequentemente a instalação - Mod. BeWeather 433 SET: “Narrow Band” 433,92 MHz para detectar eventuais sinais de danos. - Mod. BeWeather 868: “Narrow Band” 868,3 MHz ( ) Produto destinado a países em que for permitida a sua utilização.
- Page 39 A central BeWeather deve ser ligada permanentemente à rede de alimen- - A central no momento da instalação deve tação e não possui qualquer tipo de...
- Page 40 Utilizando o comando rádio com uma só tecla, obtém-se o seguinte funcionamento: o pri- meiro impulso comanda a Subida até terminar o tempo motor. O segundo impulso coman- Série BeWeather da a Descida da persiana ou do toldo; se um impulso chegar antes do fim do tempo motor, a central efectuará...
- Page 41 riore alla soglia selezionata. È possibile la programmazione di differenti modelli di radioco- mandi, memorizzando un codice ( 1 tasto ) si ottiene un funzio- Regolazione della sensibilità al Sole ( 5 ¸ 40 Klux ) namento ciclico Passo - Passo (Salita - Stop -Discesa), memo- La centrale permette la regolazione della sensibilità...
- Page 42 Atenção, após ter feito o ensaio dos sensores, restabeleça o Dip 1 e 2 no modo de fun- 1) CODE (Programação do comando de rádio) cionamento desejado. Programação do comando rádio 1 ou 2 Teclas A programação do código de transmissão do comando rádio é realizada da seguinte manei- Anemómetro: ra: carregue na tecla SEL, LED CODE começará...
- Page 43 3) WIND ( Programação limite de Segurança do Vento ) com a tecla SEL quando piscar o LED RAIN SENSOR e, em seguida carregue um instante na tecla SET, no mesmo tempo o LED RAIN SENSOR permanecerá aceso e a desactivação Visualização do limite de vento programado do sensor da chuva será...
- Page 44 B) T. MOT. (Bloqueio movimentos automáticos): Subida, ou seja, se o sensor detectar a chuva, comandará a subida do toldo. Se desejar A central possibilita o Bloqueio dos movimentos Automáticos (Subida/Descida do toldo que o sensor, ao detectar a chuva, comande a Descida do toldo, realize as seguintes com comando do Sensor do sol ou da função de Sensores Automáticos), deste modo se operações: assegure-se que activou o menu extenso (evidenciado pelo piscar alternado durante a fase automática de movimento é...
- Page 45 - Mod. (BeWeather 418): 418 MHz - Mod. BeWeather 433: 433,92 MHz Gebruik het apparaat niet als er een repa- - Mod. BeWeather 433 SET: “Narrow Band” 433,92 MHz ratie plaats moet vinden. - Mod. BeWeather 868: “Narrow Band” 868,3 MHz...
- Page 46 De centrale BeWeather moet blijvend wor- apparaat zijn bijgeleverd. den aangesloten op een voedingsnet en - De centrale moet voorzichtig worden geïn- bezit geen enkel soort verdeelsysteem van stalleerd en er moet nauwkeurig worden de elektrische lijn 230 Vac.
-
Page 47: Technische Eigenschappen
De tweede impuls bedient het dalen van het luik. Als er een impuls doorkomt voordat de bedrijfstijd van de motor is verlopen, zorgt de centrale ervoor dat het luik stopt. Een Serie BeWeather volgende impuls zorgt voor het hervatten van de beweging in de tegenovergestelde richting. - Page 48 ONDIZIONE NIZIALE DI UNZIONAMENTO qual volta il vento supera la soglia d'intervento selezionata. L'apparecchiatura può funzionare solamente in abbinamento UNZIONAMENTO DEL ENSORE con uno o più radiocomandi. Nella configurazione di fabbrica la La centrale elettronica comanderà la discesa della tenda dopo centrale non contiene nessun codice di radiocomando in me- 5 minuti di luminosità...
- Page 49 van een van de twee sensoren zodra de regenbui is verstreken, zal de centrale na 5 minuten de ————————————— HOOFDMENU ——————————————— opdracht geven voor het dalen van het scherm. Referentie Led Led Uit Led Aan 1) CODE Geen code Code TX Pgm 3) Persoon Aanwezig (Dip 1 OFF en Dip 2 ON) 2) T.
- Page 50 Ga met de toets SEL naar het knipperen van de LED T.MOT. Houd de toets SET ingedrukt, bevestigen. De LED SUN SENSOR blijft aan. U kunt deze handeling herhalen voor het het scherm begint omhoog te gaan. Op het gewenste punt laat u de toets SET los en zal de deactiveren van de Zonnesensor.
- Page 51 ven voor de LED CODE in het hoofdmenu. E) RAIN SENSOR (Interventietijd Automatische sensoren): De centrale is door de fabriek ingesteld met de programmering van de transmissiecode De centrale wordt door de fabriek geleverd met een interventietijd van de automatische op afstand gedeactiveerd.
- Page 52 - Mod. (BeWeather 418): 418 MHz respekteras. - Mod. BeWeather 433: 433,92 MHz - Mod. BeWeather 433 SET: “smalband” 433,92 MHz - Undersök regelbundet utrustningen för - Mod. BeWeather 868: “smalband” 868,3 MHz att upptäcka eventuella tecken på skad- ( ) Produkt avsedd för länder där användningen är tillåten.
- Page 53 - Styrenheten ska vid installationsmomen- viktigt för installatören Styrenheten BeWeather ska alltid vara tet behandlas försiktigt och du ska se till ansluten till elnätet och är inte försedd att de delar den består av är korrekt hop- med någon typ av frånskiljare på ellinjen monterade.
-
Page 54: Tekniska Egenskaper
Om knappen trycks ned innan motorns tid går Att produkterna: ut, stoppar styrenheten låsanordningen. En ytterligare nedtryckning återupptar rörelsen i motsatt riktning. Serie BeWeather Användning av fjärrkontroll (3 knappar): Genom att använda fjärrkontrollen med två knappar, erhålls följande funktion: Den första överensstämmer med specifikationerna i direktiven: knappen (“Up”... - Page 55 per lo Stop ed il terzo per la Discesa. UNZIONAMENTO DEL ENSORE IOGGIA Funzionamento con radiocomando 1 Tasto : La centrale elettronica comanderà la salita della tenda non ap- Utilizzando il radiocomando con un solo tasto, si ottiene il se- pena la parte sensibile del sensore pioggia viene bagnata dal- guente funzionamento: il primo impulso comanda la Salita fino l’acqua, segnalata tramite l’accensione del LED RAIN.
- Page 56 i moturs riktning (i läge -) och i samma ögonblick släcker styrenheten lysdioden SUN och höjer knapp på fjärrkontrollen, lämnar styrenheten programmeringsfasen. Om alla 10 koder skulle markisen under 5 sekunder. vara lagrade börjar alla signaleringslysdioder att blinka, när du upprepar programmeringso- perationen, för att meddela att inga ytterligare lagringar är möjliga.
- Page 57 Val av gränsvärde för vindskydd från 5 till 40 Km/h UTÖKAD MENY Styrenheten levereras med ett ingreppsgränsvärde för vindskydd på 25 km/h (lysdiod När styrenheten levereras från tillverkaren går det att endast välja funktioner från huvud- WIND OFF). menyn. Om du vill koppla i de funktioner som beskrivs i den utökade menyn gör så här: Tryck Programmeringen av gränsvärdet för vindskydd sker på...
- Page 58 kade menyn (meddelas genom att lysdioderna SUN, RAIN och R. HEAT blinkar), placera SEL knappen på den blinkande LED T. MOT. och tryck därefter på SET-knappen, samtidigt tänds LED T. MOT. permanent och programmeringen är klar. Upprepa operationen om du vill återgå...
- Page 59 Μοντ . (BeWeather 418): 418 MHz Μοντ . BeWeather 433: 433,92 MHz Μη χρησιμοποιείτε τη διάταξη αν απαι- . BeWeather 433 SET: “Narrow Band” 433,92 MHz Μοντ τείται επέμβαση επισκευής. . BeWeather 868: “Narrow Band” 868,3 MHz Μοντ Προϊόν προοριζόμενο για χώρες στις οποίες επιτρέπεται η χρήση...
- Page 60 - Η στερέωση των καλωδίων σύν- ΣΗΜΑΝΤΙΚΟ ΓΙΑ ΤΟΝ ΕΓΚΑΤΑΣΤΑΤΗ Το κέντρο BeWeather πρέπει να συν- δεσης, πρέπει να διασφαλίζεται με δέεται διαρκώς στο δίκτυο τροφο- συναρμολόγηση της παρεχόμενης δοσίας και δεν φέρει κανενός τύπου κλέμας που παρέχεται στο εσωτερι- διάταξη...
-
Page 61: Τεχνικα Χαρακτηριστικα
από το άλλο. επιφάνεια του κέντρου. - Μην βάφετε ή βερνίκι την ευαίσθητη τα προϊόντα: επιφάνεια του κεντρικού. Σειρά BeWeather - Η βρωμιά που συσσωρεύεται στην τηρούν τις ειδικές Οδηγίες επιφάνεια του αισθητήρα βροχής πε- RED 2014/53/EU, EMC 2014/30/EU, LVD 2014/35/EU ριορίζει... - Page 62 Χρησιμοποιώντας το ραδιοχειριστήριο BeFree x3 – x6, επιτυγχάνεται η λειτουρ- γία που περιγράφηκε προηγουμένως για την έκδοση BeFree x1, επιπλέον με ΑΡΧΙΚΗ ΣΥΝΘΗΚΗ ΛΕΙΤΟΥΡΓΙΑΣ τα πλευρικά κουμπιά (–) και (+) του ραδιοχειριστηρίου μπορείτε να επιλέγετε Η συσκευή μπορεί να λειτουργεί μόνο σε συνδυασμό με ένα ή περισσότερα ραδι- οχειριστήρια.
- Page 63 il secondo attuali condizioni di luce per stabilire quella desiderata. UNZIONAMENTO DEL ENSORE IOGGIA La centrale elettronica comanderà la salita della tenda non ap- ttiene il se- pena la parte sensibile del sensore pioggia viene bagnata dal- a Salita fino l’acqua, segnalata tramite l’accensione del LED RAIN.
- Page 64 1) CODE (Προγραμματισμός του ραδιοχειριστηρίου) σει στο τέλος διαδρομής. Στην περίπτωση που επιθυμείτε άπειρο χρόνο κινητήρα, εκτελέστε την ίδια διαδικασία προγραμματισμού κρατώντας πατημένο το κου- Προγραμματισμός του ραδιοχειριστηρίου 1 ή 2 Κουμπιών. μπί SET συνεχώς για χρόνο μικρότερο των δύο δευτερολέπτων, το LED T.MOT Ο...
- Page 65 μένως, ταυτόχρονα το κέντρο θα κάνει μια κίνηση Up/Down ίση με 1 δευτερόλεπτο A) CODE ( Προγραμματισμός Ραδιοχειριστηρίου εξ αποστάσεως) : για να επιβεβαιώσει την πραγματοποιηθείσα ενεργοποίηση του Αισθητήρα Ήλιου και Το κέντρο επιτρέπει τον προγραμματισμό του κωδικού μετάδοσης, χωρίς την απ’ το...
- Page 66 D) SUN SENSOR (Αντιστροφή κίνησης εντολής Βροχής) : Το κέντρο παρέχεται από τον κατασκευαστή με το συνδυασμό Εντολή Βροχής = Εντολή Ανόδου δηλαδή ο αισθητήρας καταγράφοντας βροχή διευθύνει την Άνοδο του κουφώματος. Αν επιθυμείτε ο αισθητήρας καταγράφοντας βροχή να διευθύνει την...
Need help?
Do you have a question about the BeWeather and is the answer not in the manual?
Questions and answers