Grundfos KPL Installation And Operating Instructions Manual
15 to 1060 hp
Hide thumbs
Also See for KPL:

Subscribe to Our Youtube Channel
Related Manuals for Grundfos KPL


Summary of Contents for Grundfos KPL
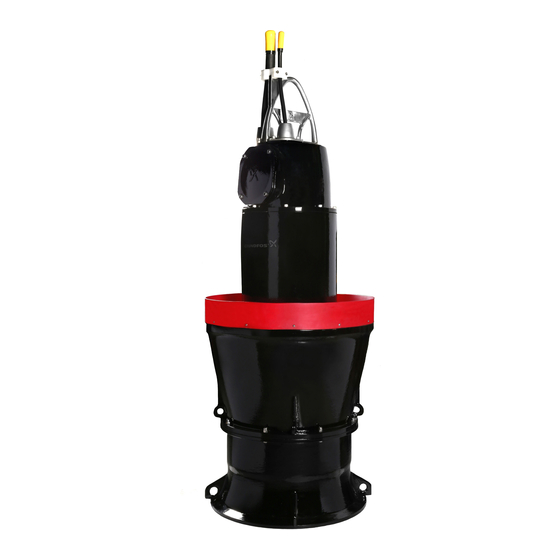
- Page 1 GRUNDFOS INSTRUCTIONS KPL, KWM 15 to 1060 Hp Installation and operating instructions...
-
Page 2: Table Of Contents
Original installation and operating instructions. 1. Limited warranty Products manufactured by GRUNDFOS PUMPS CORPORATION CONTENTS (Grundfos) are warranted to the original user only to be free of Page defects in material and workmanship for a period of 24 months Limited warranty from date of installation, but not more than 30 months from date of manufacture. -
Page 3: Symbols Used In This Document
Turbulence optimizer (discharge sealing parts) Discharge casing Anti-rotation bracket Suction casing The KPL and KWM pump range offers the following features: – best-in-class hydraulic efficiency at reduced operating costs – compact and lightweight design facilitates easy handling and installation – backswept, self-cleaning hydraulic design provides great non-clogging performance –... -
Page 4: Operating Conditions
3.2 Operating conditions 4. Identification pH value 4.1 Nameplate 4-10. The nameplate is located on the top cover of the pump. Liquid and ambient temperature The extra nameplate supplied with the pump should be affixed at 34-104 °F (1 °C to +40 °C). the installation site. -
Page 5: Type Key
4.2 Type key All KPL and KWM pumps described in these installation and operating instructions are identified by the type designation stated in the order confirmation and other documentation supplied with the pump. Code Example .665 Pump type Submersible axial-flow pump... -
Page 6: Safety
5. Safety The pump may lose its stability during transportation, assembly or dismantling if tilted more than 10 ° in any direction from its normal position (BS EN 809:1998+A1:2009). Warning Pump installation in pits must be carried out by specially trained persons. Warning It must be possible to lock the mains switch in the 0/Off position. -
Page 7: Storage
6.2 Storage Do not remove the protection from the free end of the power supply cable or sensor cables until the electrical connection is to be made. Whether protected or not, the free cable end must Caution never be exposed to moisture or water. Non-compliance may involve the risk of damage to the motor. -
Page 8: Installation
Please contact Grundfos for details. – Clamp wire rope and all cables together at distances of Take particular care when installing the KPL or KWM pumps, as 20 in. (508 mm) between the clamps adapted to weight of the procedure is not similar to that of other submersible pumps. - Page 9 Cable suspension system The cable suspension system is illustrated in fig. 9 (principal sketch only. The cable suspension system may be adapted to the specific pump model). Lifting wire, detail D Cable clamps distance Max. 20 inch (508 mm) Turnbuckle Wire rope Intermediate lifting ring (on request)
-
Page 10: Lead Colors
The ground (earth) lead is green and marked "PE". Moisture 8. Pump protection switch KPL, KWM pumps are equipped with the following protective switches and sensors. In the Factory Product Variant (FPV) version, the sensors can be chosen individually. Standard Sensor... -
Page 11: Thermal Protection Of The Stator
8.1 Thermal protection of the stator 8.2 Moisture switches The KPL and KWM pumps have two moisture switches (one Thermal switches positioned in the terminal box and one in the lower part of the • Standard KPL and KWM pumps incorporate three bimetallic stator housing). -
Page 12: Wio (Water-In-Oil) Sensor
One pump can be connected to an IO 113. The WIO sensor can be used together with Grundfos IO 113 or Together with the sensors, IO 113 forms a galvanic separation SM 113, but it can also be used together with other controllers between the motor voltage in the pump and the controller with 4-20 mA inputs. -
Page 13: Pump Controllers
Requirements • The thermal protection of the motor must be connected. The KPL, KWM pumps can be connected to a separate Grundfos pump controller for level control, which is available as an • Peak voltage and dU/dt must be in accordance with the table accessory: below. -
Page 14: Electrical Connection
11. Electrical connection 12. Startup The electrical connection should be carried out in accordance 12.1 Before startup with local regulations. Turn the propeller or impeller by hand (clockwise seen from the The supply voltage and frequency are marked on the pump motor side). -
Page 15: Maintenance And Service
13.2 Normal inspection Pumps running in normal operation should be inspected twice a year. Check the following points: Inspection Remedy Replace or fix worn and damaged parts. Visible parts of Make sure that all screws, bolts and nuts are Direction of pump and tightened. -
Page 16: Replacing The Wear Ring, Kpl
1. Remove the screws and lift the pump off the suction casing. 2. Replace the wear ring. 3. Assemble the pump in reverse order. If you have any questions, please contact the nearest Grundfos or service workshop. 13.4 Replacing the wear ring, KWM When the clearance between the impeller blade and the wear ring exceeds 0.078 in. -
Page 17: Fault Finding
14. Fault finding Fault Cause Remedy 1. Pump does not start. a) A fault signal is indicated on • If the bearing temperature is high, take the pump to the workshop the control panel. for repair. • If the stator temperature is high, check that the water is able to move around the stator housing without any objections, and that the propeller/impeller rotates easily. -
Page 18: Dimensions
15. Dimensions 15.1 KPL dimensional sketch Fig. 16 Dimensional sketch, KPL... - Page 19 KPL dimensional data Weight Pump type [lb (kg)] [in. (mm)] [in. (mm)] [in. (mm)] [in. (mm)] [in. (mm)] KPL.20".15.6.T.60.L 727 (330) 44 (1118) 20.25 (515) 19.29 (490) 15.35 (390) 16.94 (430) KPL.20".20.6.T.60.L 815 (370) 44 (1118) KPL.24".20.8.T.60.L 1124 (510) 56 (1423) 25.82 (655)
-
Page 20: Kwm Dimensional Sketch
15.2 KWM dimensional sketch Fig. 17 Dimensional sketch, KWM... - Page 21 KWM dimensional data Weight Pump type [lb (kg)] [in. (mm)] [in. (mm)] [in. (mm)] [in. (mm)] [in. (mm)] [in. (mm)] KWM.24".40.6.T.60.M 1587 (720) 70.29 (1786) 25.19 (640) 11.04 (280) 23.22 (590) 20.47 (520) 22.07 (560) KWM.24".50.6.T.60.M 1653 (750) 70.29 (1786) KWM.24".40.6.T.60.H 1609 (730) 69.10 (1756)
-
Page 22: Installation Dimensional Requirements
96-159 (2450-4050) 126-189 (3200-4800) 64 (1626) 31 (788) 118-165 (3000-4200) 150-197 (3800-5000) 72 (1829) 35 (889) 157-181 (4000-4600) 193-217 (4900-5500) Minimum water level M.W.L M.W.L Fig. 18 Minimum water level, KPL pump Fig. 19 Installation dimensions, KPL pump, ACC installed... - Page 23 M.W.L M.W.L Fig. 20 Installation dimensions, KPL pump, ACC installed Fig. 22 Installation dimensions, KPL pump M.W.L Fig. 21 Installation dimensions, KPL pump...
- Page 24 15.3.2 KWM The requirements for installation are shown in the table below. Figures 23 to 29 show installation examples. ∅D M.W.L [in. (mm)] [in. (mm)] [in. (mm)] [in. (mm)] [in. (mm)] 12 (305) 10.6 (270) 43-55 (1100-1400) 55-67 (1400-1700) 12 (305) 11.0 (280) 43-55 (1100-1400) 55-67 (1400-1700)
- Page 25 M.W.L M.W.L Fig. 26 Installation dimension, KWM pump Fig. 28 Installation dimension, KWM pump M.W.L M.W.L Fig. 27 Installation dimension, KWM pump Fig. 29 Installation dimensions, KWM pump...
-
Page 26: Disposal
This product or parts of it must be disposed of in an environmentally sound way: 1. Use the public or private waste collection service. 2. If this is not possible, contact the nearest Grundfos company or service workshop. Subject to alterations. - Page 27 Appendix 1. Wiring diagrams Control cable Control cable Fig. 1 Direct-online-starting (DOL), one power cable Fig. 3 Direct-online-starting (DOL), three power cables Control cable Control cable Fig. 2 Direct-online-starting (DOL), two power cables Fig. 4 Star-delta starting (Y/D), one power cable...
- Page 28 Symbol Description Symbol Description Thermal switch Pt100 sensor Moisture switch Earth lead Water-in-oil sensor Fig. 5 Standard sensor wiring of IO 113 and SM 113 (outside pump) Symbol Description Symbol Description Thermal switch Pt100 sensor Moisture switch Earth lead Water-in-oil sensor Fig.
- Page 29 Symbol Description Thermal switch Moisture switch Pt100 sensor Earth lead Water-in-oil sensor Fig. 7 Standard sensor wiring of IO 113 and SM 113 (inside pump) Symbol Description Thermal switch Moisture switch Pt100 sensor Earth lead Water-in-oil sensor Fig. 8 FPV sensor wiring of IO 113 and SM 113 (inside pump)
- Page 31 C.P. 66600 Apodaca, N.L. México Phone: +1-630-236-5500 Telefax: +1-905 829 9512 Phone: +52-81-8144 4000 Fax: +1-630-236-5511 Telefax: +52-81-8144 4010 www.grundfos.ca GRUNDFOS Kansas City www.grundfos.mx 17100 West 118th Terrace Olathe, KS 66061 Phone: +1-913 227 3400 Fax: +1-913 227 3500 www.grundfos.us...
- Page 32 98344189 1114 ECM: 1137521 www.grundfos.com www.grundfos.us...
Need help?
Do you have a question about the KPL and is the answer not in the manual?
Questions and answers