
Subscribe to Our Youtube Channel
Related Manuals for Regin EXIGO TOOL


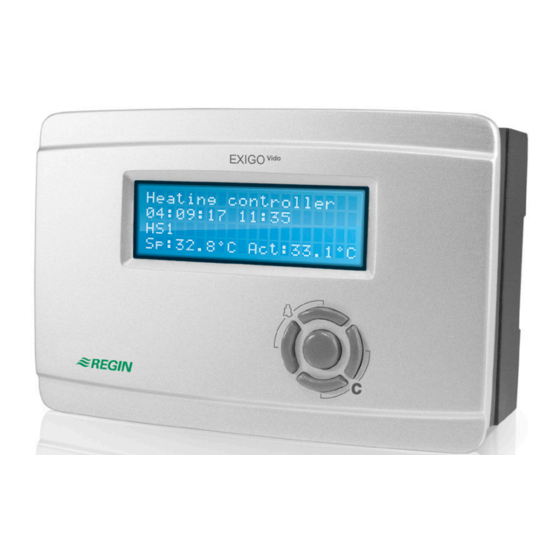
Summary of Contents for Regin EXIGO TOOL
- Page 1 W E TAK E B U I L D I N G AU TO M AT I O N PER SO N A L LY MANUAL E X I G O TO OL © Copyright AB Regin, Sweden, 2019...
- Page 2 The information in this document is subject to change without prior notification. The software described in this document is supplied under licence by Regin and may be used or copied only in accordance with the terms of the licence.
-
Page 3: Table Of Contents
Table of contents CHAPTER 1 ABOUT THIS MANUAL ....................4 CHAPTER 2 INSTALLATION ......................5 CHAPTER 3 ABOUT EXIGO TOOL ....................6 CHAPTER 4 STARTUP ........................7 CHAPTER 5 MENU BAR ........................9 5.1 File ............................9 5.2 Edit ............................10 5.3 View ............................. -
Page 4: Chapter 1 About This Manual
Chapter 1 About this manual This manual is designed to be an aid during installation and use of Exigo Tool. It describes all the functions unique to the program. The Exigo control parameters however are not described here. For detailed information on these, please see the Exigo manual. -
Page 5: Chapter 2 Installation
Chapter 2 Installation To install and run Exigo Tool you need a PC running Windows 2000, Windows XP, Windows Vista, Windows 7 or Windows 8, Windows 8.1 or Windows 10. Communication with an Exigo requires a special communication cable, E-CABLE2-USB. -
Page 6: Chapter 3 About Exigo Tool
Exigo tool is a Windows-based PC program for configuration and maintenance of the Exigo series controllers. Exigo tool has not been designed with the intention of being a fully fledged SCADA program. The display window is divided into several parts: At the top, there is a menu bar with standard Windows type drop-down menus. -
Page 7: Chapter 4 Startup
Start screen. From here, it is only neccessary to click on the relevant icon to start the program. It is also possible to create a shortcut to Exigo Tool in the taskbar. To do so, right- click on the icon and select “Pin to taskbar”... - Page 8 Exigo Tool always starts with a box where you enter which controller model you are using. The Overview folder is also displayed. Make sure that you enter the correct model, or errors may occur in the control and alarm handling.
-
Page 9: Chapter 5 Menu Bar
This item can normally be ignored. Should you for some reason open two instances of the same file one of them will be marked as Read only to prevent data conflict. Print Prints a list showing all the configuration settings of the present file. Exigo tool manual Chapter 5 Menu bar... -
Page 10: Edit
Exit Close Exigo tool. If the present configuration is unsaved you will be asked if you wish to save it before closing. 5.2 Edit The Edit menu only contains one item: Delete Delete is only used in conjunction with holiday periods to remove assigned periods. -
Page 11: Tools
All items in the list are normally tick-marked. By removing the tick-mark from an item you can exclude it from the selection. You can then choose to update Exigo Tool using the controller values or update the controller using the Exigo Tool values. - Page 12 Search for controllers If, on startup, Exigo Tool fails to establish contact with a connected controller it is usually due to an address mismatch. This function will search through all the possible addresses and list the addresses of the unit that is connected to the computer. These addresses are then written into the address fields in the folder Configuration / System.
- Page 13 Click “OK” to reload the controller. The “Synchronize parameters” dialogue window till be displayed: Select whether differences in parameter configuration should be updated in Exigo Tool or in the controller. After the controller has been reloaded with the new application program, the below dialogue window...
- Page 14 Next, follow the directions above for reloading the controller. Another warning message will now be displayed: Click “Yes”. Upgrade controller operating system Unless the controller is brand new, it is advisable to upgrade the operating system. Chapter 5 Menu bar Exigo tool manual...
- Page 15 5 is the basic level with the lowest access, 3 is the operator level giving more access, 2 is the service level giving even more access and 1 is the Admin level with full access. Exigo tool only uses the levels Logged off, Service, Operator and Admin. As default Exigo comes with the following passwords for the different levels:...
- Page 16 Exports all recorded values to a .txt file. The values are tab-separated for easy import to, for example, Excel. Each line of the text file contains the values from one recording together with the time for the recording. Recorded data are saved for approximately 24 hours. Chapter 5 Menu bar Exigo tool manual...
- Page 17 5 seconds. Pressing Pause again will cause all the saved readings to be added into the chart. Options Set various options. Time scale signifies the time width of the chart display. Left scale / Right scale sets the scaling for the left and right chart scales. Exigo tool manual Chapter 5 Menu bar...
- Page 18 After inactivity for longer than the set time the log-on level will be set to 5. Number of decimals Sets the number of decimals displayed. All calculations however, are always done with full precision. Lock configuration Blocks access to the configuration tab. Chapter 5 Menu bar Exigo tool manual...
- Page 19 Synchronize alarm texts when synchronizing all parameters When synchronizing all parameters, alarm texts will also be synchronized. Communication Setting of the communication between Exigo tool and controller. You can choose if the communication should take place via E-CABLE (serial) or the TCP/IP port. Serial communication Click on Communication channels and then on Serial.
- Page 20 In the most basic case, a crossover network cable, E CABLE-TCP/IP, is used. The user is connected directly to the controller. Connect a crossover TCP/IP-cable directly between the controller and the computer. Start Exigo tool. Open the tool ”Communication settings” from the menu Tools or via the icon in the toolbar.
-
Page 21: Help
When the controller and the computer running Exigo tool are on the same subnet, you do not have to specify a DNS name or a domain. When the controller and the computer are on different subnets, you have to specify the DNS name and the Domain. -
Page 22: Chapter 6 Toolbar
The toolbar provides shortcuts to several functions. By placing the cursor over a tool icon, a tool tip will be displayed giving a short description of the tool. All the tools are described in the menu bar description above. Chapter 6 Toolbar Exigo tool manual... -
Page 23: Chapter 7 Folders
You can also synchronize parameters following the same rules as above but choose Synchronize parameters. A useful tool to compare the settings in the controller with the settings in Exigo tool. It is also possible to reset parameters to default values by right-clicking and choosing Reset parameters to default values. -
Page 24: Overview
To update the values, press F5 or click on the Refresh button in the toolbar. You can choose to auto refresh pictures with dynamic values, i.e. an automatic activation of the F5 update function at settable intervals. See Options. 7.3 Actual / Setpoint Displays relevant setpoint values and actual values. Chapter 7 Folders Exigo tool manual... -
Page 25: Consumption
Displays consumption values for energy meter, heat water meter and cold water meter. The values are calculated using pulse constants that are set in the submenu Pulse constants in the configuration folder or are communicated from M-Bus meters if a controller with M-Bus interface is selected. Exigo tool manual Chapter 7 Folders... -
Page 26: Alarm Status
Grey box with a black X: Blocked alarms. Any changes made to alarm status in Exigo tool are instantly transmitted to the controller without the need to use Load parameters. Changes in alarm status in the controller however are not displayed in Exigo tool until you make a refresh. - Page 27 The alarm text that is displayed in the Exigo on activated alarm is shown in column 2, Alarm text. This text can be changed, but only via Exigo Tool. Double-clicking on the alarm text will open a dialogue box in which various alarm parameters, including the alarm text itself, can be changed.
-
Page 28: Inputs/Outputs
The 8th day, Holiday, governs the activity on all days marked as holidays in the holiday schedule, see below. The schedules for Time channel output 1…5 dictate the activation of the corresponding digital output signal. Chapter 7 Folders Exigo tool manual... - Page 29 Holidays/holiday periods that have been set will be valid every year, until they are removed. This means that for example Christmas and New Year will only have to be set once and are then valid for all future. Exigo tool manual Chapter 7 Folders...
-
Page 30: Settings
To download, right-click on a parameter name or a parameter group name and choose Load parameters or click on Load all parameters in the toolbar or the Tools menu. Alarm settings / alarm objects Chapter 7 Folders Exigo tool manual... -
Page 31: Manual / Auto
Setting functions to manual command will generate alarms to ensure that control is returned to Auto. In this menu, all changes are instantly downloaded to any attached controller, it is not necessary to run Load parameters for changes to take effect. Exigo tool manual Chapter 7 Folders... -
Page 32: Configuration
This folder contains all the configuration parameters for the Exigo. Since the contents are very diverse, the folder has been divided into sub-folders. These are accessed by clicking on the buttons in the left- hand button-list. For detailed information on these, please see the Exigo manual. Chapter 7 Folders Exigo tool manual... -
Page 33: Chapter 8 Expansion Units
For controllers that are factory loaded with version 3.0 or later, you can select ”Expansion unit 1” or ”Expansion unit 2” under Application choices in the controller. In this case, Exigo Tool is not required to set the controller as an expansion unit. -
Page 34: Chapter 9 Tcp/Ip - Network Terms
This can be given as an IP address or a DNS name. DNS is a name service which can translate hierarchical names like exomaincomputer.regincontrols.com to an IP address. Several DNS servers are part of the system, but you only have to know the IP address to one of them. Chapter 9 TCP/IP – network terms Exigo tool manual... -
Page 35: Dhcp, Fixed And Dynamic Addresses
(which has a public IP address) to the Internet server. The Internet server may then return the information to the firewall which forwards it to the computer with the black address. This is called NAT or masquerading. Exigo tool manual Chapter 9 TCP/IP – network terms... -
Page 36: Tunnels
The same technology can be used by the duty technician to work with the EXOscada work station from his home, from the service vehicle or similar. Chapter 9 TCP/IP – network terms Exigo tool manual... -
Page 37: Chapter 10 Exigo With Web Interface
This is built into the Exigo and is based on the fact that it has an integrated web interface. Using NAT- routing, you can also connect more than one web server behind the same white IP address. A Exigo can handle a maximum of 5 connections from Exigo Tool, EXOscada and web browser at a time. - Page 38 EXOline communication. The router settings in the example may differ depending on the manufacturer. See the example below for guidance. Chapter 10 Exigo with web interface Exigo tool manual...
-
Page 39: Web Server Configuration
10.3 Web server configuration As before, all configuration of the controller parameters takes place via Exigo Tool or directly in the display. No configuration can be done via the web server. For configuration of the controller, see the previous chapters in this manual or the manual for Exigo. - Page 40 The encryption is used to prevent other users in the TCP/IP network from connecting to the Exigo via Exigo Tool. The password is only used when you want to reach the Exigo via Exigo Tool. If you lose the password, the controller must be cleansed and reloaded.
- Page 41 MyController@MyDomain.se. Ask your network technician for advice if you are unsure. Load TCP/IP settings After the above settings have been made, you download the settings to the Exigo by clicking this button. Exigo tool manual Chapter 10 Exigo with web interface...
-
Page 42: Chapter 11 Cloudigo - A Cloud Service
The user then navigates to the same server and controls the air handling system from there. For additional handling information, see the document “CLOUDigo user guide”, available for download from Regin's website: www.regincontrols.com. Chapter 11 CLOUDigo – a cloud service Exigo tool manual...
Need help?
Do you have a question about the EXIGO TOOL and is the answer not in the manual?
Questions and answers