Advertisement
Quick Links
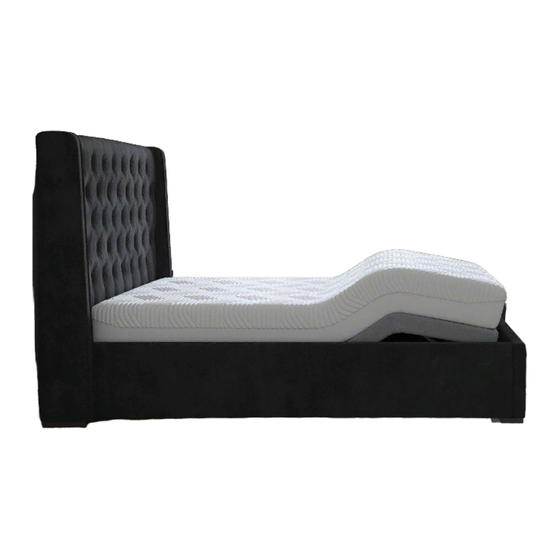
Deacon bed
Assembly Instructions
NOTE: If you choose to purchase the
sleepmotion bed, please use this AI'
Before you
Start, here
are some
helpful
advices.
Revision number 1/1
BEFORE STARTING ASSEMBLY PLEASE REFER TO THE OWNERS MANUAL
SUPPLIED WITH YOUR SLEEPMOTION 200i BED BASE AND FOLLOW THE
INSTRUCTIONS TAKING NOTE OF ANY SAFETY PRECAUTIONS OR
OPERATIONAL SAFETY REQUIREMENTS OF THE INSTALLATION. BUILD THE
BED BASE FIRST USING ONLY THE EIGHT LONGER LEGS 6"(15cm),SEE
STAGE 1.IMPORTANT: PLACE THE BASE IN FINAL POSITION IN THE ROOM
OF USE, CONNECT THE POWER AND CHECK THE OPERATION THEN STEP
BY STEP FOLLOW THE BED ASSEMBLY INSTRUCTIONS BELOW, TO BUILD
THE BED AROUND THE SLEEPMOTION 200i BED BASE
1. We suggest you spend a short time reading through this leaflet and then follow
the simple step by step instructions.
2. If you follow the instructions carefully the end result should be worth the effort.
3. Do not discard any of the packaging until you have checked that you
have all the parts and the pack of fittings.
4. Assemble this product on a carpet.
5. To ensure an easier assembly, we strongly advise that all fittings are only
finger tightened during initial assembly. Only upon completion of the.
Assembly should all fixing points be fully tightened.
6. We recommend a periodic check on all fixing points to make sure they remain
fully tightened.
7. Keep glue and fittings out of children s reach.
In the unlikely event that this product has missing or damaged parts, please call
03442 920000 to obtain spares
Advertisement

Subscribe to Our Youtube Channel
Summary of Contents for DREAMS Deacon bed
- Page 1 Deacon bed Assembly Instructions NOTE: If you choose to purchase the sleepmotion bed, please use this AI’ BEFORE STARTING ASSEMBLY PLEASE REFER TO THE OWNERS MANUAL SUPPLIED WITH YOUR SLEEPMOTION 200i BED BASE AND FOLLOW THE INSTRUCTIONS TAKING NOTE OF ANY SAFETY PRECAUTIONS OR OPERATIONAL SAFETY REQUIREMENTS OF THE INSTALLATION.
- Page 2 PARTS Fittings M6x 35mm x 8 pcs M6 Washer x 8 pcs M4Allen key x 1pcs M5Allen key x 1pc NO. PART LIST (1) HEADBOARD (2) WOODEN FEET (3) FOOTBOARD (4) SIDE RAILS Revision number 1/1...
- Page 3 ASSEMBLY STEP 1 (1). Screw in the Legs and put Bed Base in the Position in which it will be used Revision number 1/1...
- Page 4 ASSEMBLY STEP 2 (1). Attach the Wooden Feet to the M6×35mmx8pcs headboard and footboard by using bolt (A) 、washer (B) and Allen Key (C) M6 Washer x8pcs (2). Loosen the pre-assembled bolts M4 Allen key × 1pcs on the headboard and footboard with the Allen Key(D) M5 Allen key ×...
- Page 5 ASSEMBLY (1). Assemble Head End and one STEP 3 Side Rail (4) Revision number 1/1...
- Page 6 ASSEMBLY Raise the Head and Foot Ends of STEP 4 the Bed Base Revision number 1/1...
- Page 7 ASSEMBLY Position Foot End and connect STEP 5 Side Rail brackets. Revision number 1/1...
- Page 8 ASSEMBLY Make sure everything is working STEP 6 properly then fit second side rail (4) Revision number 1/1...
- Page 9 ASSEMBLY MAKE CERTAIN THE BED IS STEP 7 M4 Allen key × 1pcs SQUARED UP .AS SHOWN ON THE RIGHT. M5 Allen key × 1pcs Square up the Bed then tighten Bolts Revision number 1/1...
- Page 10 ASSEMBLY STEP 8 Make Certain Gaps around the Bed Base are correct Revision number 1/1...


Need help?
Do you have a question about the Deacon bed and is the answer not in the manual?
Questions and answers