Subscribe to Our Youtube Channel
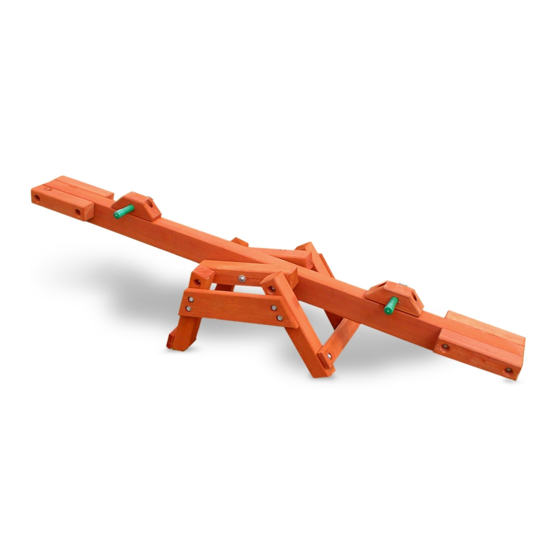
Summary of Contents for Gorilla Playsets See Saw
- Page 1 ™ ™ playsets playsets See Saw ASSEMBLY MANUAL Copyright © 2015 Gorilla Playsets All Rights Reserved Latest Revision: July 2, 2015 Gorilla Playsets • 190 Etowah Industrial Court Canton, GA 30114 www.gorillaplaysets.com...
- Page 2 TABLE OF CONTENTS Warranty, Safety Guidelines and General Information.....……..……...Pages 3 - 7 Kit Contents and Tool List…………..………………………………………..Pages 8 - 10 Steps 1-6 ....................Pages 11 - 16 Customer Registration Card………………………..…..…………..….…………... Page 17 PLEASE READ OWNER’S MANUAL CAREFULLY BEFORE STARTING ASSEMBLY! ®...
-
Page 3: Important - Please Read
Click on the “Customer Care” tab on the left hand side of the page, then click on “Warranty Claim” and follow the instructions. We appreciate your purchase and know that you will enjoy your See Saw for many years to come. - Page 4 Playsets® believes every child should have a See Saw and with our kits they can! You can rest assured your new See Saw is safe, durable and designed to hold up to the elements. As parents ourselves, we know how important the security and well-being of our children is, and this shows in all of our products.
-
Page 5: Limited Manufacturer's Warranty
Limited Manufacturers Warranty Gorilla Playsets® (“Gorilla”) warrants its See Saw to be free from defects in workmanship and materials, under normal use and conditions at its original installation, for one year for structural wood components and for one year for all other components (e.g., hardware, plastics, tarps, rope ladder, etc.) -
Page 6: Important Safety Guidelines
While the See Saw is being constructed, please keep children off the See Saw until the project is complete. Bolts and screw heads should be checked regularly for tightness. - Page 7 • Depending on your experience, assembly of the See Saw can take as little as 1 hour up to 2 hours. • Identify all of the parts for your See Saw. Empty the box and lay out boards so you can see each part. Your instruction book will have detailed drawings that will make it easy for you to recognize individual parts.
-
Page 8: Required Tool List
Counter-sunk Hole Thru Hole Lag Screws - Lag screws are used in the construction of the See Saw. There will not be predrilled holes in the parts for the lag screw installation. Lag screws are self- tapping, though if you are using a manual socket wrench it may be necessary to tap the head of the lag screw with a hammer. -
Page 9: Description Qty
Picture Description Qty. 3/8 x 3-1/2” Lag Screw 3/8 x 5” Lag Screw 3/8 x 10” Carriage Bolt 3/8” Washer Torque Washer 3/8” Lock Nut 3/8” Green Bolt Cap #10 x 2” Self Tapping Screw 1-3/8” X 6”L Pivot Pipe 1-3/8”... - Page 10 Picture Description Qty. 4 X 6 X 96” Main Beam 4 X 4 X 18-1/2” Frame Block (At Right) (One countersunk hole) 4 X 4 X 18-1/2” Frame Block (At Left) (Two countersunk holes) 4 X 4 X 13-3/4” Seat 4 X 4 X 20-1/2”...
- Page 11 4: Repeat steps 1-2 to complete installing the remaining Seat pieces. 4 X 6 X 96” Main Beam 4 X 4 13-3/4” See Saw Seat NOTE: Each Seat has two countersunk holes. The hole that is 2” from the end should be on the RIGHT.
- Page 12 Step 2: Main Beam 1: Place the 1-3/8” x 6”L Pipe through the 1-3/8” hole in the 4 x 6 x 96” Main Beam. 2: Place the 4 x 4 x 18-1/2” Frame Blocks on either side of the Main Beam. 3: Work the 1-3/8”...
- Page 13 Flush Note: Counter-sunk holes in all parts should be facing you. 4 x 4 x 20-1/2” 2 x 6 x 23-1/2” See Saw Legs Side Leg Support SECOND: 5”Lag Screw (Attach Leg assemblies to Frame Blocks.) Frame Block Frame Block 3/8”...
- Page 14 Step 4: Lower Leg Supports 1: Measure 2” from the bottom of each Leg and mark with a pencil. 2: Place the bottom of the 2 x 4 x 17-1/2” Lower Leg Supports against the 2” mark. 3: Fasten the Lower Leg Supports to the Legs using 3-1/2” lag screws and 3/8” washers.
- Page 15 Step 5: Handle Assembly 1: Place the 1-3/8” x 11-1/2” green Handle Bar through the 4 x 4 x 9-1/2” Handle Block. 2: Make sure the weld seam inside the Handle Bar is on the bottom as shown in the picture.
- Page 16 Step 6: Handles 1: Place the Handle Block Assembly on top of the Main Beam, 7” from the Seats. 2: Fasten the Handle Block Assembly to the Main Beam using 3-1/2” lag screws and 3/8” washers. 3: Repeat substeps 1 and 2 for the other Handle Block Assembly. Handle Block Assembly 3-1/2”Lag Screw 3/8”...
-
Page 17: Warranty Registration
WARRANTY REGISTRATION - SEE SAW - Gorilla Playsets manufactures 3 EASY WAYS TO REGISTER the finest quality products that Mail this completed form to: are designed for outstanding Fax this completed form to: Gorilla Playsets strength and durability. OPTION 1...


Need help?
Do you have a question about the See Saw and is the answer not in the manual?
Questions and answers