smirthwaite Juni User Manual
Hide thumbs
Also See for Juni:
- Instructions for use manual (72 pages) ,
- Instructions for use manual (16 pages)
Table of Contents
Advertisement
Quick Links
Advertisement
Table of Contents

Related Manuals for smirthwaite Juni


Summary of Contents for smirthwaite Juni
- Page 1 User Manual Juni P a g e...
-
Page 2: Table Of Contents
Pommel.............................. 16 Removable Ski ..........................16 Mobile Base, Retractable Footboard and Height Adjustable Handle ..........17 Four Point Harness Accessory ......................18 Footboard Raisers ..........................18 Juni Booster ............................19 4.6.1 Adjustments ..........................20 4.6.2 Attaching Juni to Booster......................20... - Page 3 CONTENTS Five Point Harness ..........................21 Juni Hi-Lo ............................22 Adjustable Footrest ........................... 26 4.10 Extended Backrest ......................... 28 4.11 Headrest Attachment ........................30 4.12 Juni Laterals ........................... 32 4.13 Sacral Pad ............................35 Technical Specification ......................... 37 Chair Dimensions ..........................37 Environmental - Storage and Operating Conditions ................
-
Page 4: Safety Instructions And Warnings
If you require larger print or videos – these are available on the Smirthwaite website: www.smirthwaite.co.uk/product/Juni-chair/ The information in this manual is important for the safety of anyone near the Juni chair and must be read and understood to help prevent injuries. It is also crucial to the proper operation and maintenance of the Juni chair. -
Page 5: Symbols Used
European Community 1.4 Contraindications/Limitations There are no known “contraindications” associated with the usage of the Juni chair and its accessories, provided they are used as per manufacturer’s recommendations and guidelines. Smirthwaite Ltd. does not recommend a required number of care givers for the use of our... -
Page 6: Intended Use
Juni. The Juni is designed to be checked and adjusted by a therapist to ensure the child is seated correctly. 1.6 Chair Operating Environment The Juni chair is suitable for use within the professional health care facility environment as well as the home health care environment. -
Page 7: Vicinity To Other Equipment
• Smirthwaite Ltd will not accept liability for any injury or damage incurred through such malpractices. Any repairs required must be carried out by Smirthwaite Ltd authorised personnel. -
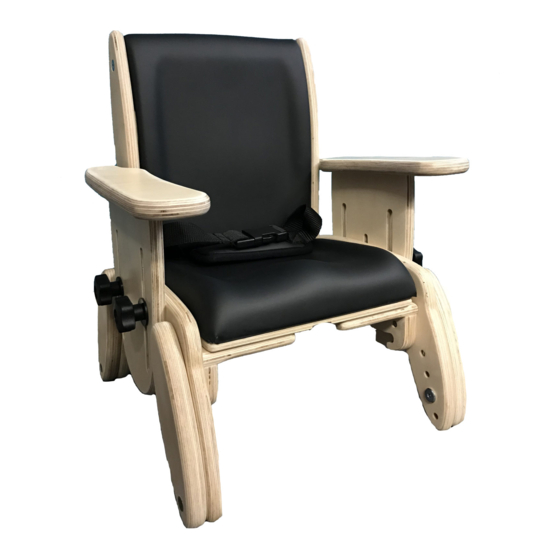
Page 8: Components/Key Parts
2 minutes If in any doubt, always seek advice. Always turn hand wheels, levers and screws clockwise to tighten or anti-clockwise to loosen. Conveniently packaged in a single box (Figure 1) the following components are included with your new Juni chair (Table 1 and Figure 1): Item Description... -
Page 9: Packaging
COMPONENTS/ KEY PARTS 2.3 Packaging • The Juni chair is supplied either fully assembled or in part assembled form, for the customer to undertake final assembly – see guide below. For a detailed guide refer to Section 5. • A part assembled Juni is supplied with the seat cushion (A) removed and the back cushion fully rotated forward (B). -
Page 10: Installation
INSTALLATION 3.0 INSTALLATION When delivered, the chair will be supplied fully assembled except for the attachment of any special accessories ordered. Export orders may require the chair to be fully assembled, which takes approximately 2 minutes If in any doubt, always seek advice. -
Page 11: Seat Height
INSTALLATION 3.1.2 Seat Height • Your Juni chair is fitted with four outrigger legs (Ref. A of Figure 3), permitting seat height adjustment • To adjust, firstly lay the chair on its back • For each outrigger, identify and remove the securing screw (M6 x 30) (Ref. -
Page 12: Back Recline
3.1.5 Back Recline • Locate remove handwheels securing the seat back recline angle (E) • The Juni seat back can be reclined in steps of 5 from 95 through to • When the desired back recline angle has been achieved, simply... -
Page 13: Pelvic Lap Strap
INSTALLATION 3.1.8 Pelvic Lap Strap • The pelvic strap is secured to the seat cam-lock mechanisms, located under the seat base (I, J) • To adjust the strap for growth, simply lift each cam-lock release, adjust strap appropriately and then close each cam-lock Buckle Strap (Standard) •... -
Page 14: Velcro Strap
INSTALLATION 3.1.10 Velcro Strap • The strap is secured by pressing the two Velcro sections together and is released by pulling the sections apart. • When Velcro straps are used, the Velcro should overlap by at least 75mm (3 inches) -
Page 15: Compatible Accessories
COMPATIBLE ACCESSORIES 4.0 COMPATIBLE ACCESSORIES The Juni chair comes with a variety of compatible accessories. These accessories and part codes are listed below (Table 3); Accessories Size 1 Size 2 Size 3 Size 4 Code Code Code Code Juni adjustable & foldable table red top... -
Page 16: Pommel
Figure 8 4.2 Removable Ski • The static ski accessory is fixed to the Juni chair by 4 x M6 screws (Ref. 14 of Figure 9), which locate through each Juni chair outrigger. • A slot is designed into the rear of each static ski, this facilitates ski fitment if height of chair is adjusted. -
Page 17: Mobile Base, Retractable Footboard And Height Adjustable Handle
COMPATIBLE ACCESSORIES 4.3 Mobile Base, Retractable Footboard and Height Adjustable Handle • The mobile base accessory is fixed to the Juni chair by 4 x M6 screws (N), which locate through each Juni chair outrigger • The rear castors can be locked by applying... -
Page 18: Four Point Harness Accessory
COMPATIBLE ACCESSORIES 4.4 Four Point Harness Accessory • A four-point harness is available as an accessory • The rear of the Juni seat back has 4 recesses that are designed to locate fixing cam-locks for the four-point harness • Take a sharp implement and pierce each recess where the ‘dimple’... -
Page 19: Juni Booster
To complete the Booster assembly, simply offer up the metal legs to the Booster and insert 4 x M6x50 screws, as shown below. The seat bracket provided should be fixed to the rear underside of your Juni Chair as shown below by inserting 2 x M6x12 screws. -
Page 20: Adjustments
(C). 4.6.2 Attaching Juni to Booster • Offer up the Juni chair to the seat interface plate as shown opposite. • The chair seat batten should hook over two metal pins (E) on the seat interface plate (one each side). -
Page 21: Five Point Harness
COMPATIBLE ACCESSORIES 4.7 Five Point Harness Each Juni Booster comes complete with a padded five-point buckle harness. This should be attached to the Juni Chair that is intended for use with the Juni Booster. (I) Rear straps (x4) (J) Central Buckle (K) Handwheel for central strap. -
Page 22: Juni Hi-Lo
Once all straps are fitted, adjust to suit the specific needs of your client. To use the 5-point harness; • The central strap (secured to the underside of the Juni chair) should remain fitted at all times. • To fasten the harness, take each shoulder strap and group together before simply clicking into the buckle. - Page 23 Overall product weight (kg) 10.5 10.5 Attaching Juni to Juni Hi-Lo Offer up the Juni chair to the seat The chair seat batten should hook interface plate as shown below over two metal pins (G) on the seat interface plate (one each side).
- Page 24 Ensure the screw is fully tightened before use The footplate should NOT be used as a transfer step – always lower the height of the Juni Hi-Lo to floor level before transferring your client onto the seat. Foot plate at minimum setting...
- Page 25 COMPATIBLE ACCESSORIES Seat at lowest setting Seat at highest setting Push Handle Height The push handle height can be adjusted suit carer’s requirement for comfort and use. To adjust, firstly locate and loosen the grip locks (E) Lift or lower the handle to the desired height.
-
Page 26: Adjustable Footrest
Juni chair. To attach the footrest to the front legs of the Juni chair, simply align the footrest correctly to the front of the chair and insert the two M6 x 25 socket screws as shown below. - Page 27 COMPATIBLE ACCESSORIES Adjusting Adjustable Footrest Footrest Height The footrest top plate adjusts up and down within the safety slots provided at each end. Loosen four hand wheels, two found at each end of the footrest (E). Select the most appropriate slot on each end of the footrest to set the desired height you wish to achieve.
-
Page 28: Extended Backrest
B. Fixing Arms C. CAM Locks D. Headrest Fixing Points Attaching the Extended Backrest On the back of the of the Juni chair (E) there are 4 countersunk bolts (F). Loosen and remove the top two using the hexagon key provided. - Page 29 Attaching Multi-Adjustable Headrest The Multi-Adjustable Headrest by Smirthwaite (I) may be attached to the extended backrest (H). Align the fixing holes in the headrest base and the backrest and secure in place using any supplied bolts.
-
Page 30: Headrest Attachment
A. Headrest Attachment Board B. Fixing Points C. Headrest Fixing Points Attaching Headrest Attachment On the back of the of the Juni chair (D) there are 4 countersunk bolts (E). Loosen and remove the top two using the hexagon key provided. - Page 31 Attaching Multi-Adjustable Headrest The Multi-Adjustable Headrest by Smirthwaite (G) can be attached to the headrest attachment board (A). To do this, align the fixing holes in headrest base...
-
Page 32: Juni Laterals
Each set of laterals will be supplied with an interface plate to attach them to the chair. These interface plates must be attached prior to the laterals. In this example a Smirthwaite Juni chair (A) has been used. To attach the interface plate;... - Page 33 COMPATIBLE ACCESSORIES • Remove the 2 bolts (B) at the side of the chair. • Place the interface plate (C) in position. • Secure using the bolts (B) (Longer bolts will be supplied with the laterals if required). • Repeat for the other side of the chair. To attach the laterals;...
- Page 34 COMPATIBLE ACCESSORIES To change the length of the lateral; • Loosen the swing knob (H). • Pull/push the lateral pad (G) to the desired position. • Tighten the swing knob (H) to secure into position. As each lateral is independent, the laterals can be set to different lengths as required.
-
Page 35: Sacral Pad
COMPATIBLE ACCESSORIES 4.13 Sacral Pad A. Pad B. Straps Attaching Sacral Pad On the back of the of the Juni chair (C) there are 4 countersunk bolts (D). Loosen and remove the bottom two. - Page 36 ‘5.1 Preparing the Chair for the Juni Sacral Pad’. Place the CAM locks (E) over the straps (B) ensuring the opening of the locks are facing down.
-
Page 37: Technical Specification
16042 16043 16044 The Juni chair comes complete with a buckle pelvic strap. The chair is available with fixed arms or adjustable arms. You can also choose from a contoured or flat seat. *Height of chair with contoured seat. The height with a flat seat is 25mm less. -
Page 38: Environmental - Storage And Operating Conditions
The Juni chair suffers little from any effects of lint, dust and light. Lint – Due to there being no mechanical or electrical mechanisms on the Juni · chair, lint would not affect the chair working. -
Page 39: Standards Applied
TECHNICAL SPECIFICATION 5.3 Standards Applied The standards that have been applied to the device are as follows: • BS EN ISO 12182:2012 (Assistive products for persons with disability. General requirements and test methods). • IEC 62366:2015 (Application of usability engineering to medical devices). •... -
Page 40: General Inspection And Maintenance
• Check the strap is securely fastened to the poppers on the underside of the chair. 6.2 Service Interval The Juni chair should be serviced every 3 years. Servicing must only be undertaken by a Smirthwaite Ltd. service engineer, or by a Smirthwaite Ltd. trained representative. -
Page 41: Extending Nominal Service Life
• Use by a client who is extremely active, either voluntarily or involuntarily. 6.4 Extending Nominal Service Life At Smirthwaite Ltd. we are proud to produce products that have a reputation for quality and durability. We believe our products have the potential to provide benefits to our clients beyond the nominal service life documented above. -
Page 42: Cleaning
7.1.1 General cleaning The exterior of the Juni chair can be cleaned using a damp soapy cloth for general cleaning duties. Please ensure the cloth is damp and not wet. Ensure the exterior of the chair is dry after cleaning. -
Page 43: Service Documentation
SERVICE DOCUMENTATION 9.0 SERVICE DOCUMENTATION 9.1 Documentation/ Records It is the responsibility of the current equipment owner to ensure the Service Manual (As well as any further manuals for accessories fitted to the equipment) are handed over to the new owner at the time of exchange/sale. -
Page 44: Service Record History
SERVICE DOCUMENTATION 9.2 Service Record History Complete this record after each service, repair inspection and/or maintenance. * Photocopy additional pages as required * 9.2.1 Product Information Model Size Date of Manufacture Serial Number 9.2.2 Service & inspection record form: Date Procedure Service Personnel... -
Page 45: Warranty
WARRANTY 10.0 WARRANTY Smirthwaite Ltd warrants the products detailed on your order to be free from defects in materials and workmanship for a period of 2 years from date of delivery. If a fault develops during the period, please call Customer Services by email or telephone 01626 835552 who will advise you on the best course of action. - Page 46 Smirthwaite Ltd, 16 Wentworth Road • Heathfield • Newton Abbot • Devon • TQ12 6TL Part Number: 999-1-04 / Rev: 1 / Date: May 21...
Need help?
Do you have a question about the Juni and is the answer not in the manual?
Questions and answers