
Related Manuals for Horizon Hobby Timber X 1.2m


Summary of Contents for Horizon Hobby Timber X 1.2m
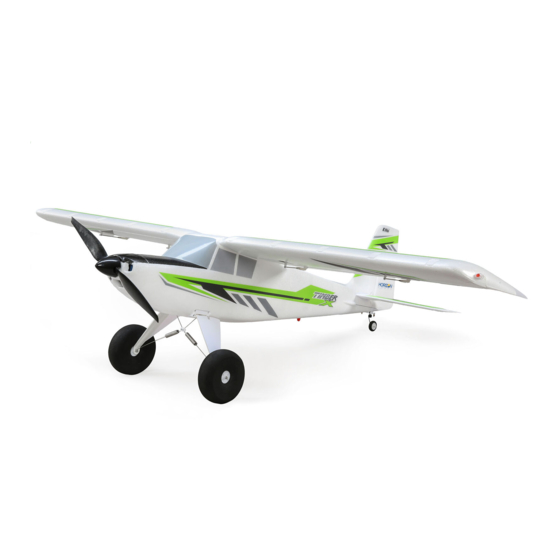
- Page 1 Timber X 1.2m ® Instruction Manual Bedienungsanleitung Manuel d’utilisation Manuale di Istruzioni SAFE Select Technology, Optional Flight Envelope Protection ®...
- Page 2 NOTICE All instructions, warranties and other collateral documents are subject to change at the sole discretion of Horizon Hobby, LLC. For up-to-date product literature, visit www.horizonhobby.com or www.towerhobbies.com and click on the support or resources tab for this product. Meaning of Special Language:...
-
Page 3: Table Of Contents
Box Contents Quick Start Information Transmitter Set up your transmitter using the Setup transmitter setup chart Hi Rate Low Rate 33mm 25mm 33mm 25mm Dual Rates 22mm 16mm 30mm 20mm Full Half Flaps 35mm 20mm Center of 82mm-92mm back from leading edge Gravity (CG) of wing at the fuselage. -
Page 4: Select Technology (Bnf Basic)
* Flap programming values may vary slightly. For your initial flights use the POS 2: 100% FLAP* 20% Elevator recommended flap travel settings provided in the Flaps section and adjust the flap NX6, NX10 SPEED 2.0 travel to your preference on subsequent flights. Timber X 1.2m... -
Page 5: Model Assembly
Model Assembly Landing Gear Installation 3 x 8mm button head Mount the Landing Gear to the Fuselage machine 1. Insert one landing gear assembly into the pocket on the side of the fuselage as shown. The landing gear legs mount to the aluminum block which can pivot in the pocket. - Page 6 3. Slide the pushrod in the quick connector to change the length of the linkage between the servo arm and the control horn so the control surface is centered. 4. Apply thread lock compound to the screw threads and tighten the screw to secure the pushrod at the desired length. 90˚ Timber X 1.2m...
- Page 7 Model Assembly Continued Slat Installation (Optional) Required Adhesives Medium CA 1. Carefully remove all the foam slat pocket covers (A) from the wing. 2. When the pocket is exposed, carefully apply medium CA to each slat pocket. 3. Mount the slat onto the wing with the rounded edge facing forward. Ensure that the left and right slats are on the correct wing half.
-
Page 8: Binding / Switching On And Off Safe Select (Bnf Basic)
If the receiver loses transmitter communication, the failsafe will activate. When activated, failsafe moves the throttle channel to its preset failsafe position (low throttle) that was set during binding. All other channels move to actively level the aircraft in flight. Timber X 1.2m... -
Page 9: Battery Installation And Esc Arming
Battery Installation and ESC Arming Battery Selection The Spektrum 2200mAh 14.4V 4S 50C Li-Po battery (SPMX22004S50) is recommended. The SPMX22003S50 battery may also be used. For maximum performance with 3 cells, a 13X6.5 electric propeller may be utilized. Refer to the Optional Parts List for other recommended batteries. -
Page 10: Control Horn And Servo Arm Settings
After flying, you may choose to adjust the linkage positions for the desired control response. See the table to the right. Rudder Aileron Flaps Flaps Flaps Flaps Flaps Tuning Elevator Horns Arms Elevator Elevator Elevator More control throw Less control throw Timber X 1.2m... -
Page 11: Center Of Gravity (Cg)
Center of Gravity (CG) CAUTION: Install the battery but leave it disconnected while checking the CG. Personal injury may result. The CG location is measured from the leading edge of the wing at the root. This CG location has been determined with the recommended Li-Po battery (SPMX22004S50). -
Page 12: Flying Tips And Repairs
For a short takeoff, apply full throttle and hold up elevator until the desired pitch attitude is reached. Continue holding up elevator until the appropriate altitude is reached. Once the elevator stick is returned to center, the aircraft will automatically resume level flight. Timber X 1.2m... -
Page 13: Pnp Receiver Selection And Installation
PNP Receiver Selection and Installation The Spektrum AR631 receiver is recommended for this airplane. If you choose AR631 Port to install another receiver, ensure that it is at least a 5-channel full range (sport) receiver. Refer to your receiver manual for correct installation and Assignments operation instructions. -
Page 14: Troubleshooting Guide
Motor power pulses Weather conditions might be too cold Postpone flight until weather is warmer then motor loses Battery is old, worn out, or damaged Replace battery power Battery C rating might be too small Use recommended battery Timber X 1.2m... -
Page 15: Bnf Advanced Receiver Setup (Optional)
BNF advanced receiver setup (optional) With the basic transmitter setup, the ailerons and flaps will operate separately. Advanced Transmitter Setup For increased aileron authority, the AR631 receiver included in the BNF version Start all transmitter programming with a blank ACRO model (perform a model may be configured so the flaps can operate as both flaps and ailerons. -
Page 16: Ama National Model Aircraft Safety Code
AMA’s Competition Regulation. • I will use an established safety line to separate all model aircraft operations from spectators and bystanders. For a complete copy of AMA’s Safety Handbook please visit: www.modelaircraft.org/files/100.pdf Timber X 1.2m... -
Page 17: Limited Warranty
Product, (iv) attempted service by Return Merchandise Authorization (RMA) number. Pack the Product securely anyone other than a Horizon Hobby authorized service center, (v) Product not using a shipping carton. Please note that original boxes may be included,... -
Page 18: Fcc Information
EU Radio Equipment Directive 2014/53/EU. Champaign, IL 61822 USA EU Importer of Record: Timber X 1.2m PNP (EFL3875); Hereby, Horizon Hobby, LLC declares that the Horizon Hobby, GmbH device is in compliance with the following: EU EMC Directive 2014/30/EU. Hanskampring 9 The full text of the EU declaration of conformity is available at the following 22885 Barsbüttel Germany... -
Page 19: Recommended Receivers
9g Servo MG Reversed 9 Gram Servo, R Servo 9 gr, R Servocomando 9 g, R AR631 6-Channel AS3X Sport AR631 6-Kanal AS3X Sport SPMAR631 Récepteur AR631 6 voies Ricevente AR631 AS3X sport a 6 canali Receiver Empfänger Timber X 1.2m... -
Page 20: Optional Parts
Optional Parts • Optionale Bauteile • Pièces optionnelles • Pezzi opzionali Part # | Nummer Description Beschreibung Description Descrizione Numéro | Codice EFL5261 Float Set: Timber Timber: Schwimmerset Timber - Flotteurs Set galleggianti: Timber Park Flyer Tool Assortment, Park Flyer Werkzeugsortiment, 5 Park Flyer assortimento attrezzi, EFLA250 Assortiment d'outils park flyer, 5pc... - Page 21 E-Flite, Timber, AS3X, DSM, DSM2, Spektrum Airware, Bind-N-Fly, BNF, the Bind-N-Fly logo, Plug-N-Play, SAFE, the SAFE logo, ModelMatch, Dyanmite, EC3, IC3, Passport, Prophet and the Horizon Hobby logo are trademarks or registered trademarks of Horizon Hobby, LLC. The Spektrum trademark is used with permission of Bachmann Industries, Inc.
Need help?
Do you have a question about the Timber X 1.2m and is the answer not in the manual?
Questions and answers