Table of Contents
Troubleshooting

Subscribe to Our Youtube Channel
Summary of Contents for Standard Change-Makers Guardian GXP
- Page 1 P.O. Box 36550 Indianapolis, IN 46236-0550 3130 N. Mitthoeffer Rd. Indianapolis, IN 46235-0550 (317) 899-6966 FAX (317) 899-6977 W EB:www.standardchange.com Models Included: GXP, BX, BE and Operating Instructions 8M00585 REV. 3...
- Page 2 Limited Product Warranty Standard Change-Makers, Inc. (“Manufacturer”) warrants the machine (the “Product”), excluding any component(s) not manufactured by Standard Change-Makers, Inc. (Third Party Product(s)), to be free from defects in material and workmanship if properly installed according to the Manufacturer’s Installation Instructions and serviced and operated under normal conditions according to the Manufacturer’s instructions.
-
Page 3: Table Of Contents
Contents Introduction ......................... 8 Quick Start Guide........................ 9 2.1 Coin Dispenser ........................9 2.1.1 Loading The Coin Dispenser ..................9 2.1.2 Emptying The Coin Dispenser..................10 2.1.3 Programming the Coin Dispenser ................. 10 2.2 Removing Bills From The Bill Acceptor Bill Box..............12 2.3 Loading Paper In The Printer .................... - Page 4 5.3.14 Monitor the Wash In Use signal? .................. 27 5.3.15 Monitor the Wash Bay Fault signal? ................27 5.3.16 Wash Bay Busy timeout ....................27 5.3.17 Ignoring a missed WASH IN USE/END OF CYCLE feedback signal......27 5.3.18 Delaying the wash signal ....................28 5.3.19 When to prompt users to upgrade their wash..............
- Page 5 5.6 Auxiliary Output Settings..................... 37 5.6.1 Will the machine control a gate?................... 37 5.6.2 Will there be a feedback signal provided?..............37 5.6.3 Gate out signal time...................... 37 5.7 Card and Bill Fast Vend Settings..................37 5.7.1 Bill Fast Vend Settings (not BE or DLR models)............38 5.7.2 Card Fast Vend Settings (not DLR model) ..............
- Page 6 5.9 Alarm Settings ........................48 5.10 Other Settings........................49 5.10.1 Owner Language ......................49 5.10.2 User 1 language ......................49 5.10.3 User 2 language ......................49 5.10.4 Machine Type....................... 50 5.10.5 Error Time Out ......................50 5.10.6 Hold money that can not be dispensed for the next transaction........50 5.10.7 Allow exact change ......................
- Page 7 5.14.3 Cassette Type....................... 68 5.14.4 Cassette Low Count ..................... 68 5.14.5 Cassette Override ......................69 5.15 Email Settings (software version x.xxxE)................. 69 5.15.1 Recipient........................71 5.15.2 Alarms ......................... 71 5.15.3 Reports......................... 72 5.15.4 Enable Account ......................72 5.15.5 Report Send Time ......................73 5.15.6 Email Code .........................
-
Page 8: Introduction
1.0 INTRODUCTION Dear Valued Customer, Thank you for your recent Guardian XP (GXP) Entry System purchase from Standard Change Makers, Inc. Within this manual you find Operating Instructions for the following products. GXP - BX GXP - BE GXP - DLR You will also find instructions for 3rd party products that we use within our GXP Model Series. -
Page 9: Quick Start Guide
2.0 QUICK START GUIDE Your machine has been shipped preprogrammed from the factory. All settings will be programmed to the factory default unless otherwise specified at the time of order. The majority of new machine owners need only read this section in order to learn the basic installation and operating features of your machine. -
Page 10: Emptying The Coin Dispenser
2.1.2 Emptying The Coin Dispenser The majority of coins in a dispenser can be removed from the hopper using the bulk dump method. Bulk dumping refers to the manual method of tilting the coin dispenser forward in order to empty coins from a dispenser into a container. - Page 11 board is used to identify the value of coin the hopper is to dispense. The table below shows the setting for each coin value. Also, note that the token setting is also included in the table. If you have changed the hopper value, you will need to reprogram your Button Settings from the main menu of the Guardian XP Control Module.
-
Page 12: Removing Bills From The Bill Acceptor Bill Box
2.2 Removing Bills From The Bill Acceptor Bill Box The bill box is attached to the rear of the bill acceptor. Each bill box will have an access door that can be easily opened to allow the accepted bills to be removed. The location of the access door varies depending on the bill acceptor model, yet all are easily viewable. -
Page 13: Loading Paper In The Printer
2.3 Loading Paper In The Printer Automatic Loading With Power On – Pull the printer plunger out and load paper in. When the printer senses the paper it will pull the paper in and print the hardware settings of the printer. This is a function of the printer and not the Guardian. -
Page 14: Crank Lock Operation
Crank Lock Operation The crank lock is quick and easy access to the interior of the cabinet with maximum security. To remove the plug locks it is only necessary to insert key and rotate ¼ turn. Next turn the wrench handle counter clockwise until it disengages from the interior lock mechanism and then pull the door open. -
Page 15: How To Program Your Guardian
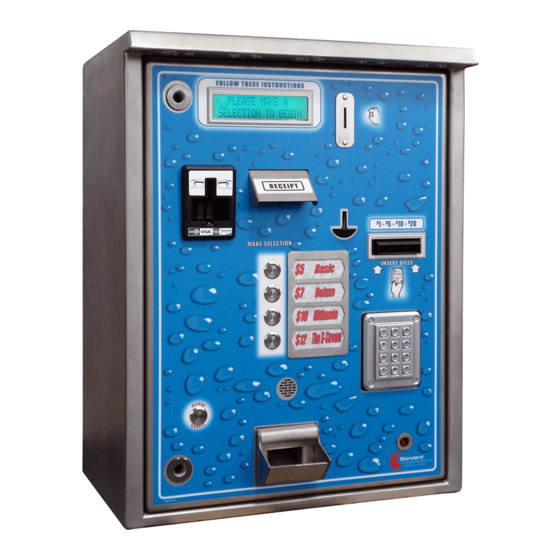
3.0 HOW TO PROGRAM YOUR GUARDIAN Overview of Owner Interface The Owner Interface features allow you to navigate through the various programming and reporting menus and reset the machine from error conditions. The User Keypad (pin pad), User Selection (package selection) Buttons and User Display located on the front of the machine will be used to navigate through the various Main Menu features available. -
Page 16: Menu Navigation
1. IF THE STATUS LIGHT IS FLASHING A CODE OR IF YOU WANT TO ACCESS THE PROGRAMMING MENU. PRESS BOTH TEST AND RESET TO ENTER MENU. Note - see viewing errors below. 2. PRESS RIGHT ARROW TO VIEW Press REPORTS OR SETTINGS. 3. - Page 17 Cancel Button The Cancel button is used to step back through the menus and then to exit the programming mode. USER CANCEL Number & Text Buttons The Numeral / Alphabetical buttons on the User Keypad are used for numeric and text entries. Press the key multiple times to access other letters.
- Page 18 Yes and No Buttons The Numeral button 6 (MNO) is used for NO and the numeral button 9 (WXY) is used for YES. “N” for No “Y” for Yes Help Button The Help button is used to display help relating to the menu feature you are looking at. It will also provide navigation tips to let you know how to move through the menu to see available choices.
-
Page 19: Drilling Down Into A Menu
3.3 Drilling Down into a Menu The UP and DOWN arrow buttons are used to navigate up and down through the list of details for a given feature group. You can move down in the list by pressing the DOWN arrow button. You can move up in the list by pressing the UP arrow button. -
Page 20: Report Menus
4.0 REPORT MENUS 4.1 Printing a Report (not DLR model) Reports can be printed by pressing answering yes (button 9 on user keypad) when prompted (asked if you want to print a report). Reports can be cleared by answering “yes” when prompted or by pressing the “clear”... -
Page 21: Engineering Report
4.5.2 Engineering Report The Engineering Report is used to log easily identifiable problems that engineering wants to track. This report is only printable. 4.5.3 Debug Report The Debug Report is used to log occurrences in new features that engineering wants to track. This report is only printable. - Page 22 4) The total number of all washes that were issued from the GXP to the wash bay. 5) The total number of wash codes that were redeemed at the GXP machine. Note: If you do not have a POS connected to the GXP machine only the GXP Sales will be printed.
-
Page 23: Settings Menus
5.0 SETTINGS MENUS Update a Setting The Settings menus are used to “set” values and other operating parameters that are specific to your machine. You can also print a report for almost every setting menu and it is advisable to do so. This will be useful if you need to reprogram for any reason. -
Page 24: Setting The Name Of The Button
make the select (and a la carte) before they deposit payment so they have plenty of time press the a la carte button. Notes: 1. At least one of the buttons must be configured (programmed) as a regular Wash Package selection. -
Page 25: Adding An A La Carte To A Wash Package
5.3.5 Adding an A la carte to a wash package includes a la carte “button name”? NO This is only asked of a wash if you have assigned button(s) as an A la carte. This allows you to always include the A la carte with a wash package. More than one A la carte can be included with a wash package. -
Page 26: Wash Equipment Signal Time
4 & 1 4 & 2 4 & 3 4 & 3 & 1 These are the Y1 through Y8 outputs on the PLC. Note that the standard PLC only has Y1 through Y4. If you need Y5 through Y8 a separate module must be purchased. 5.3.8 Wash equipment signal time vend duration time 1 secs... -
Page 27: Automatically Refund Upon A Wash Error
· Single – A second user can pay for his wash while a car is in the wash bay. · Multiple – Up to ten users can pay for their wash. · None – A second user can not pay for his wash until the wash bay is empty. 5.3.13 Automatically refund upon a wash error Auto refund on equipment error? NO... -
Page 28: Delaying The Wash Signal
Enter the number of times to ignore a missed feedback signal before a Wash Equipment error occurs. The count is decremented if a Cycle Inhibit signal is not seen within the Wash Bay Busy timeout. When the count reaches zero a Wash Equipment Error is generated. If you set the count to zero a Wash Equipment error will occur immediately. -
Page 29: Pos4000
If you are connecting the machine to a POS system then select the appropriate brand / model from the available list. 5.4.2 POS4000 5.4.2.1 GXP address GXP address The address the GXP would use when communicating to the POS system. 5.4.2.2 Use POS names and prices? Use POS names and Prices? YES... -
Page 30: Operating Hints
The number of digits that can be entered before a code will automatically entered. This can be convenient for you customer so they do not have to press the enter key. You need to make sure this is large enough for any codes, PIN numbers or external access codes. 5.4.2.6 Operating Hints ·... -
Page 31: Cci Wired - (Code Command I)
Make sure a number has been entered at the GXP address in “POS SETTINGS”. On advance replacements for the EFII board, make sure the proper software and Rev board is used. No Comm- make sure the RS485 cable is terminated correctly and plugged into the correct locations. 5.4.3 CCI wired –... -
Page 32: Entering A Code To Be Checked
5.4.4.1.1 Entering a code to be checked enter code number 0 Enter the code you wish to check and press the down arrow to check a code. 5.4.4.1.2 Printing a summary of the entered code print code summary? Press YES to print out the details of the code. 5.4.4.1.3 Canceling a code Cancel code? Press YES to cancel the code. -
Page 33: Ccii Encrypted - (Code Command Ii)
This is only available if you have Code Command II selected under POS Settings. 5.4.5 CCII Encrypted – (Code Command II) The settings for the encrypted POS involve mathematical algorithms. Therefore it is very important that the encrypted settings in the GXP match the settings in the sales terminal (satellite). This authenticates one time use codes from single or multiple terminals. -
Page 34: Network Mask
5.4.5.5 Network Mask Network Mask Enter a unique 5 digit number so that your codes will be different then other nearby encrypted codes. This does not have anything to do with an ethernet network. It is very important that this matches the setting in the sales terminal (satellite). -
Page 35: Ccii Wired - (Code Command Ii)
5.4.6 CCII Wired – (Code Command II) This authenticates one time use codes from single or multiple terminals. The one time use codes will expire. Fleet codes are only for a single site. This requires a cable connection between the GXP and the CCII terminal. -
Page 36: Entering A Code To Be Checked
number, print out an “audit” of the last 50 Book of Code transactions, and allows the owner to cancel a code. 5.5.1 Entering a code to be checked enter code number 0 Enter the code you wish to check and press the down arrow to check a code. 5.5.2 Printing a summary of the entered code print code summary? -
Page 37: Clearing A Book Of Codes
5.5.5 Clearing a Book Of Codes clear Book Of Codes report? Press YES to clear all of the Book Of Codes sold at this machine. This is only available if you have Code Command II selected under POS Settings. 5.6 Auxiliary Output Settings This menu lets you set parameters for controlling a generic output. -
Page 38: Bill Fast Vend Settings (Not Be Or Dlr Models)
5.7.1 Bill Fast Vend Settings (not BE or DLR models) This is used to restrict machine usage to normal bill transaction amounts in a given time period. The primary benefit of this feature is in the added protection against stringing should the bill acceptor stringing detection devices become defeated. -
Page 39: Choose The Credit Card System That You Will Be Using
5.8.1.1 Choose the credit card system that you will be using card system < no card > 5.8.2 Datacap or Twintran If you have selected the Datacap or Twintran you should configure the Credit Card reader and modem (black box). It is important to be familiar with your “Merchant Setup” prior to altering any of these settings. -
Page 40: Credit Card Module
5.8.2.7 Credit Card Module The Credit Card Module is based on the same technology that is used in the credit card terminals found at the major super market store checkout lanes. A credit card terminal will include a card reader, a modem and a display for prompting the user with credit card related instructions such as “swipe card”, “card not read”, “card authorizing”, etc. -
Page 41: Washcard Or Washcard & Datacap (Non "E" Versions Of Software)
5.8.3 WashCard or WashCard & Datacap (non “E” versions of software) 5.8.3.1 GXP ethernet IP address local IP address 000.000.000.000 You can set this to an address you want to use or clear it and your server will assign it (DHCP). 5.8.3.2 GXP ethernet port local port The actual port may not be important as long as it is not zero. -
Page 42: Operating Hints
low = 20 This is the maximum number of times cash can be used with out a credit card being used. This will create a warning for the owner. This may indicate a card reader problem. Choose a number that fits your cash and credit card usage. -
Page 43: Washgear (Non "E" Versions Of Software)
Left LED on steady green When power is cycled or the Guardian is reset. Left LED goes off while right led blinks orange Then left LED is on steady green 3. WashCard is selected, the cable is connected and after connection with WashCard. Left LED on Right LED blinks green occasionally Note: This is the same if the WashCard application goes away. -
Page 44: Washgear Ethernet Ip Address
If the router can not be found enter the IP address. 5.8.4.5 WashGear ethernet IP address remote IP address 000.000.000.000 This is the IP address of the WashGear server and it must be set. Please contact WashGear for this information. 5.8.4.6 WashGear ethernet port remote port This is the port used by the WashGear server and it must be set. -
Page 45: Troubleshooting
5.8.4.10 Troubleshooting When connected to the WashGear card system the WashGear version will appear in the “CONFIGURATION REPORT”. If communication is lost the version will be replaced with “not connected”. After initializing, the GXP will beep twice indicating that auto addressing is done. A single beep will occur when a connection has been made to the WashGear card system. -
Page 46: Sitepro (Non "E" Versions Of Software)
5.8.5 SitePRO (non “E” versions of software) 5.8.5.1 GXP ethernet IP address local IP address 000.000.000.000 As a guide the first GXP this should be set to 010.001.010.101. If you have a second GXP it should be set to 010.001.010.102. SitePRO may have you change this. 5.8.5.2 GXP ethernet port local port You will get the best results if this is set to zero. -
Page 47: Warning For Possible Credit Card Problems
5.8.5.8 Warning for possible credit card problems card usage low = 20 This is the maximum number of times cash can be used with out a credit card being used. This will create a warning for the owner. This may indicate a card reader problem. Choose a number that fits your cash and credit card usage. -
Page 48: Alarm Settings
Under “CONFIGURATION REPORT” you will see “SitePRO version” with the version number underneath if communication has been established. If communication to the SitePRO system is lost for more than 3 minutes, you will see “SitePRO version is NOT CONNECTED”. After initializing, the GXP will beep twice indicating that auto addressing is done. A single beep will occur when a connection has been made to the SitePRO card system. -
Page 49: Other Settings
The Auxiliary Alarm Relay option can be connected to an existing dialing device that you may already have at your site. You can set any or all of the 8 available alarm conditions to trigger the relay, which in turn will trigger your dialer. This option is most commonly used to notify the owner of only critical alarm conditions that have placed the machine, or wash bay, out of service. -
Page 50: Machine Type
This is the language that will be displayed if the user presses the language button. The language button is optional. 5.10.4 Machine Type Machine Type ¬ ® Guardian XP This is used to identify if this machine includes any Expanded Function hardware modules. The Guardian XP should be the choice selected under the Machine Type setting. -
Page 51: Allow Customers To Use The Machine As A Changer
5.10.9 Allow customers to use the machine as a changer cash cancel limit = 3 Enter the number of times you will allow a user to insert cash and then press the cancel button to get change. A zero will always allow the user to make change. Version 2.010 or later. 5.10.10 Bill acceptor tamper level acceptor tamper ¬... -
Page 52: Date
5.10.14 Date current date (m/d/y) 01/04/10 If incorrect, enter the current date. This must be correct for proper credit card and email operation. 5.10.15 Day of the week day of the week ¬ ® Monday If incorrect set the current day. This must be correct for proper credit card and email operation. 5.10.16 Time current time (h:m) 10:45 AM... -
Page 53: Coin Acceptor Error Takes The Machine Offline
last address 0 This is the number of machines that are networked. Currently only two are supported. This question is only asked if the machine is GXP 1. 5.10.22 Coin acceptor error takes the machine offline Disable if coin errored? NO YES –... -
Page 54: Button Light Delay
· Lights OFF - All button lights will be OFF. · Lights ON - All button lights will be ON. Sets the way the selection buttons light when the machine is in an idle state. 5.10.27 Button Light Delay Btn Light delay 0 secs Enter the delay in seconds before the button light pattern will repeat. -
Page 55: Prompt Settings
5.11 Prompt Settings A prompt is the message, voice and / or text, that is given to the user to instruct them on what to do next or to advertise something to them. The Welcome Prompt in particular can be a very effective advertising tool for letting users know that you are running a promotion. -
Page 56: Entering A Custom Display Prompts
§ Welcome None: (disable this prompt) Up Sell Prompt -This prompt is used for advertising. It is played when a patron has purchased a wash but is being held (stacked) until the wash bay becomes available. § Up Sell 1: “For drying towels, window cleaners and air fresheners please visit our vending area”... -
Page 57: Custom Voice Prompts
To get to the next display screen simply press the down arrow button. You can have up to 4 display screens. We recommend short and concise messages so the message is displayed quickly and is easily understood. Use the Display Template below to layout the custom prompt message you wish to display. -
Page 58: Bonus Codes
associated Promotion Audit. The audit totals will be listed under the name of the discount type, not the generic label. The top line of the display will now show [code 1 name], which is the generic label for this discount. The generic label cannot be changed, The bottom line of the display will show [CODE 1]. -
Page 59: Coupons
generic label for this discount. The generic label cannot be changed, The bottom line of the display will show [BONUS CODE 1]. The cursor will be flashing under the first character of the name. You can now change the name using the text entry method. Step down in the menu and enter a name for each bonus code you wish to use. - Page 60 Step 2 – Identify the number of different coupons to be accepted. Each coupon trained in the acceptor is considered a different coupon. Step down into the menu until you see [maximum number] on the top line of the display and [of coupons] on the bottom line. Enter the number of different coupon types you plan to use.
-
Page 61: Tokens
5.12.4 Tokens This discount uses acceptance of the IDX tokens to either give a discount towards a wash or credit towards a wash. There are five steps required to setup the token discounts: · train the coin acceptor to recognize the tokens to be accepted ·... - Page 62 · Deposit 6 of the same token. The LED should flash red-green a few times to indicate the token is stored. · Turn the rotary switch to position 0. The LED should be green. · Repeat the above steps for each token (or coin) to be trained. Be sure to change the “rotary switch position”...
-
Page 63: Discount Cards
5.12.5 Discount Cards This discount type uses up to the first six digits of a credit card for a discount. The user only has to swipe a matching credit card to receive the discount. They do not have to enter the number on the pin pad. -
Page 64: Time Based
The maximum number of One Time Use codes that can be used is twenty. Step 1 – Identify the number of different codes to be accepted. Step down into the menu until you see [maximum number] on the top line of the display and [of codes] on the bottom line. -
Page 65: Planning A Promotion
5.13.1 Planning a Promotion Care should be taken to think through all of the factors related to developing an effective promotion. Below are the factors related to developing an effective promotion and marketing campaign. Review all of these before attempting to setup a promotion in the GXP machine. Once you have a well thought out plan, proceed to setting up the discounts using the Discount Type Settings menu and then setup the promotion using the Promotion Settings menu. -
Page 66: Setting Up A Promotion - Promotion Settings Menu
· Time of Day / Day of Week – ideal and economical way to load balance. Load balancing is where you encourage customers to use your wash during slow periods so full price customers are not turned away during peak usage periods. ·... -
Page 67: Programming Steps
Important Notes: · Remember that it is very important to design the promotion on paper before trying to set it up in the machine. · It is a good idea to clear the promotion audit after you have made a change to it so your accounting starts at zero. -
Page 68: Bill Dispenser Settings (Bx Model)
5.14 Bill Dispenser Settings (BX model) This menu should only be used if you have a bill dispenser connected to the control board at connector J8. If you make a change to the bill dispenser model or value of the cassette it will be necessary that you reset the control board before these changes can take affect in the rest of programming. -
Page 69: Cassette Override 1
This feature is typically used to decrease the number of bills remaining in a bill dispenser compartment (cassette) before it reports that it is sold out. Use this to allow between 0 and 255 additional bills to be dispensed after the bill compartment senses it is sold out. The number of bill remaining after the bill compartment senses a sold out will vary depending on the condition of the currency being used. - Page 70 EMAIL SETTINGS? edit account? enter name Recipient 1 Recipient 1 edit account? Recipient 1 Address Recipient 2 name@domain.com send test alarm to Recipient 1 machine offline edit Recipient 1 edit account? send email? NO alarms? Recipient 6 exact change send email? NO card system comm.
-
Page 71: Recipient
send all reports on Edit report < Everyday > Send time? send all reports at Email Code (h:m) 11:00 PM send service clear all reports reports now? after send? NO print email settings report? end of email settings report 5.15.1 Recipient Name - You can change the name from the generic “Recipient”... -
Page 72: Reports
Exact Change – Exact Change Active is sent if all dispensers are sold out or in error. Exact Change Not active is sent if one or more dispensers become not sold out or in error. Door Status – A door switch kit can be connected at J6 to monitor when the GXP door is opened and closed. -
Page 73: Report Send Time
5.15.5 Report Send Time It is necessary that the GXP has power at the time the reports are to be sent. If the GXP does not have power during the Report Send Time you will not receive your reports. Day – Select the day of the week to send the reports. If “None” is selected no reports will be sent. This can be useful if you only want to send reports using the Access Code. -
Page 74: Steps In Sending An Email
Sprint PCS (now Sprint Nextel) [10-digit phone number]@messaging.sprintpcs.com [10-digit phone number]@pm.sprint.com (MMS) Example: 1234567890@messaging.sprintpcs.com T-Mobile [10-digit phone number]@tmomail.net Example: 1234567890@tmomail.net US Cellular [10-digit phone number]email.uscc.net (SMS) [10-digit phone number]@mms.uscc.net (MMS) Example: 1234567890@email.uscc.net Verizon [10-digit phone number]@vtext.com [10-digit phone number]@vzwpix.com (MMS) Example: 1234567890@vtext.com Virgin Mobile USA [10-digit phone number]@vmobl.com... -
Page 75: Troubleshooting
421 - not available 450 - requested command failed, mailbox unavailable 451 - command aborted server error 452 - command aborted server has insufficient storage 500 - syntax error 501 - syntax error in arguments 502 - command not implemented 503 - bad sequence of commands 504 - parameter not implemented 550 - mailbox unavailable... -
Page 76: Replacing The Pricing Placard
6.0 REPLACING THE PRICING PLACARD The pricing placard is simple to make and to replace. You can use a simple text editing program like Microsoft Word to design the new placard and then you can laminate it for water protection. Use black inks in place of color ink, as the black will hold up longer when exposed to the UV rays from the sun. -
Page 77: Troubleshooting & Maintenance
7.0 TROUBLESHOOTING & MAINTENANCE 7.1 Condition Overview General error conditions that occur in the “machine” will be shown on the user LCD display as soon as the “Menu Mode” is accessed. These errors along with other “events” can be viewed or printed from the Event Report menu. -
Page 78: Machine Troubleshooting Chart
To access the Configuration Menu, enter the Main Menu and press the left arrow (selection 3 button) to “Configuration Report”. Press the down arrow button (selection 4 button) to view the report and verify all the components found in the machine are displayed in the report. -
Page 79: Viewing Dispenser Errors (Not Be Or Dlr Models)
7.6 Viewing Dispenser Errors (not BE or DLR models) If an error condition is present on any dispenser, the status LED will be flashing at a rate of one flash per second and there will be a brief delay (LED will be off for approx. 3 seconds) between consecutive flashes. - Page 80 Flash TROUBLESHOOTING HELP & COMMON FAILURE SOURCES Code THE DISPENSER IS SOLD OUT. This is a normal operating condition and it indicates that the dispense compartment needs to be refilled. Once refilled the error condition will automatically go away (reset). If this error is issued and the device is not sold out (near empty), check the device sold out sensing contacts / circuit for debris.
-
Page 81: Resetting Dispenser Error Conditions
limit settings for the affected device. Check the Program settings. TRACKING CODES – These codes are intended for use by SCM troubleshooting personnel. If code 15-30 persists, contact the nearest SCM service center. DISPENSER OUTPUT BLOCKED – The dispenser (coin, bill, ticket) sensor is blocked. Check the dispenser counting sensor and associated connections. -
Page 82: Coin Acceptor Troubleshooting (Not Be Or Dlr Models)
7.7 Coin Acceptor Troubleshooting (not BE or DLR models) The coin acceptor used in the Guardian XP is the IDX-X10 coin acceptor. This coin acceptor includes a troubleshooting LED indicator to aid in programming and troubleshooting this device. The status for each LED color and condition is shown below. -
Page 83: Printer Fault Conditions
If paper is being ejected but not printed you should check to see if the paper is loaded upside down. 7.8.1 Printer Fault Conditions Green LED Red LED Fault Condition Slow Blink-----1 second on, 1 second off Normal Operation Medium Blink-1/10 second on, 1/10 second off Out of Paper On –... -
Page 84: Voice Module Troubleshooting
7.9 Voice Module Troubleshooting The optional voice module should be very maintenance free. There is nothing to clean and no moving parts. If for some reason you do not hear voices from your voice module try the following. · Check to see if the card is seated properly. The SD card is spring loaded and will eject if you push down on it. -
Page 85: Direct Logic 05 Plc Indicator Lights (Discontinued)
Direct Logic 05 PLC Indicator Lights (discontinued) XO =Wash Bay Inhibit, X1 = Proximity Sensor, X2 = Bay Fault, X3-X7 =Future expansion YO – Y3 =Wash Selection Outputs, Y4 =not used, Y5= Bay Busy Port / LED XO = OFF Wash bay empty. -
Page 86: Frequently Asked Questions
X4 = ON Gate closed signal return. X4 = OFF Gate normal. Y1 = ON Wash one has been selected. On time will be set by relay on time in wash settings menu. Y2 = ON Wash two has been selected. On time will be set by relay on time in wash settings menu. - Page 87 A dirty sensor is one of the main reasons for bill rejections. For MEI acceptors, refer to the label located on the back of the bill magazine for cleaning instructions. Also, check the bill acceptor manual for error code and troubleshooting information. Why has my coin acceptor stopped accepting coins? ·...
-
Page 88: Maintenance & Repair
be updated by the DIP switches. Nickel and dime dispensers are not as flexible and will have to be replaced. · If you are wanting a token dispenser please contact our parts department with the thickness and diameter of the token you wish to dispense. They will find the correct dispenser for you. Why do I need surge protection on my ethernet connection? More than likely your Guardian is sitting in an open area in the weather and the ethernet connection is running underground. -
Page 89: Coin/Token Dispenser Repair (Not Dlr Model)
10.2 Coin/Token Dispenser Repair (not DLR model) Coin Coin Interrupter Interrupter Optic Optic Motor Connector Sold Out Connector Mounting Mounting Screw Screw Mounting Mounting Important: If the entire coin dispenser is replaced AND it is being replaced by one that was not the same value, it will be necessary to check the Wash Settings in the Main Menu mode. -
Page 90: Coin/Token Dispenser Control Board Replacement
10.2.1 Coin/Token Dispenser Control Board Replacement The coin dispenser control board can be easily replaced. First, turn the power off to the machine. Next unplug the cables connected to the dispenser control board. Next remove the two screws in the upper two corners of the board as shown in the photo below. -
Page 91: Bill Acceptors (Not Be Or Dlr Models)
11.0 BILL ACCEPTORS (NOT BE OR DLR MODELS) 11.1 Bill Acceptor Preventative Maintenance · Use canned air regularly to remove dust and debris from bill path. · Use clean damp rag to wipe off optic sensors on the upper and lower track ·... -
Page 92: Part Ordering Information
1. Locate the fault to a specific component or module. See the troubleshooting section of this manual for assistance. 2. Call the service department at Standard Change-Makers. You will need to give the service representative the following. MODEL NUMBER OF YOUR MACHINE SERIAL NUMBER OF YOUR MACHINE 3. -
Page 93: Parts List
12.1 Parts List Guardian XP Replacement Parts List Part Number Description 1E00144 BUZZER, CONTINUOUS 4K00884-FI PROXIMITY SENSOR KIT, PHOTOELECTRIC 4E00353 TERMINAL BLOCK, PROXIMITY SENSOR 4E00352 TERMINAL BLOCK, MAIN INTERFACE 1K00115 RELAY, 24VDC 1K00116 RELAY, 24VAC 1K00117 RELAY, 110VAC 1S00105 SWITCH,POWER SUPPLY, LIGHTED 1S00219 SWITCH, INHIBIT, TOGGLE 1S00202... - Page 94 2F03436 C.C. READER INTERNAL COVER 2F02984 C.C. INSTRUCTION MOUNTING PLATE 5M00231 C.C. MODULE, IPTRAN for MERCURY PAYMENT 5M00232 C.C. MODULE, IPTRAN for STERLING PAYMENT 5M00229 C.C. MODULE, IPTRAN for ALL OTHERS (NO MERCURY & STERLING) 5M00228 C.C. MODULE, DATATRAN for DIAL-UP 5P00241 C.C.
- Page 95 STAINLESS STEEL HOOD ASSEMBLIES 2F03416 FRONT PANEL, FOR DECAL APPLIED HOOD 6D00700 LEXAN DECAL, "PAY HERE" 5L00135 LOCK, FRONT PANEL, ALL HOOD ASSEMBLIES 2F03412 FRONT PANEL, FOR BACK LIGHTED & SCROLLING HOOD 6L00142 LENS, "PAY HERE", BACK LIGHTED HOOD 4E00358 LED LIGHT MODULE, BACK LIGHTED HOOD 5P00240 POWER SUPPLY UNIT, BACK LIT HOOD, 12 VDC...
-
Page 96: Appendix A. Custom Entry Template
Appendix A. Custom Entry Template The user display in the Guardian XP is an alpha/numeric 2 line, 20 character per line display. The template below can be used by the machine owner to map out the possible messages you would like to display. -
Page 97: Appendix B. Setting Dispenser Type
Appendix B. Setting Dispenser Type (The Factory Default Setting for Dispenser Type is “COIN”). To make a change to the Dispenser Type feature, follow the step by step procedure outlined below. Note: The five-position switch and red selection button are located on the dispenser control board. For machines with multiple dispensers, these settings must be set on each dispenser control board for the feature to be activated. -
Page 98: Appendix D. Restrictions On Port Usage
Note: The five-position switch and red selection button are located on the dispenser control board. For machines with multiple dispensers, these settings must be set on each dispenser control board for the feature to be activated. 1. Activate the Dispenser Value programming mode by setting: Switch 1–ON;... -
Page 99: Service Center
Standard Change-Makers SERVICE CENTER Standard Change-Makers – Central Region Factory and Home Office P.O. Box 36550 Indianapolis, IN 46236-0550 3130 North Mitthoeffer Road Indianapolis, IN 46235-0550 (317) 899-6966 800-968-6955 FAX (317) 899-6977 WEB: www.standardchange.com Record these numbers here for use when ordering parts.
Need help?
Do you have a question about the Guardian GXP and is the answer not in the manual?
Questions and answers