
Subscribe to Our Youtube Channel
Related Manuals for Virax Micro Visioval 294200

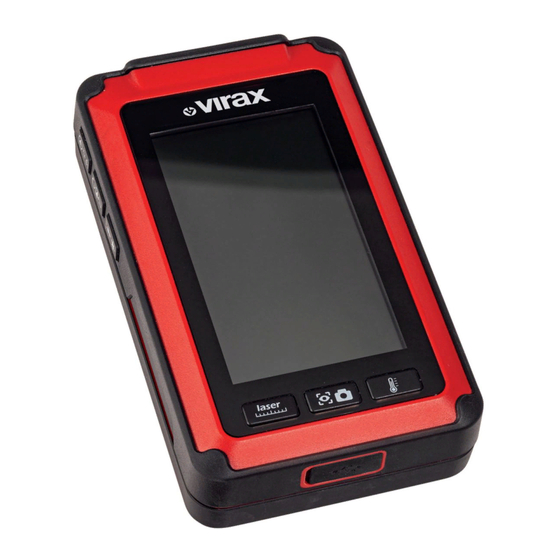
Summary of Contents for Virax Micro Visioval 294200
- Page 1 User manual Read carefully and keep safe for future reference 5 in 1 camera Original operating manual Micro Visioval® Ref. 294200...
-
Page 2: Table Of Contents
Table of contents Scope of delivery / parts list ........................General ................................... Read and keep the user manual carefully ................Symbols used in this manual ....................... Safety ....................................Proper use ................................Residual risk ................................. General safety instructions ........................Safety warnings for batteries ........................ - Page 3 Usage - Camera recording ........................Switching the LED camera light on / off ..................Zooming ..................................Setting the display alignment ....................... Adjusting background brightness ..................... Colour change ..............................Freezing images ............................... Seeing images ..............................Deleting images ..............................Transferring images ............................Usage - Distance measurement ......................
-
Page 4: Scope Of Delivery / Parts List
Scope of delivery / parts list Scope of delivery / parts list 1. Front housing part 15. Magnetic attachment 2. Rear housing part 16. Mirror attachment 3. "LED light / laser pointer" 17. Battery compartment cover function switch 18. Tripod 4. - Page 5 Scope of delivery / parts list...
-
Page 6: General
General General Read and keep the user manual carefully This operating manual is an integral part of this 5-in-1 multi-function camera (hereafter referred to only as "inspection camera"). It contains important information on safety, usage and maintenance. Please read the operating manual carefully before using the inspection camera. Pay particular attention to the safety instructions and warnings. - Page 7 General The model name is a combination of letters and numbers: Micro Visioval ® Ref. 294200 Explanations of symbols Indicates the brightness of the LED camera light in 7 levels (the dots next to the symbols indicate the respective level). Indicates the brightness of the display in 7 levels (the number next to the symbol indicates the respective...
-
Page 8: Safety
Safety Safety Proper use The inspection camera is intended for private and DIY use only for the following purposes: - for visual examination, inspection and troubleshooting on disconnected systems and equipment. - for measuring the distance to fixed objects easily; - for contactless measurement of surface temperature. -
Page 9: Residual Risk
Safety Residual risk Residual risks cannot be completely ruled out even in case of proper use. Due to the nature of the inspection camera, the following risks may arise: - Health hazards as a result of working with toxic or harmful materials (e.g. -
Page 10: Safety Warnings For Batteries
Safety i) Do not use the camera in areas with live parts. You may get an electric shock. Before starting the work, make sure that all the circuits in the work area are switched off and secured against accidental switching on. j) Do not use the camera in areas where it may come into contact with moving parts. -
Page 11: Proper Use Of The Camera
Safety f) Do not remove the battery fluid with bare hands, use household dish-washing gloves. g) Check the condition of the contacts in the battery compartment and clean them if necessary. h) If you do not intend to use the camera for more than a month, remove the battery from the camera. -
Page 12: Before Use
Before Use Before Use WARNING! Do not use the inspection camera in a potentially explosive atmosphere. Use the inspection camera only in ambient temperatures between 10 - 40°C. Check the inspection camera and scope of delivery • Take the inspection camera and accessories out of the packaging. •... -
Page 13: Inserting / Replacing The Batteries
Before Use Inserting / replacing the batteries You need four LR6 / AA 1.5 V batteries to operate the inspection camera (included in the supply). You need to insert or replace the batteries in the following situations: - when using it for the first time; - if the status line of the display shows the battery symbol ;... -
Page 14: Mounting / Removing The Tripod
Before Use Mounting / removing the tripod For stability, the inspection camera is provided with a 1/4"-20 UNC tripod thread on the back (centre of the battery compartment • Turn the fine thread screw holder of the tripod (not included in the supply) clockwise into the tripod thread of the inspection camera. -
Page 15: Usage - General Applications
- The display shows a home screen with VIRAX logo for about 3 seconds and then switches to standby mode (indicated by the 3 modes on the display). -
Page 16: Switching The Led Work Light On / Off
Usage - General applications Switching the LED work light on / off Switching on: • Turn on the inspection camera (see chapter "Switching the inspection camera on / off"). • Press the "LED work light / laser pointer" function switch to switch on the LED work light Switching off:... -
Page 17: Switching The Laser Pointer On / Off
Usage - General applications Switching the laser pointer ON / OFF Switching on: • Turn on the inspection camera (see chapter "Switching the inspection camera on / off"). • Keep the "LED work light / laser pointer" function switch pressed for at least two seconds to switch on the laser pointer Switching off: •... -
Page 18: Mounting / Removing The Inspection Attachments
Usage - General applications Mounting / removing the inspection attachments • Coiling the flexible shaft (see chapter "Coiling / uncoiling the flexible shaft") • Select the appropriate inspection attachment is useful for locating and retrieving Magnetic attachment metallic items from places that are difficult to reach Hook and is useful for locating and retrieving... -
Page 19: Usage - Camera Recording
Usage - Camera recording Usage - Camera recording • Turn on the inspection camera (see chapter "Switching the inspection camera on / off"). • Optional: Mounting a tripod (see Chapter "Mounting / Removing the tripod") • Coiling the flexible shaft (see chapter "Coiling / uncoiling the flexible shaft") •... -
Page 20: Zooming
Usage - Camera recording Zooming The symbol at the upper right corner of the display, indicates the magnification / zoom factor in four levels. The levels are displayed by the number next to the symbol. • Press the "Zoom / UP" function switch to increase / reduce the zoom in the "Camera... -
Page 21: Setting The Display Alignment
Usage - Camera recording Setting the display alignment The symbol at the upper left corner of the display indicates the alignment of the display / camera image in 4 levels (see chapter "Explanation of symbols"). • Press the "Delete / alignment" function switch to rotate the screen alignment in the "Camera recording"... -
Page 22: Colour Change
Usage - Camera recording Colour change • Press and hold the "Delete / alignment" function switch to switch between colour and black / white view in the "Camera recording" mode. Freezing images • Press and hold the "LED brightness / DOWN" function switch for at least 2 seconds. -
Page 23: Seeing Images
Usage - Camera recording Seeing images • Press the "Playback / display brightness" function switch in the "Camera recording" mode • Select the desired image using the following function switch. - Function switch "Zoom / UP" - Function switch "LED brightness / DOWN" Deleting images •... -
Page 24: Usage - Distance Measurement
Usage - Distance measurement Please note that deleted images can not be restored. Usage - Distance measurement The measurable distance range is between 0.05 and 20 m (+/- 3mm). Use the "Zoom / UP" function switch and the "LED brightness / DOWN" function switch to define the measurement starting point. - Page 25 Usage - Distance measurement • Press and hold the "Distance measurement" selection switch - The measuring point is marked by the laser pointer with a red dot. - The reading continuously changes with the measurement point. • Release the "Distance measurement" selection switch.
-
Page 26: Usage - Temperature Measurement
Usage - Temperature measurement Usage - Temperature measurement The measurable temperature range is between -20 °C and + 350 °C. 5 memory spaces are available for temperature measurement, the reading is pushed up by one place after each measurement. The maximum recommended measuring distance is 1 m and has a ratio of 8: 1 (D:S) •... - Page 27 Usage - Temperature measurement • Press and hold the "Temperature measurement" selection switch - The measuring point is marked by the laser pointer with a red dot. - The reading continuously changes with the measurement point. • Release the "Temperature measurement" selection switch.
-
Page 28: Maintenance, Cleaning, Storage And Transport
Maintenance, cleaning, storage and transport Maintenance, cleaning, storage and transport WARNING! Remove the batteries of the inspection camera before carrying out any adjustments, maintenance or repair. Maintenance The inspection camera requires very little maintenance. Only use spare parts / accessories from the manufacturer or authorised and qualified workshops. -
Page 29: Storage
Maintenance, cleaning, storage and transport Storage • Remove the inspection attachments before storing them (see chapter "Inserting / removing the inspection attachments"). • Remove the battery before storing it (see chapter "Inserting / replacing the battery"). • Clean the inspection camera before storage. •... -
Page 30: Troubleshooting
Troubleshooting Troubleshooting Problem Possible cause Rectification The camera is The batteries are Remove the batteries and not working. inserted incorrectly. insert them properly. Pay attention to the correct polarity (see chapter "Inserting / replacing the batteries"). The batteries are dead. Replace all four batteries with new ones ( see chapter "Inserting / replacing... -
Page 31: Technical Data
Technical data Technical data Reference 294200 Display 10.92 cm/ 4.3" screen size Resolution of camera head 640 x 480 pixels Resolution of display 480 x 272 pixels Camera light 6 LEDs, white (0603x6), free group (risk group 0) according to EN 62471 Power source (4 x 1.5 V LR6 (AA) batteries) Length of flexible shaft... -
Page 32: Recycling
Do not dispose of spent batteries with the household waste, instead hand the batteries in at a designated collection point (dealership or local authority recycling facility). Declaration of conformity The EU declaration of conformity can be downloaded from www.virax.com. - Page 36 FR - Retrouvez la liste de nos distributeurs sur www.virax.com EN - Find the list of our dealers on www.virax.com IT - Trova il rivenditore Virax più vicino a te su www.virax.com ES - Encuentra el listado de distribuidores en www.virax.com PT - Encontre a lista de nossos revendedores www.virax.com...
Need help?
Do you have a question about the Micro Visioval 294200 and is the answer not in the manual?
Questions and answers