
Related Manuals for Citizen CZ-01


Summary of Contents for Citizen CZ-01
- Page 1 DIGITAL PHOTO PRINTER CZ-01 Version 1.0.0 User Guide ©2019 CITIZEN SYSTEMS JAPAN CO.,LTD.
- Page 2 WARNING Warning on power connection For the Customers in Europe For kundene i Norge...
- Page 4 For the Customer in USA For the customers in Canada For the Customers in Oceania Türkçe For the customers in Thai...
- Page 5 Safety precautions Remodeling Copyright CITIZEN SYSTEMS EUROPE GmbH Germany (Stuttgart Office) U.K. (London Office) Otto-Hirsch-Brucken 17 Elizabeth House, 56-60 London Road 70329 Stuttgart, Germany Staines-Upon-Thames, TW18 4HF United Kingdom +49 (0)711 49 0320 +44 (0)20 8893 1900 Fax +49 (0)711 49 032 45...
-
Page 6: Table Of Contents
Table of Contents Introduction ..................... 7 For Safe Operation ..................7 Caution for installation ................. 10 Printer Installation ..................11 Troubleshooting .................... 23 Cleaning ......................28 Repacking ...................... 30 ....................31... -
Page 7: Introduction
Introduction For Safe Operation Warnings and Cautions Warning Caution Symbols... - Page 8 Warning...
- Page 9 Caution...
-
Page 10: Caution For Installation
Caution for installation... -
Page 11: Printer Installation
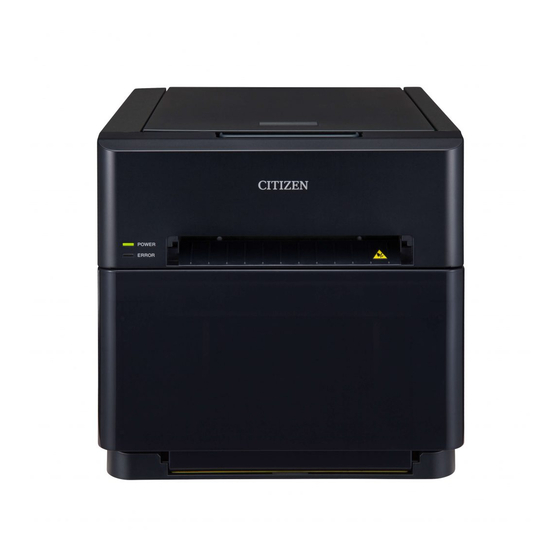
Printer Installation Checking the contents Caution... - Page 12 Name of components 5.0 V DC, 2.0 A Top door Vent Opening lever Vent Paper output Vent Trash box LEDs Power inlet Caution...
- Page 13 Connecting the power cord and a computer Make sure that the ON/OFF switch of the printer unit is set to OFF. Make sure that the power switch of the computer is set to OFF. Plug the connector of the power cord (supplied) into the printer power inlet. Plug the power cord into an outlet.
- Page 14 Media (ribbon, paper) Size Paper Ribbon Caution Removing the spacers Spacer Caution...
- Page 15 Setting the media (ribbon, paper) Pull the opening lever toward you to open the printer unit’s top door. Top door Ribbon Opening lever Caution Top door Set the new ribbon. Take-up side Supply side Rotate in the direction of the arrow to take up the slack.
- Page 16 Install the ribbon to the printer unit. New ribbon Align with the groove and then set in place Close the printer unit’s top door. Remove the printer unit’s trash box. Trash box Caution...
- Page 17 Remove the paper holder from the printer. Paper holder Caution Remove the old paper roll from the paper holder, and then set the new paper roll ensuring there are no gaps. Caution Set the roll so that there are no gaps. Set the paper so that it does not protrude from the roll.
- Page 18 Caution Set the paper holder into the printer. Remove the seal, place a hand on the paper, and rotate the paper holder in the direction of the arrow to insert the paper leading edge until the buzzer beeps. Attach the printer unit’s trash box. LEDs Trash LEDs...
- Page 19 Caution...
- Page 20 Paper tray installation Insert the paper tray into the attachment parts on the sides of the printer unit’s paper output port. Insert the tray horizontally. Lower the paper tray to set it. Caution...
- Page 21 Assembling the paper tray Align the pegs on both sides with the hooks. Insert and push the pegs into the hooks.
- Page 22 Disposing of paper scrap Remove the printer unit’s trash box. Trash box Dispose of paper scraps. Attach the printer unit’s trash box. Trash Caution...
-
Page 23: Troubleshooting
Troubleshooting Error display POWER ERROR There is... - Page 24 Solving errors Open the printer unit’s top door. Remove the ribbon from the printer unit. Perform the action corresponding to the error. The printer is jammed with paper Caution Pull out the jammed paper toward you (paper holder side).
- Page 25 Pull out the paper end toward you. Caution pair of scissors.
- Page 26 The paper cannot be pulled out toward you (paper holder side) If the paper cannot be pulled out toward you (paper holder side), open the printer unit’s top door and then pull out the paper with the following procedure. Remove the ribbon, insert a hand, and then grip the leading edge of the paper and pull it out toward you (direction of the arrow in The ribbon is caught in the printer...
- Page 27 Reattach the ribbon with tape or similar material. Rotate the take-up roller until the part a t t a c h e d w i t h t a p e c a n n o t b e s e e n anymore.
-
Page 28: Cleaning
Cleaning Platen roller Prepare a piece of gauze or other soft cloth moistened with ethyl alcohol. Perform the steps of “Setting the media (paper, ribbon)”. roller. Caution Platen roller... - Page 29 Thermal print head Prepare a piece of gauze or other soft cloth Thermal print head moistened with ethyl alcohol. Gently wipe the thermal head without touching it directly with your hands. I f t h e p r o b l e m p e r s i s ts , w i p e w i t h a polishing sheet.
-
Page 30: Repacking
Repacking... - Page 31 Model Print method Width direction Resolution Paper feed direction Print size Paper / ink ribbon set capacity Interface Dimensions (W) × (D) × (H) Weight Rated Voltage Rated Current Operating environment Customer service...