Table of Contents
Advertisement
Advertisement
Table of Contents

Subscribe to Our Youtube Channel
Related Manuals for thomann SP-120


Summary of Contents for thomann SP-120
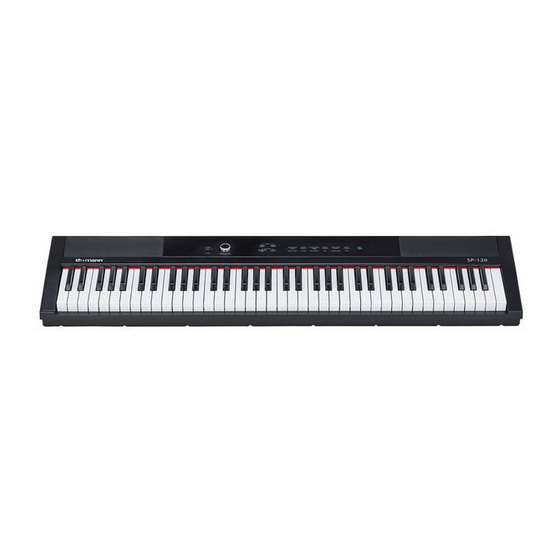
- Page 1 SP-120 digital piano user manual...
- Page 2 Musikhaus Thomann Thomann GmbH Hans-Thomann-Straße 1 96138 Burgebrach Germany Telephone: +49 (0) 9546 9223-0 E-mail: info@thomann.de Internet: www.thomann.de 26.05.2020, ID: 482377...
-
Page 3: Table Of Contents
8.3 Digital effects........................20 8.3.1 Reverb and Chorus effects..................20 8.3.2 Equalizer........................21 8.4 Metronome........................21 8.5 Transposing........................22 8.6 Layer mode........................23 Troubleshooting........................25 Technical specifications....................26 MIDI implementation chart..................... 28 Function button allocation....................30 Protecting the environment................... 33 SP-120... -
Page 4: General Information
1.1 Further information On our website (www.thomann.de) you will find lots of further information and details on the following points: Download This manual is also available as PDF file for you to download. -
Page 5: Symbols And Signal Words
NOTICE! This combination of symbol and signal word indicates a possible dangerous situation that can result in mate‐ rial and environmental damage if it is not avoided. Warning signs Type of danger Warning – danger zone. SP-120... -
Page 6: Safety Instructions
Safety instructions Safety instructions Intended use This device is intended to be used for electronic sound generation using a piano key‐ board. Use the device only as described in this user manual. Any other use or use under other operating conditions is considered to be improper and may result in per‐ sonal injury or property damage. - Page 7 Ensure that proper polarity is observed when inserting batteries. NOTICE! Possible damage by leaking batteries Leaking batteries can cause permanent damage to the device. Take batteries out of the device if it is not going to be used for a longer period. SP-120...
-
Page 8: Features
Features Features The digital piano is characterized by the following features: 73 light weighted keys 12 selectable timbres Polyphony: 32-voice Layer mode Reverb and Chorus effects Integrated metronome 12 Demo songs, playback tempo adjustable Connections: Headphones, USB to host (MIDI / audio), LINE OUT (L / R), sustain pedal Voltage supply: Via the supplied power adapter or with 6 D-cells (LR20, 1.5 V) digital piano... -
Page 9: Installation
Use of stands When mounting the device onto a stand, ensure that the stand is in a safe and stable position and that the weight of the device does not exceed the maximum permissible load capacity of the stand. SP-120... - Page 10 Installation Assembly overview Control panel Main switch Holes for music stand Claviature digital piano...
- Page 11 Installation SP-120...
-
Page 12: Connection Options
Connection options Connection options Headphones The headphones output is located on the rear side of the device. Connecting headphones (not supplied) to the headphones output mutes the speakers. Pedal Connect the supplied Sustain pedal to the provided connector on the rear side of the device. -
Page 13: Control Panel And Connections
[GRAND PIANO / BRIGHT PIANO] Voice selection button Grand Piano / Bright Piano [E.PIANO 1 / E.PIANO 2] Voice selection button EPIANO1 and EPIANO2 [CHURCH ORGAN/ROCK ORGAN] Voice selection button Church Organ / Rock Organ [STRINGS/BASS] Voice selection button Strings / Bass SP-120... - Page 14 Control panel and connections [VIBRAPHONE/HARPSICHORD] Voice selection button Vibraphone and Harpsichord [GUITAR/CHOIR] Voice selection button Guitar and Choir accompaniment 8 [BANK] Toggle button to change the sound banks Connection box 9 [USB TO HOST] USB interface to connect a computer 10 [SUSTAIN] Sustain pedal connection.
-
Page 15: Operating
Press and hold [METRONOME] and [TEMPO] simultaneously to enter Edit mode. ð The LEDs of the buttons [METRONOME] and [TEMPO] light up. Press and hold [F#1], [G#1] or [A#1] to adjust the touch sensitivity according to the table below. SP-120... -
Page 16: Master Tuning / Midi Functions
Operating The device automatically exits the edit mode. ð The LED of the button lights up. Setting Meaning ‘F#1’ Soft (0...30) In this setting, the volume is lower than usual even when playing with a hard touch. ‘G#1’ Normal (31...70) This setting corresponds to the usual touch response of a key‐... -
Page 17: Midi Panic Button
‘Local: OFF’ – built-in sound system deactivated (double key touch sound). Press and hold [METRONOME] and [TEMPO] simultaneously to exit the Edit mode. When switching off the built-in sound system, the speakers as well as the line and headphones output are switched off. SP-120... -
Page 18: Reset To Factory Defaults
Operating 7.5.5 Reset to factory defaults Resetting to factory defaults clears the battery-powered memory and resets all func‐ tions to the factory defaults, as they existed on delivery. To reset the piano to factory defaults, proceed as follows: Switch off the device. Press and hold [REVERB] and [CHORUS] simultaneously and turn the piano on. -
Page 19: Functions
To select the second demo track that is stored on the selection button, first press [BANK]. ð The LED of the button lights up. Press one of the selection buttons again to select the demo track in the second row. Press [REVERB] and [CHORUS] again simultaneously to stop playback. SP-120... -
Page 20: Digital Effects
Functions 8.3 Digital effects 8.3.1 Reverb and Chorus effects The sound of the digital piano can be modified by the built-in Reverb and Chorus effect. The effects are retained even if the device is switched off. Press [REVERB] or [CHORUS] to switch to the Edit mode. ð... -
Page 21: Equalizer
ð The LEDs of the buttons [METRONOME] and [TEMPO] light up. Use the key [G#0] to select the desired time signature: 2/4, 3/4, 4/4, 5/4, 6/8, 9/8 or 12/8. Standard value is set to 4/4. Press and hold [METRONOME] and [TEMPO] again simultaneously to exit the Edit mode. SP-120... -
Page 22: Transposing
Functions Setting the Metronome volume Proceed as follows to adjust the volume: Press and hold [METRONOME] and [TEMPO] simultaneously to switch to Edit mode. ð The LEDs of the buttons [METRONOME] and [TEMPO] light up. Press the key [F#0] to switch to the Volume menu for the main layer. Now you can adjust the volume in 73 note steps from 0…127. -
Page 23: Layer Mode
Then press a second selection button (e.g. [STRINGS]) to get a layer effect on the second bank. ð The LEDs of both selection buttons light up. If two voices are selected on the same key, the LED of this key flashes. SP-120... - Page 24 Functions Adjusting the volume in the main layer (voice 1) To adjust the main layer volume proceed as follows: Keep [METRONOME] and [TEMPO] pressed to enter Edit mode. ð The LEDs of the buttons [METRONOME] and [TEMPO] light up. Press the key [C#] to switch to the volume menu for the main layer. Now you can adjust the volume in 73 note steps from 0…127.
-
Page 25: Troubleshooting
On activating, the display shows ‘Local On’ . Malfunction occurs when using a mobile phone. Using a mobile phone near the digital piano can cause inter‐ ference. To prevent this, turn off the mobile phone or use it only at a safe distance. SP-120... -
Page 26: Technical Specifications
Technical specifications Technical specifications Input connections Voltage supply Input socket for external plug-in power supply USB port USB-to-host Sustain pedal 1 ×1/4" jack socket Output connections Headphones 1 ×1/4" jack socket MIDI port Line Out 2 ×1/4" jack socket Keyboard 73 light weighted keys and adjustable touch velocity Polyphony 32-voice... - Page 27 Technical specifications Sequencer Master keyboard functions Pitch bend Modulation wheel Number of split zones Layer function MIDI port SP-120...
-
Page 28: Midi Implementation Chart
MIDI implementation chart MIDI implementation chart Function Sent Received Notes Basic Channel Default 1 – 16 1 – 16 up to 3 channels at a time Changed 1 – 16 1 – 16 Mode Default Mode 3 Mode 3 Messages Altered ******** Note Number... - Page 29 Reset All Controllers signal, but not to the piano voices Local ON/OFF* ALL Notes OFF Active Sensing System Reset Notes: MIDI channel modes POLY OFF MONO ON OMNI ON Mode 1 Mode 2 OMNI OFF Mode 3 Mode 4 SP-120...
-
Page 30: Function Button Allocation
Function button allocation Function button allocation Select the value to be parameterised using the following table: Tuning Voice Layer Metro.V Reverb Chorus Tempo Treble Bass EQ Trans. digital piano... - Page 31 Function button allocation Tuning Voice Layer Metro.V Reverb Chorus Tempo Treble Bass EQ Trans. SP-120...
- Page 32 Function button allocation Tuning Voice Layer Metro. Reverb Chorus Tempo Treble Bass EQ Trans. × × × × × × × × × × × × × × × × × × × × × × × × × × ×...
-
Page 33: Protecting The Environment
Dispose this device through an approved waste disposal firm or through your local waste facility. When discarding the device, comply with the rules and regulations that apply in your country. If in doubt, consult your local waste disposal facility. SP-120... - Page 34 Notes digital piano...
- Page 36 Musikhaus Thomann · Hans-Thomann-Straße 1 · 96138 Burgebrach · Germany · www.thomann.de...
Need help?
Do you have a question about the SP-120 and is the answer not in the manual?
Questions and answers