Advertisement
Quick Links
Advertisement

Related Manuals for BikeYoke Divine


Summary of Contents for BikeYoke Divine
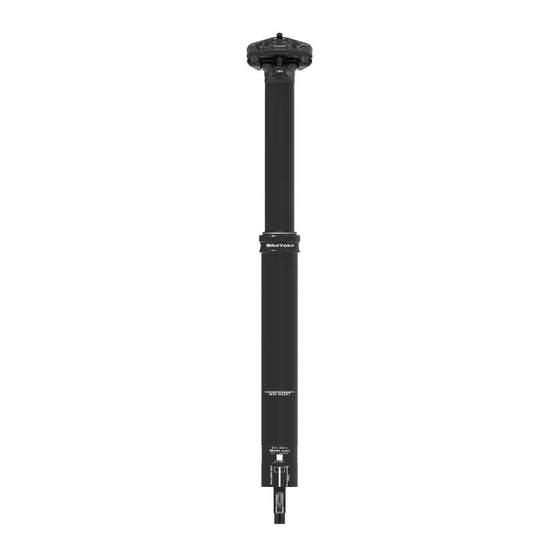
- Page 1 DROPPER POST USER MANUAL Copyright © 201 BikeYoke All Rights Reserved...
- Page 2 DIVINE USER MANUAL English 1-24 page German 26-47 page Copyright © 201 B keYoke All Rights Reserved...
- Page 3 If you need assistance locating a qualified service technician, more information can be found at www.bikeyoke.com Do not disassemble your seatpost by yourself Disassembly could cause damage and severe personally injury as some of the contents are under pressure.
- Page 4 Please read the following instructions carefully and install your DIVINE according to the steps detailed below. Your BikeYoke dropper post is precision piece of cycling equipment that requires a specific understanding of bicycle maintenance and assembly to install. If you are not...
- Page 5 BEFORE INSTALLING THE SEATPOST Please be sure that your new fit in your frame. All models are designed to fit either 30.9mm or 31.6mm seat tube inner diameters in frames originally designed for internal cable routing. Improper fit may cause slippage, faulty performance, injury or death and may result in void of warranty.
- Page 6 MINIMUM INSERTION DEPTH All seatpost models must be inserted into the bicycle’s seat tube while covering the minimum insertion line indicated on the seatpost. Insufficient insertion of the seatpost into the bicycle frame’s seat tube could MIN INSERT result in damage to the seatpost and/or bicycle and may result in a loss of control of the bicycle which...
- Page 7 SEATPOST ORIENTATION SEATPOST ORIENTATION There is only one position for seatpost direction, saddle and saddle clamp orientation. Front of Bike Rear of Bike...
- Page 8 DETERMINING CABLE HOUSING LENGTH DETERMINING CABLE HOUSING LENGTH Temporarily install the remote lever in the desired final location. The 2-by remote can be installed on either the right or left side of the handlebar. NOTE: You will use this position to determine cable length, but remove and reinstall the lever again in a later step.
- Page 9 1.5Nm barrel nut pin barrel nut pin triggy bolt I-Spec II adapter arm screw M5x6 screw M5x10 screw M5x10 I-Spec B I-Spec II...
- Page 10 With the housing and noodle in place at the remote lever, route the housing through your bicycle frame per your bicycle frame manufacturer's specifications. To determine the correct length for your housing, pull the housing to remove excess slack with the handlebars turned more than 90°...
- Page 11 Mark the location on your cable housing at the seat collar as it protrudes from the seat tube. Pull the cable housing out of the seat tube and make another mark 90mm in the direction of the handlebar. This will be your final housing length for minimum insertion depth.
- Page 12 Ferrule DETERMINING INNER CABLE LENGTH With the housing still routed through Cable Housing your frame, install the ferrule on the free end of the cable housing. Make sure to push the ferrule competely onto the cable housing. Feed the inner wire through the remote lever, ellbow noodle and cable housing.
- Page 13 Securely tighten the barrel nut using a 2mm and 3mm hex key with 2 Nm. Use a pair of cable cutters and cut the inner cable flush with the end of the barrel nut. Be careful! The ends of the inner wire might be sharp after cutting! hex key 2mm Locking...
-
Page 14: Connecting The Cable
CONNECTING THE CABLE CONNECTING THE CABLE TO THE SEATPOST Insert the barrel nut end into the actuation lever. Guide the inner cable through the slotted cable end stop and push the ferrule firmly into the cable end stop by hand. Gently pull on the outer housing and move the lever down to pass the cable end stop with the ferrule. - Page 15 INSERTING THE SEATPOST INSERTING THE SEATPOST...
- Page 16 SADDLE INSTALLATION SADDLE INSTALLATION Once you have installed your seatpost into your seat tube you will need to install your saddle. Unscrew the two saddle head clamp bolts, barrel nuts, upper and lower floating clamp using a wrench Barrel Nut Barrel Nut Upper Saddle Clamp...
- Page 17 AIR PRESSURE When adjusting the air pressure, always wear safety glasses and gloves, since the dropper post contains high pressures and suspension fluid! Always hold your post right side up,when adjusting air pressure! Never operate the air valve,while the post is laying horizontally or upside down or you will cause suspension fluid to leal out of the post under high pressure! This can cause...
- Page 18 350psi.
- Page 19 USING YOUR SEATPOST LOWERING AND RAISING THE SADDLE To lower the saddle, push the and then weight the saddle firmly by hand or by sitting on it. Apply force only in the direction of the seat tube axis, as this will ensure smoothest action and reduce wear of pins and bushings inside the post.
-
Page 20: Safety And Maintenance
PERIODIC MAINTENANCE Your seatpost requires periodic service to maintain consistent function. Please check our website www.bikeyoke.com for detailed service intervall documents. Please see your local dealer or contact one of our service centers Routine maintenance should be done at regular intervals. - Page 21 My DIVINE moves a little bit, when I am pushing on it. measure...
- Page 22 QUICK My remote/lever is stuck and does not return, after pushing it • to the your your • post is 300psi also Make sure, the pressure is set correctly. •...
- Page 23 My post returns very slowly and/or feels sticky, especially right before top-out, although pressure is set correctly ring the using the best thing to do. ind more troubleshooting on directly.
- Page 24 A video with detailed description of how to perform a full cartridge rebuild can be found on www.bikeyoke.com. * Lifespan and the type and frequency of maintenance/service depends on many factors, such as frequency and type of use, rider weight, riding conditions and/or impacts.
Need help?
Do you have a question about the Divine and is the answer not in the manual?
Questions and answers