Advertisement
Quick Links
Download this manual
See also:
User Manual
Advertisement

Summary of Contents for Samsung SD-616E
- Page 1 Visit the Customer Support homepage of the Samsung Electronics Optical Media Solution Division (Http://samsung-ODD.com) to find out about the latest Samsung ODD firmwares and learn how to use them.
- Page 2 Introduction Front Rear Setup Installing the DVD-ROM Drive Connecting the Cables Installing the Device Driver Setting Up the Device Driver Using the Drive Using the DVD-ROM Drive Storing and Cleaning Your Discs Upgrading the Firmware Flash Memory System Requirements Troubleshooting...
-
Page 3: Safety Precautions
Always make sure that the disc does not have a crack before use. If the disc has a crack (especially around the center hole), it is recommended to make a copy immediately and use the copy instead. - Page 4 Safety Precautions Installation Place the drive on a level surface. - Failure to do so may cause the device to fall onto a hard surface, resulting in damage or malfunction. Do not place the drive in direct sunlight. Avoid low- or high-temperature environments.
- Page 5 - Do not insert a pin into the emergency opening while in operation. Do not use cracked, distorted or damaged discs. - In particular, a disc with a crack on the inner tracks may break while in use.
- Page 6 Never allow food particles or foreign substances to enter the drive casing. To protect against the risk of fire, do ot spill such liquids as alcohol and benzene on the drive. Do not disassemble, attempt to repair or modify the device without express approval as directed in the manual.
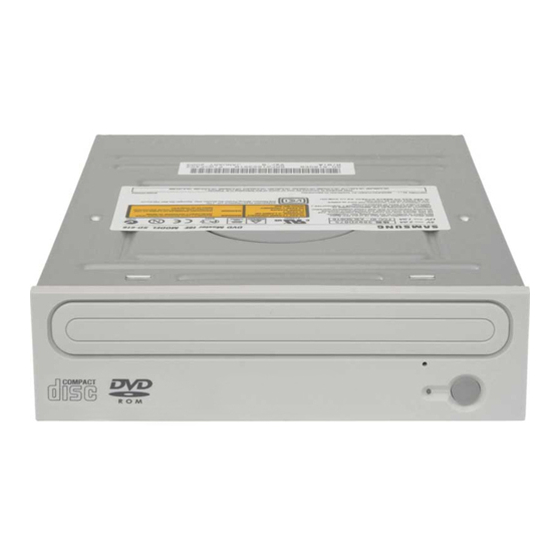
- Page 7 Introduction Front 1. Emergency eject hole. (if the compartment does not open when you press the Eject button, power off the computer, insert a pin or unfolded paper clip in the hole and push firmly) 2. Indicator Light. (When it is green, a disc is being read.) 3.
- Page 8 Introduction Rear 1. Two-pin digital audio output terminal for use with a sound or MPEG card supporting digital audio features. 2. Four-pin sound output terminal for use with a sound card. (refer to the sound card documentation for further details) 3.
- Page 9 Make sure that the PC is powered off and disconnected from any power source. If necessary, attach a horizontal bracket to both sides of the drive. Remove the cover from a free expansion slot and install the DVD-ROM drive, as shown in the illustration.
- Page 10 Setup Connecting the Cables Connecting the power cable The 4-pin power cable from the internal power unit of your computer must be connected to the power terminal on the rear of the DVD-ROM drive. A - Cut Side Note: An improperly connected power cable may cause trouble. Check the direction of the power connector and the incline side of the DVD-ROM drive before connecting.
- Page 11 : Secondly 1 If there is two DVD-ROM drive, select MA (Master) / SL (Slave). a : Master Drive (Choose the MA Jumper) b : Slave Drive (Choose the SL Jumper) c : Hard Drive e : Primary 1...
- Page 12 If the jumper is connected to SL (Slave), it will work in the Slave mode. If the jumper is connected to CS (CSEL), you can control the device by using the host interface signal CSEL. (In general, connection to MA is recommended.)
- Page 13 Installing the Device Driver No additional device driver is needed for Windows 98/2000/ME/XP/NT4.0, as the default Windows device driver is used. You can check that the DVD-ROM drive has been correctly detected by Windows. To do so, proceed as follows.
- Page 14 Setup Setting Up the Device Driver The device driver is located in the Ddriver folder of the User's Guide disc with is provided in the package. This device driver is to recognize a DVD-ROM drive on Dos mode. This driver should be applied for DOS mode user to install on Windows 98 or Windows ME only.
-
Page 15: Using The Drive
Using the Drive Using the DVD-ROM Drive To play audio or video CDs and / or DVDs in your DVD-ROM drive, proceed as follows. Push the power button and boot the computer. After booting the computer, open the disc compartment by pressing the Eject button. - Page 16 Do not touch the surface of a disc; hold it by the edges. To clean a disc, polish lightly from the inside of the disc to the outside with a soft cotton cloth. Do not leave the disc compartment open when you are not using it.
- Page 17 Using the Drive Upgrading the Firmware Flash Memory The product firmware can be upgraded by downloading the updated file from the following Web site: http://samsung-ODD.com Http://samsung.com...
- Page 18 Disk space Windows version The RPC feature is supported on DVD players and is used with DVD-video discs (such as movies). Currently, the motionpicture industry has divided the worldinto different regions or zones thatcorrespond to the regional markets intowhich the motion picture industry releasesmovies. Simply put, RPC codes are placedon movies marketed throughout the world,based on the region of the world inwhich they are being sold.
-
Page 19: Troubleshooting
Clean the disc and try again. The interface mode of the sound card is AT-BUS. You must therefore connect the DVD-ROM drive to the IDE port on the PC mother board, rather than to the sound card, or install an IDE compatible sound card. -
Page 20: Specifications
Specifications SAMSUNG continually strives to improve its products. Both the design specifications and these user instructions are thus subject to change without notice. Technical Specifications ITEM Model Name ITEM Disc Disc types supported in read mode Disc diameter DRIVE PERFORMANCE Data transfer rate Sustained : Max.


