Advertisement
Available languages
Available languages
Quick Links
Advertisement

Subscribe to Our Youtube Channel
Related Manuals for Camp Chef COVEND

Summary of Contents for Camp Chef COVEND
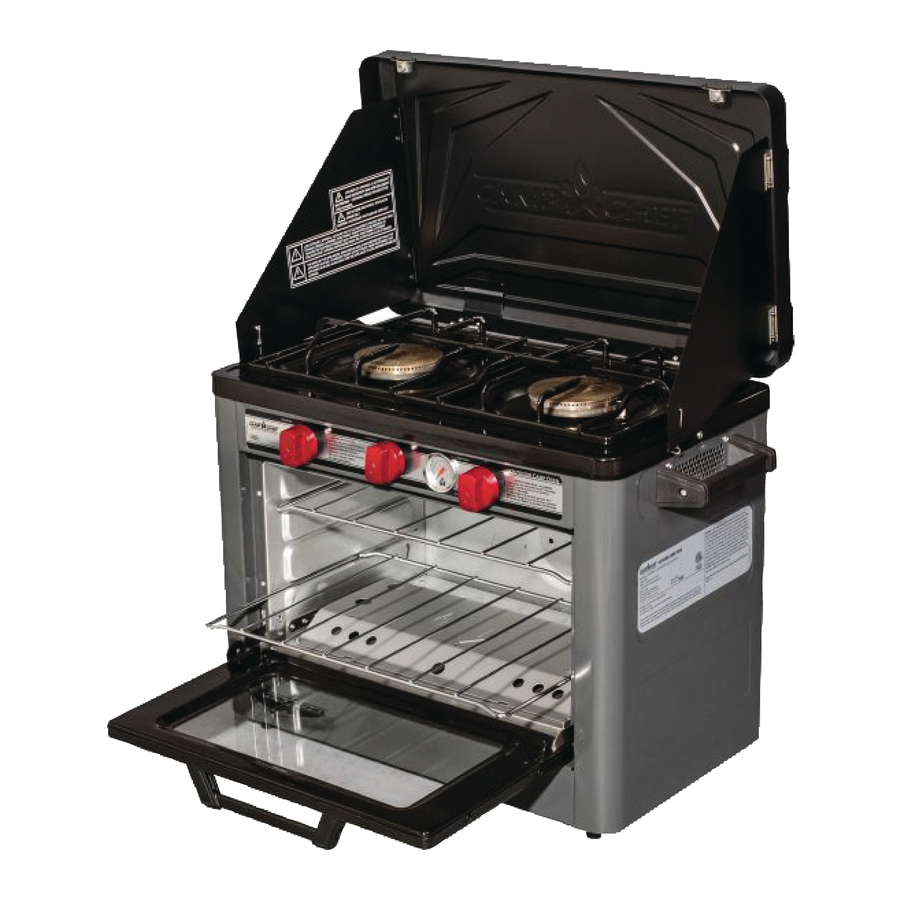
- Page 1 DELUXE OUTDOOR OVEN WARNING & INSTRUCTION BOOKLET MODEL: COVEND...
-
Page 2: For Your Safety
WARNING WARNING FOR OUTDOOR USE ONLY Take care the openings at side and rear of the appliance are not obstructed, or that air flow is restricted by placing DANGER items or other appliances close to, or CARBON MONOXIDE adjacent to openings. Do not build this HAZARD appliance into a cavity or enclosure. - Page 3 REMOTE THERMOMETER (1) COVEN - 22 RANGE IGNITER (2) COVEN - 14 WINDSCREEN CLIP (2) COVEN - 27 RANGE VALVE (2) COVEND - 1 SIDE HANDLE (2) COVEND - 2 VALVE KNOB (3) COVEND - 3 OVEN GASLINE (1) COVEN - 7...
- Page 4 Install side handles as shown. or if oil begins to smoke, IMMEDIATELY turn burner off. 12. When cooking with oil or grease, fire extinguishing materials shall be readily accessible. In the event of an oil or grease fire do NOT attempt to extinguish with water. Use a Type BC dry chemical fire extinguisher or smother fire with dirt, sand or baking soda.
- Page 5 5. Never operate stove with propane cylinder in an inverted WARNING position. • Do not use appliance until leak checked. • If you cannot stop a gas leak, immediately close LP tank valve and call LP gas supplier on your fire department! WARNING Appliance must be leak checked outdoors in well-ventilated area, away from ignition sources such as gas fired or...
- Page 6 include a collar to protect the cylinder valve. WARNING HOSE IS A TRIP HAZARD LP tank valve must have: • Type 1 outlet compatible with regulator or appliance. • Safety relief valve. • UL listed Overfill Protection Device (OPD). This OPD safety feature is identified by a unique triangular hand wheel.
- Page 7 area, away from ignition sources such as gas fired or electrical • Never attempt to attach this appliance to the self-contained appliances. During leak test, keep appliance away from open LP gas system of a camper or trailer or motor home. flames or sparks.
- Page 8 opening the control valve. twice a month). NOTE: Water or air pressure will not normally clear a spider web. Lighting Oven Instructions: WARNING DO NOT lean over the Oven while lighting. 1. Remove all appliances from the oven to create a free flow of All cleaning and maintenance should only be done when the air.
-
Page 9: Limited Warranty
Camp Chef No-Hassle Warranty remove water before being immersed in the fryer. Here at Camp Chef we stand by our products and take pride • Be sure thermometer is in good working condition. To check in our customer service. Because of this, your new Camp the thermometer, insert it into a pot of boiling water and Chef product comes with a No-Hassle Warranty. - Page 10 | 1.800.650.2433 • Camp Chef is a registered trademark of Logan Outdoor Products ©2018 • 3985 N 75 W, Hyde Park, UT 84318, USA • Made in China 0118_COVEND_TRIBOOK...
- Page 11 DELUXE FOUR D'EXTERIEUR MODE D’EMPLOI & AVERTISSEMENTS MODÈLES : COVEND...
- Page 12 AVERTISSEMENT AVERTISSEMENT DESTINÉ UNIQUEMENT À UNE Assurez-vous que les orifices latéraux et arrière de l’appareil ne sont pas UTILISATION EN EXTÉRIEUR obstrués, ou que la circulation de l’air n’est pas restreinte par des objets ou DANGER d’autres appareils placés trop près des RISQUE LIÉ...
- Page 13 COVEND PARTS LIST GRILLE PORTE-PLATS (1) COVEN - 33 BRÛLEUR DU RÉCHAUD (2) COVEN - 29 ALLUME-GAZ DU RÉCHAUD (2) DETENDEUR (1) COVEN - 14 SPG25 - 17 ROBINET DU RECHAUD (2) THERMOMETRE (1) COVEND - 1 COVEN - 22...
- Page 14 Installez la poignée latérale comme indiqué. savonneuse indique une fuite. Ne pas utiliser l’appareil en cas de fuite. Remplacer les pièces défectueuses. 9. Éteindre toute flamme nue avant de raccorder l’alimentation en gaz à l’appareil et avant d’effectuer le test d’étanchéité. 10.
- Page 15 bouteilles de propane jetables de 465 g (16,4 oz). Utiliser uniquement des bouteilles portant la mention « propane ». Les bouteilles de propane jetables doivent être débranchées du four pendant l’entreposage. Des bouteilles en vrac de GPL rechargeables d’une capacité maximale de 9 kg (20 livres) peuvent également être utilisées avec un adaptateur facultatif pour réservoir en vrac.
- Page 16 Retrait, transport et entreposage de la bouteille de GPL • Avant d’ouvrir le robinet du réservoir de GPL, vérifier que • Placer tous les boutons de réglage en position OFF et l’écrou de raccord est bien serré. Lorsque l’appareil ne sert pas, fermer le bouton de réglage et le robinet de la bouteille fermer le robinet de la bouteille de GPL.
- Page 17 Test d’étanchéité de la bouteille de GPL anti-débordement est identifiable par un volant de Pour votre sécurité manœuvre triangulaire reconnaissable. Utiliser uniquement les bouteilles munies de ce type de robinet. La bouteille de • Il est obligatoire d’effectuer le test d’étanchéité chaque fois que la bouteille de GPL est remplacée ou a été...
- Page 18 3. Attacher l’adaptateur à la bouteille. 3. Laisser la flamme s’éteindre d’elle-même. 4. Quand la flamme est éteinte, fermer les boutons de réglage de l’appareil. 5. Enlever l’adaptateur. Leak Check Leak Check 4. Tourner l’écrou de raccordement dans le sens des aiguilles d’une montre jusqu’à...
- Page 19 8. Régler les boutons de réglage jusque la position désirée. AVERTISSEMENT 9. Si l’allumage ne se produit pas dans les 5 secondes, éteindre le(s) bouton(s) de réglage du brûleur, attendre Toutes les opérations de nettoyage et d’entretien peuvent 5 minutes, et recommencer la procédure d’allumage. Si uniquement être effectuées lorsque l’appareil est refroidi l’allume-gaz intégré...
- Page 20 centimètre (1/2 pouce) de l’extrémité du thermomètre soit plongé dans l’huile. Repositionner le thermomètre au besoin au cours de la cuisson. Continuer à utiliser le thermomètre jusqu’à ce que le brûleur soit éteint. Friture : • Suivre les instructions fournies par le fabricant de l’appareil. •...
-
Page 21: Garantie Limitée
La responsabilité de Camp Chef prend fin au moment de l’expiration de la présente Garantie. Il n’existe aucune autre garantie expresse ou tacite. - Page 22 | 1.800.650.2433 • Camp Chef is a registered trademark of Logan Outdoor Products ©2018 • 3985 N 75 W, Hyde Park, UT 84318, USA • Made in China 0118_COVEND_TRIBOOK...
- Page 23 DELUXE HORNO AL AIRE LIBRE ADVERTENCIA E INSTRUCCIONES MODELO: COVEND...
- Page 24 ADVERTENCIA ADVERTENCIA SÓLO PARA USO EXTERNO Este producto contiene un componente químico que se conoce en el setado de California como cáusante de cáncer. PELIGRO RIESGO DE MONOXIDO ADVERTENCIA DE CARBONO Tenga cuidado de las aberturas en el lado y la parte trasera del aparato no están obstruidas, o que el flujo de aire está...
- Page 25 ENCENDEDOR ESTUFA (2) COVEN - 14 TERMÓMETRO (1) COVEN - 22 VÁLVULA DE ESTUFA (2) PARABRISAS CLIP (2) COVEND - 1 COVEN - 27 MANGO LATERAL (2) COVEND - 2 VÁLVULA DE HORNO (1) LÍNEA DE GAS HORNO (1) COVEN - 9...
- Page 26 Instale los mangos laterales como se muestra. 11. Nunca permita que la temperatura del aceite o grasa llegue a calentarse más de 400ºF o 200ºC. Si la temper-atura excede de 400ºF (200ºC), o si el aceite empieza a tener humo, INMEDIATAMENTE apague el quemador. 12.
- Page 27 del departamento de E.U. de transportacion o transporte de Canada CAN/CSA B339. WARNING • No use el aparato hasta que no haya revisado si hay fuga. • Si no puede parar la fuga de gas, ¡inmediatamente cierre la válvula del tanque LP y llame al proveedor de gas LP o a al cuerpo de bomberos! ADVERTENCIA Desmontaje Disponible Cilindro de Propano...
- Page 28 Tubos para el Transporte de Mercancías Peligrosas. • El cilindro de propano usado con este aparato debe incluir un collar para proteger la válvula del cilindro. La válvula del tanque LP debe tener: • Salida tipo 1 compatible con el regulador o aparato. •...
- Page 29 3. Asegúrese que el regulador esté firmemente conectado al ADVERTENCIA tanque LP. Aparato debe ser comprobado por fugas al aire libre en un lugar bien ventilado, alejado de fuentes de ignición, tales como artefactos a gas o eléctricos. Durante la prueba de fugas, mantenga aparato alejado de llamas o chispas.
- Page 30 Encendido con encendedor giratorio: No incline la cocinilla LP mientras está encendiendo. 1. Quite todos los aparatos del quemador para tener un flujo Apagado de la cocinilla LP de aire libre. • Gire todos los botones a la posición APAGADO. APAGUE el 2.
- Page 31 • Clip • Cepillo de púas de metal suave Limpieza del componente: El quemador deve ser limpiado con un trapo mojado con agua caliente y javon. Y un cepillo suave puede ser usado. Reemplace los quemadores corroídos o dañados que emitirían gas en exceso.
-
Page 32: Garantía Limitada
La garantía se aplica solamente a los estados contiguos de EE.UU. www.CampChef.com | 1.800.650.2433 • Camp Chef is a registered trademark of Logan Outdoor Products ©2018 • 3985 N 75 W, Hyde Park, UT 84318, USA • Made in China 0118_COVEND_TRIBOOK...
Need help?
Do you have a question about the COVEND and is the answer not in the manual?
Questions and answers