Table of Contents
Advertisement
Quick Links
Advertisement
Table of Contents

Related Manuals for Alcoa 200


Summary of Contents for Alcoa 200
- Page 1 NSTRUCTION ANUAL ODEL NEUDRAULIC NSTALLATION 07-21-2009 HK154...
- Page 2 0.075 m/s 2 Uncertainty, K: Values measured and determined according to ISO 8662-1, ISO 5349-2, and EN 1033 Test data to support the above information is on file at Alcoa Fastening Systems, Industrial Products Group, Kingston Operations, Kingston, NY, USA.
-
Page 3: Table Of Contents
200 Series Tooling Alcoa Fastening Systems ONTENTS ONTENTS EC D ......2 ECLARATION OF ONFORMITY . -
Page 4: Afety
200 Series Tooling Alcoa Fastening Systems AFETY AFETY This instruction manual must be read, Mounting hardware should be checked at the beginning of each with particular attention to the following shift/day. safety guidelines, by any person servic- 10. Make sure proper power source is used at all times. -
Page 5: Description
200 Series Tooling Alcoa Fastening Systems ESCRIPTION ESCRIPTION Description Page General............................1 Specifications ..........................1 Outline Drawing ........................2 Principle of Operation........................3 Operation Sequence as Double Action Tool ..............3 Operation Sequence as Single Action Tool ................3 Preparation and Use Preparation ..........................4 Use ............................5 Filling and Bleeding ........................5... -
Page 6: Specifications
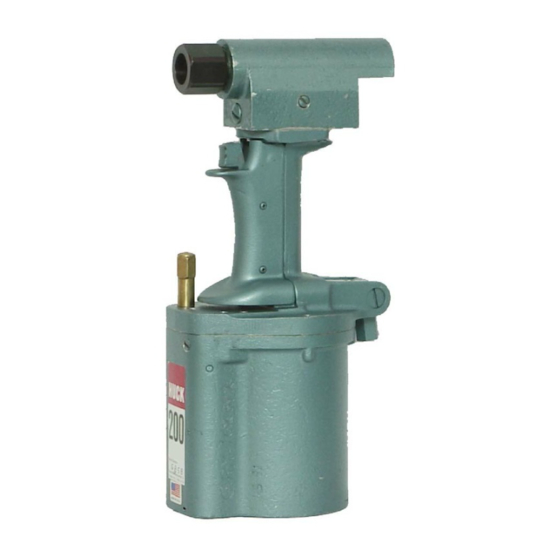
200 Series Tooling Alcoa Fastening Systems PECIFICATIONS PECIFICATIONS Length (overall) ........71/2 inches ............190 mm Height (overall) ........13-7/8 inches............352 mm Width (head) ..........2 inches ............51 mm Width (cylinder) ........4.3/4 inches ............121 mm Weight 10-1/2 pounds........4.8kg Stroke ..........1-3/16 inches ............30 mm Air Required ..........18CFM@ ............009 m3/s... -
Page 7: Principle Of Operation
200 Series Tooling Alcoa Fastening Systems RINCIPLE PERATION RINCIPLE PERATION Operation as A Double Action Tool When the tool is connected to an air supply and the trigger (3-31) is depressed, air pressure acts on the air piston (3-44) and moves it for- ward. -
Page 8: Preparation And
(See Good Services Practices.) in HUCK INSTALLATION EQUIPMENT DATA or available separately from your Huck representa- The Model 200 Huck Installation Tool is shipped with tive. a plastic plug in the swivel air inlet connector (3-4). This connector has 1/4-18 female pipe threads to 9. -
Page 9: Leeding
LEEDING ILLING LEEDING The Model 200 Tool does not require filling and bleed- 6. Turn unit switch ON. Adjust relief valve to 50-60 psi. Hold tool in all positions until air bubbles stop flowing in ing often. When it is necessary, due to loss of fluid RETURN tube. -
Page 10: Fill And Bleed Unit 970-100
200 Series Tooling Alcoa Fastening Systems Fig. 8 Fill & Bleed Unit 970-100... -
Page 11: Valve
200 Series Tooling Alcoa Fastening Systems ETTING HECKING HIFT ALVE ETTING HECKING HIFT ALVE SING HIFT ETTING SING HIFT ETTING - KIT 107569 (F - KIT101300 (F - KIT 107569 (F - KIT101300 (F REFERRED ETHOD LTERNATE ETHOD REFERRED ETHOD... -
Page 12: Shift Setting Kit 107569
200 Series Tooling Alcoa Fastening Systems Fig. 9 Using Shift Setting Kit 107569... -
Page 13: Shift Setting Kit 101300
200 Series Tooling Alcoa Fastening Systems Fig. 10 Using Shift Setting Kit 101300... - Page 14 RESSURES HIFT When used to install double action fasteners, the shift valve of the Model 200 H.I.T. must be adjusted to insure the proper installation of various fasteners. Two methods of checking the shift valve setting are available: Method #1: Shift Setting Kit No. 107569 employs a Skidmore-Wilhelm Tension Tester to check the spindle Load at shift, in pounds.
-
Page 15: Maintenance
PREVENTIVE MAINTENANCE specifically in servicing the Model 200 Huck Installation Tool. (See notice inside back cover of this The 200 Huck Installation Tool is a production tool, manual.) A clean, well-lighted area should be avail- requiring a minimum amount of maintenance. -
Page 16: Troubleshooting
200 Series Tooling Alcoa Fastening Systems ROUBLESHOOTING ROUBLESHOOTING TOOL MALFUNCTION CAUSE AND TOOL MALFUNCTION CAUSE AND I. Check valve (13-10) for leakage. Clean valve and REMEDY REMEDY reseat ball (2-51) by tapping. If ball or seal (2-2B) are damaged, replace. -
Page 17: Air Leakage
200 Series Tooling Alcoa Fastening Systems EAKAGE AUSE EMEDY EAKAGE AUSE EMEDY A. Trigger linkage not properly adjusted. With air on L. Socket head screws loose. Tighten. tool and trigger in idle position, it should have some free motion before actuating air valves. With M. - Page 18 200 Series Tooling Alcoa Fastening Systems ERVICE NOTES...
- Page 19 200 Series Tooling Alcoa Fastening Systems Fig. 13 Sectional View...
- Page 20 200 Series Tooling Alcoa Fastening Systems Fig. 12 Miscellaneous Valves...
-
Page 21: Hydraulic Fluid Leakage
200 Series Tooling Alcoa Fastening Systems YDRAULIC LUID EAKAGE AUSE YDRAULIC LUID EAKAGE AUSE EMEDY EMEDY A. Hydraulic fluid reservoir diaphragm (4-4) leaking. H. O-rings and/or quad rings leaking. Remove gland Replace. (2-7) and shift piston (2-12). Replace internal and external rings as required. - Page 22 200 Series Tooling Alcoa Fastening Systems Fig. 1 Major Subassemblies...
-
Page 23: Isassembly
200 Series Tooling Alcoa Fastening Systems AJOR UBASSEMBLIES AJOR UBASSEMBLIES ISASSEMBLY ISASSEMBLY 1. Connect to air supply. HEAD ASSEMBLY FROM HANDLE ASSEMBLY 2. Depress trigger and remove air supply. (this 1. Remove four socket head cap screws (1-3). moves the air and hydraulic pistons to their full stroke position). - Page 24 200 Series Tooling Alcoa Fastening Systems SSEMBLY SSEMBLY HEAD ASSEMBLY TO HANDLE ASSEMBLY 11. Reassemble adjusting screw (4-30). Screw in just far enough put some pressure on the spring. 1. Assemble new O-ring (2-5) and new back-up ring (2-6) to pilot of head (2-1).
- Page 25 200 Series Tooling Alcoa Fastening Systems Fig. 2 Head Assembly 100366...
- Page 26 200 Series Tooling Alcoa Fastening Systems O-ring AS568-111 Back-up Ring S-11248-111 100369 100370 111072...
- Page 27 200 Series Tooling Alcoa Fastening Systems 110558 100833 Button Bleeder 100386 100392...
- Page 28 200 Series Tooling Alcoa Fastening Systems ISASSEMBLY SSEMBLY ISASSEMBLY SSEMBLY HEAD DISASSEMBLY Check O-ring (2-50) for damage. Do not re- move ball check seat (2-2B) unless it appears Normally, it should not be necessary to completely to be damaged. disassemble the head assembly. However, in time the O-ring seals may wear and the tool will not function at 8.
- Page 29 200 Series Tooling Alcoa Fastening Systems Fig. 3 Handle & Piston Assembly 101103...
- Page 30 200 Series Tooling Alcoa Fastening Systems Handle and Piston Assembly Table 3 - Parts List...
- Page 31 200 Series Tooling Alcoa Fastening Systems Lock Nut...
- Page 32 200 Series Tooling Alcoa Fastening Systems ANDLE ISASSEMBLY SSEMBLY ANDLE ISASSEMBLY SSEMBLY HANDLE DISASSEMBLY 7. Hand grip (3-32) is removed by unscrewing four screws (3-33). Push out pins (3-30) and The handle and piston assembly contains a four remove trigger (3-31) and lever (3-29). Re-...
- Page 33 200 Series Tooling Alcoa Fastening Systems Fig. 4 Cylinder Assembly 100875...
- Page 34 200 Series Tooling Alcoa Fastening Systems Cylinder Assembly Table 4 - Pasts List...
- Page 35 200 Series Tooling Alcoa Fastening Systems YLINDER ISASSEMBLY SSEMBLY YLINDER ISASSEMBLY SSEMBLY CYLINDER ASSEMBLY CYLINDER DISASSEMBLY Before assembling cylinder assembly, clean all The cylinder assembly contains the air cylinder components thoroughly with mineral spirits and and the shift valve components. The handle lubricate lightly with LUBRIPLATE NO.
- Page 36 200 Series Tooling Alcoa Fastening Systems YLINDER SSEMBLY CONT YLINDER SSEMBLY CONT 4. Push plunger (4-10) into upper sleeve 8. Install sleeve (4-27) loosely using Wrench (4-7). Drop into cylinder from the bottom 100878. Do not tighten sleeve as this will side of cylinder.
- Page 37 Fig. 5 NOTE Use Ref. Nos. 1 (& 6 as applicable) for Series 200 Nose Assemblies (Double Action). Use Ref. Not 1 & 2 (& 6 as applicable) & 7 for Series 352 Nose Assemblies (Single Action). Use Ref. Nos. 1, 2, 3, 4, 5 (& 6 as applicable) for Series 350 Nose Assemblies (Double Action.)
- Page 38 ODEL NSTALLATION ODEL NSTALLATION he Huck Model 200 Installation Tool is available number that includes the 200 Tool, Carrying in kit form which allows the purchase of one part Case, Nose Assemblies, etc. as shown below. Table 6: 200-52 (Ref. NSN 5130-014-1979) Part NO.
- Page 39 200 Series Tooling Alcoa Fastening Systems Table 9: 200-55 Part NO. PART NAME PART NO. PART NAME Installation Tool 83289 Outer Anvil -4 78972 Nose Assy 100V-4 83290 Thrust Bushing -4 78973 Nose Assy 100V-5 100820 Inner Anvil -5 78974...
- Page 40 Alcoa Fastening Systems CCESSORIES CCESSORIES 42-236 ERVICE ARTS Service Parts Kit 42-236 contains replacement parts needed when overhauling ONE Model 200 Tool, or forreplacing a damaged or worn 0-ring, etc. Table 10 - PARTS LIST PART# QTY PART NAME REF. NO.
- Page 41 200 Series Tooling Alcoa Fastening Systems Table 10 - PARTS LIST (Continued) PART# QTY PART NAME REF. NO. 501078 Back-up Ring S-11248-06 2-39, 2-46 501079 Back-up Ring S-11248-07 2-42 501082 Back-up Ring S-11248-10 4-11, 4-15 501099 Back-up Ring S-I 1248-27...
- Page 42 14” high. lic system. It can be used to fill and bleed a Model 200, Model 970, 10000 or 40000 Huck The unit operates on 110 volt, single phase, Installation Tool. The Fill and Bleed Unit weighs...
- Page 43 Shift Setling Kit 107569 is used to check the Carrying Case, part number 110206, is available spindle load (pounds) at shift. The tester, gage to store or carry a Model 200 Tool. and adapters are housed in a sheet metal case. Compartments are provided for storing nose assemblies and accessories.
- Page 44 SPINDLE LOADS AND HYDRAULIC PRESSURES AT SHIFT FOR HUCK MODEL 200 INSTALLATION TOOL When used to install double action fasteners, the shift valve of the Model 200 H.I.T. must be adjusted to insure the proper installation of various fasteners. Two methods of checking the shift valve setting are...
- Page 45 IMITED ARRANTIES IMITED ARRANTIES Tooling Warranty: Huck warrants that tooling and other CHANTABILITY OR FITNESS FOR USE OF ANY TOOL, items (excluding fasteners, and hereinafter referred as PART(S), OR OTHER ITEMS THEREOF NOT MANU- "other items") manufactured by Huck shall be free from FACTURED BY HUCK.
- Page 46 NOTICE: The information contained in this publication is only for One Great Connection HWB898 1003-5M general guidance with regard to properties of the products shown © 2003 Alcoa Fastening Systems 1 Corporate Drive, Kingston, NY 12401 • Tel: 800-431-3091 • Fax: 845-334-7333 • E-mail: hkitoolinfo@alcoa.com • www.alcoafasteningsystems.com...
Need help?
Do you have a question about the 200 and is the answer not in the manual?
Questions and answers