
Subscribe to Our Youtube Channel
Related Manuals for Tormach 1100M


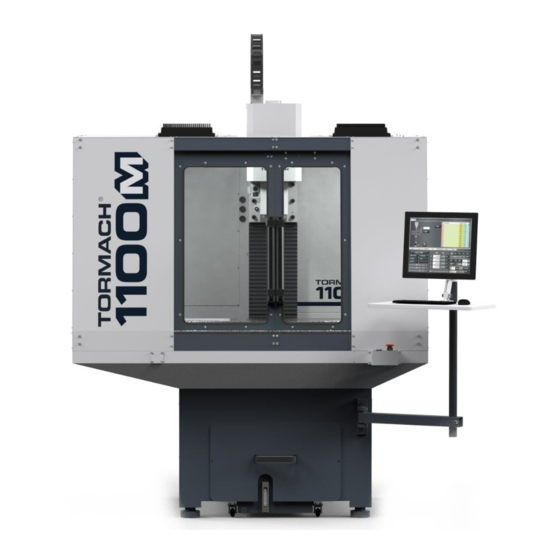
Summary of Contents for Tormach 1100M
- Page 1 TECHNICAL DOCUMENT Version 0520A OWNER'S GUIDE 1100M POWER DRAWBAR Page 1 Specifications subject to change without notice. ©Tormach® 2020...
- Page 2 TECHNICAL DOCUMENT PURPOSE This document gives instructions on installing a 1100M Power Drawbar. LOOKING FOR A VIDEO? Before you begin, select the image below to watch a walk-through video of this entire installation procedure. PRODUCT INFORMATION Product: 1100M/770M Power Drawbar Kit (PN 38436)
-
Page 3: Table Of Contents
Complete the following steps in the order listed: Prepare the Machine Disassemble the Original Drawbar Assemble the Power Drawbar Install the FRL Set Up the FRL Make Air Connections Page 3 ©Tormach® 2020 tormach.com Specifications subject to change without notice. TD10542: Owner's Guide: 1100M® Power Drawbar (0520A) -
Page 4: Prepare The Machine
1. Put on safety eyewear. 2. Open the spindle door. 3. While using one hand to support the Tormach Tooling System (TTS) collet, use the other to turn and remove the original drawbar. 4. Set the collet and the original drawbar aside. - Page 5 7. Remove the spindle lock base and its components with a 5 mm hex wrench. Figure 3: Spindle lock base from the original drawbar assembly. Page 5 ©Tormach® 2020 tormach.com Specifications subject to change without notice. TD10542: Owner's Guide: 1100M® Power Drawbar (0520A)
-
Page 6: Assemble The Power Drawbar
4. Find the eight spring washers provided. 5. Move one spring washer on the drawbar, with the convex side of the spring washer toward the drawbar head. Page 6 ©Tormach® 2020 tormach.com Specifications subject to change without notice. TD10542: Owner's Guide: 1100M® Power Drawbar (0520A) - Page 7 8. Repeat Steps 5 through 7 for the remaining six spring washers. Make sure that you put Anti-Seize on the spring washers at every contact point. Page 7 ©Tormach® 2020 tormach.com Specifications subject to change without notice. TD10542: Owner's Guide: 1100M® Power Drawbar (0520A)
- Page 8 11. Put Anti-Seize on the top of the drawbar bushing. 12. Put Anti-Seize on the bottom threads of the drawbar. Figure 8: Locations to apply Anti-Seize on the drawbar assembly. Page 8 ©Tormach® 2020 tormach.com Specifications subject to change without notice. TD10542: Owner's Guide: 1100M® Power Drawbar (0520A)
- Page 9 TECHNICAL DOCUMENT 13. Put Anti-Seize on the outside taper of the Tormach Tooling System (TTS) collet. Make sure that there is no Anti-Seize on the inside of the collet. 14. Put the drawbar assembly into the spindle. 15. While using one hand to insert the collet into the spindle, use the other to turn the drawbar into the collet.
- Page 10 20. Identify the Power Drawbar mounting surfaces inside of the spindle motor cabinet, as shown in the following image. Figure 11: Power Drawbar mounting surfaces inside of the spindle motor cabinet. Page 10 ©Tormach® 2020 tormach.com Specifications subject to change without notice. TD10542: Owner's Guide: 1100M® Power Drawbar (0520A)
- Page 11 The quick-release pin allows the Power Drawbar cylinder to pivot within the spindle motor cabinet. Figure 13: Quick-release pin inserted into the Power Drawbar cylinder's mount plate. Page 11 ©Tormach® 2020 tormach.com Specifications subject to change without notice. TD10542: Owner's Guide: 1100M® Power Drawbar (0520A)
-
Page 12: Install The Frl
9. Use the FRL bracket as a template to mark the two hole locations, and then drill two holes. 10. Install the FRL bracket on the machine with your own hardware. 11. Connect the air lines to the quick-connect bushings. Page 12 ©Tormach® 2020 tormach.com Specifications subject to change without notice. TD10542: Owner's Guide: 1100M® Power Drawbar (0520A) -
Page 13: Set Up The Frl
5. Examine the sight window for air bubbles. When there are no air bubbles in the sight window, and a drop of lubricant is on the bottom of the stem, turn the adjustment knob one-quarter turn back. Page 13 ©Tormach® 2020 tormach.com Specifications subject to change without notice. TD10542: Owner's Guide: 1100M® Power Drawbar (0520A) -
Page 14: Make Air Connections
3. Install the button box base, standoffs, and button assembly on the mill head with two M4 × 0.7 - 50 socket head cap screws. Page 14 ©Tormach® 2020 tormach.com Specifications subject to change without notice. TD10542: Owner's Guide: 1100M® Power Drawbar (0520A) - Page 15 6. Route the loose end of the Retract air line to the Power Drawbar cylinder, and then connect it to the lowest elbow fitting. Page 15 ©Tormach® 2020 tormach.com Specifications subject to change without notice. TD10542: Owner's Guide: 1100M® Power Drawbar (0520A)
- Page 16 Figure 20: Extend fitting on the Power Drawbar cylinder. 9. Use the three cable ties to secure both air lines together. Page 16 ©Tormach® 2020 tormach.com Specifications subject to change without notice. TD10542: Owner's Guide: 1100M® Power Drawbar (0520A)
-
Page 17: Adjust The Power Drawbar
This adjustment sets the highest possible drawbar tension while still allowing the Power Drawbar cylinder to release the tool. For information, see "About Drawbar Tension" (on the next page). Page 17 ©Tormach® 2020 tormach.com Specifications subject to change without notice. TD10542: Owner's Guide: 1100M® Power Drawbar (0520A) - Page 18 The tension force that is applied to the drawbar pulls the Tormach Tooling System (TTS) collet into the spindle taper, which then applies the clamping force to the Tormach Tooling System (TTS) tool.
- Page 19 4. Pull out the quick-release pin. 5. Pivot the Power Drawbar cylinder assembly to the left so that you can access the Power Drawbar cylinder's rod. Page 19 ©Tormach® 2020 tormach.com Specifications subject to change without notice. TD10542: Owner's Guide: 1100M® Power Drawbar (0520A)
- Page 20 Figure 24: Hex head screw on the Power Drawbar cylinder's rod. 7. Remove the M16 washer from the Power Drawbar cylinder’s rod, and set it aside. Page 20 ©Tormach® 2020 tormach.com Specifications subject to change without notice. TD10542: Owner's Guide: 1100M® Power Drawbar (0520A)
- Page 21 14. Find the three provided M14 flat washers. 15. Put one M14 flat washer under each mounting post on the Power Drawbar cylinder. Page 21 ©Tormach® 2020 tormach.com Specifications subject to change without notice. TD10542: Owner's Guide: 1100M® Power Drawbar (0520A)
- Page 22 Release Tool button. Never press the Release Tool button while the spindle is turning. 1. While using one hand to support the Tormach Tooling System (TTS) tool holder in the spindle, use the other to press and hold the Release Tool button.
- Page 23 Power Drawbar Spring Washer (PN 31319). Tormach Tooling System (TTS) Collet and Drawbar Using the Power Drawbar may cause these items to wear faster than with a manual drawbar. Inspect them regularly, and immediately replace any damaged items with the following:...
- Page 24 TTS Power Drawbar Cylinder Exploded View TTS Power Drawbar Cylinder Assembly Parts List Power Drawbar Push Button Exploded View Power Drawbar Push Button Parts List Page 24 ©Tormach® 2020 tormach.com Specifications subject to change without notice. TD10542: Owner's Guide: 1100M® Power Drawbar (0520A)
- Page 25 TECHNICAL DOCUMENT TTS Power Drawbar Cylinder Exploded View Page 25 ©Tormach® 2020 tormach.com Specifications subject to change without notice. TD10542: Owner's Guide: 1100M® Power Drawbar (0520A)
- Page 26 Washer, Flat, M16 (PN 31445) Screw, Flat-Head Cap, M14 × 2 - 40 (PN 38285) Tube, 1/4 in. OD, Plastic (Red) - 125 mm (PN 38408) Page 26 ©Tormach® 2020 tormach.com Specifications subject to change without notice. TD10542: Owner's Guide: 1100M® Power Drawbar (0520A)
- Page 27 TECHNICAL DOCUMENT Power Drawbar Push Button Exploded View Page 27 ©Tormach® 2020 tormach.com Specifications subject to change without notice. TD10542: Owner's Guide: 1100M® Power Drawbar (0520A)
- Page 28 Screw, Socket Head Cap, M4 × 0.7 - 50 (PN 38220) Power Drawbar Push Button Spacer (PN 38219) Decal, Power Drawbar, Release Tool (PN 37340) Page 28 ©Tormach® 2020 tormach.com Specifications subject to change without notice. TD10542: Owner's Guide: 1100M® Power Drawbar (0520A)
Need help?
Do you have a question about the 1100M and is the answer not in the manual?
Questions and answers