Table of Contents
Advertisement
Quick Links
Advertisement
Table of Contents

Related Manuals for Chromalox 2110


Summary of Contents for Chromalox 2110
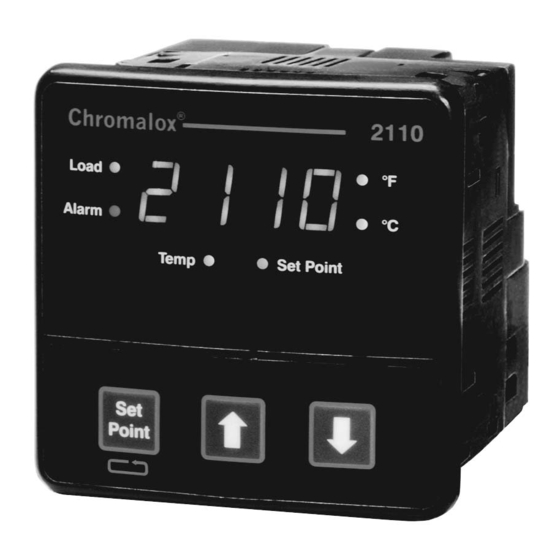
- Page 1 Instruction Manual 2110 Temperature Controller PK498-2 0037-75409 March 2020...
-
Page 2: Table Of Contents
3.1 Default Dip Switch Settings ....................4 3.2 Removing Mounting Collars ....................4 3.3 Mounting Dimensions ......................4 3.4 Mounting the 2110 ......................4 3.5 Wiring Terminal Identification..................... 4 3.6 Thermocouple Connections with Shield ................6 3.7 Three-Wire RTD Connections with Shield ................. 6 3.8 Two-Wire RTD Connections .................... -
Page 3: Quick Setup
1. Apply power to the unit. trol type and adjust the set point. 2. To adjust the set point on the Chromalox 2110 Tem- Setting the Sensor and Control Mode perature Controller, press and hold the Set Point Adjust the dip switches located on the bottom of the button (see Figure 1.2). -
Page 4: Introduction
1) Select the sen- tractive, compact design. The 2110 is housed in a rug- sor and control type, 2) Hook up the system and 3) ged, plastic 1/4 DIN package that only requires four Select the desired temperature. -
Page 5: Model Identification
Use Figure 2.3 to identify the options in your controller. Model 2110 1/4 DIN Controller, with Selectable Thermocouple or RTD Inputs Code Control Output Relay, 1 Amp Form A, 120/240Vac Relay, 20 Amps Form A, 120/240Vac... -
Page 6: Installation And Wiring
3. Installation and Wiring Sensor and Control Type Selection Mounting Switches Two mounting collars securely hold the 2110 controller in the mounting hole. Remove these mounting collars Set the Chromalox 2110 controller’s configuration via before installation. mechanical dip switches, located on the bottom of the unit. - Page 7 When driving a contactor coil or other induc- The controller will now be held firmly in place. tive load, an appropriate rated AC snubber circuit is recommended (Chromalox Part No. 0149-01305). Connect before power is applied—Make all electrical (92) (10) (12.7)
-
Page 8: Thermocouple Connections With Shield
Sensor Input Wiring Three-Wire RTD Inputs IMPORTANT: When making the three-wire RTD For safety and best controller performance, input connection, make the resistance of all • Sensor leads (thermocouple and RTD) should not three extension leadwires equal by using the be run in the same conduit as power wiring. -
Page 9: Control Output Wiring-R1 And S0
S1 (Solid State Relay, 5 Amps) and S2 (Solid State Relay, 10 Amps) Output Wiring The following figures show the proper control output Note: 2110 model S2 has a fan. 2110 model S1 does wiring for the various 2110 configurations. not have a fan. -
Page 10: Adjusting Setpoint And Configuration
4.7. The new value is set when the or button is re- 2. Apply power to the unit. leased. 3. To adjust the set point on the Chromalox 2110 Tem- 5. Press and hold the Set Point ( ) button and perature Controller, press and hold the Set Point press the button to advance to the next menu. - Page 11 Security Codes and Levels To limit access to the user configuration interface, Security Security security codes are assigned to different menu levels. Level Code Function Make security codes available to operators, mainte- Allows adjustment of the nance crew, supervisors, etc. according to what func- All Values Set Point tion level you want for each group.
- Page 12 Menu Factory Security Code Function Adjustable Range Default Level Alarm Set Point Temperature level that will ALSP 0 to 100 °F or °C actuate the alarm. Alarm Dead Band Difference of temperature ALdb from alarm set point before an active alarm 0 to 100 °F or °C resets.
-
Page 13: Controller And Alarm Operation
Cycle Time - Cycle time setting determines how often to switch the output to the heater. For example, if the cycle time is 1 second and the 2110 needs a 75% out- put, the output will be on for 3/4 of a second and off 1/4 of a second. -
Page 14: Replacing Output Modules
Control and alarm outputs can be changed in the field. heater loads directly, eliminating the need for a remote contactor or solid state relay. If a larger load is required, the 2110 can be configured with a 1A Pilot Duty Relay or Solid State Relay Drive. Module Option Descriptions... -
Page 15: Replacing Output Module
1 second (fast switching) or 30 seconds (slow switch- ing) (See table on page 17). After replacing a control output, the 2110 verifies at power up if a slow or fast cycle time output has been installed. If an output with... -
Page 16: Calibration
(736) security. Sensor Calibration: Factory Default Recovery 1. Set the 2110 selection switch to RTD or TC. If TC is This option allow you to return the controller’s configu- selected, then set the selection switch to J or K. ration parameters back to the factory default values 2. -
Page 17: Specifications
8. Specifications Control Modes ON/OFF; PI—Proportional with integral Control Adjustments Proportional Band 1 to sensor span maximum Automatic Reset 0.0 to 100.0 repeats/minute Cycle Time 0.1 to 60.0 seconds On/Off Deadband 1° to 100°F or °C Set Point Upper Limit sensor range °F or °C Set Point Lower Limit sensor range °F or °C... - Page 18 Front Panel NEMA 4X construction, requires surface finish not rougher than 0.000032 inch Influence of Line Voltage Varia- +/-0.1% of sensor span per 10% change in nominal line voltage tion Noise Rejection Common Mode Noise Less than 2°F with 240 VAC, 60 Hz applied from sensor input to earth ground Series Mode Noise Less than 2°F with 100mV, peak to peak series mode noise Typically less than 0.5% of sensor span at distance of 1 meter (3.1 feet) from a...
-
Page 19: Troubleshooting
9. Troubleshooting Note: For each symptom, perform correction steps in The following Troubleshooting Guide offers simple so- lutions to common problems and explains the 2110’s the order listed. Error Messages. Review this section for a possible so- lution to your problem before contacting Chromalox. - Page 20 Limited Warranty: Please refer to the Chromalox limited warranty applicable to this product at http://www.chromalox.com/customer-service/policies/termsofsale.aspx. Chromalox, Inc. 1347 Heil Quaker Boulevard Lavergne, TN 37086 (615) 793-3900 www.chromalox.com © 2020 Chromalox, Inc.
Need help?
Do you have a question about the 2110 and is the answer not in the manual?
Questions and answers