Advertisement
Available languages
Available languages
Quick Links
Advertisement

Summary of Contents for LichtLogistik LED Support SlimPixx
- Page 1 Manual | SlimPixx-System Bedienungsanleitung | SlimPixx-System...
- Page 2 Information and specifications in this document are subject to change without notice. LichtLogistik LED Support GmbH assumes no responsibility or liability for any errors or inaccuracies that may appear in this manual. Trademarks used in this text: „LichtLogistik LED Support GmbH" and „SlimPixx“ are registered trademarks.
- Page 3 Manual | Notice Bedienungsanleitung | Allgemeines Important Safety Information Wichtige Sicherheitshinweise In diesem Handbuch sind Anweisungen zum Schutz vor Feuer, Instructions pertaining to continued protection against fire, electric shock, Stromschlag und Verletzungen von Personen zu finden. and injury to persons are found throughout this manual. Bitte lesen Sie alle Anweisungen vor der Montage und Betrieb des Please read all instructions prior to assembling, mounting, Systems.
- Page 4 4pin LED connection cable Connect your SlimPixx LED-Sticks as you need it for your installation. Plug in the LED connection cable in your SlimPixx-controller and the first SlimPixx-stick of your installation. Connect controller to 230 VAC with the Neutrik True1 Power cable.
- Page 5 Specifications SlimPixx-Controller : Eingangsspannung: 220 VAC (85 - 220 VAC) Input voltage: 220 VAC (85 - 220 VAC) Leistung max. 400 W / 20x1000mm SlimPixx Stick Power out max. 400 W / 20x1000mm SlimPixx-Sticks LED Ausgänge: 2 Output ports: 2...
- Page 6 In general do not use more than 2m input cables from the PSU to the LEDs. This will harm the SPI Signal. For longer distances use the SlimPixx Range Extenders. Do not use extension cords between the SlimPixx-sticks without range extenders.
- Page 7 Benutzen Sie generell nie mehr als 2m Verbindungskabel zwischen Controller und dem 1. SlimPixx-Stick. Dies beeinträchtigt das SPI Datensignal. Für grössere Distanzen nutzen Sie bitte den SlimPixx Range Extender. Bitte benutzen Sie niemals Verlängerungskabel ohne Range Extender zwischen den SlimPixx-Sticks.
- Page 8 Bedienungsanleitung | Anschlussdiagramm General The SlimPixx-system will only work in one direction. Input/ Output attending to original connectors. Any attempt of using gender changers will harm your system. It is not possible to use Y-signal dividers. This will harm the SPI Signal.
- Page 9 Connect your SlimPixx-sticks to the controller and the controller to main voltage. The SlimPixx-sticks should now run a rainbow test pattern on 50% brightness. You can change this in the controller software menu afterwards. The Power1 and Power2 LEDs on your controller should now be lighting up.
- Page 10 Inbetriebnahme Ihres SlimPixx-Systems: Verbinden Sie Ihre SlimPixx-Sticks mit dem SlimPixx-Controller. Schließen Sie den Controller mittels Neutrik-Kabel an 230VAC Netzspannung an. Ihre LEDs sollten nun ein Regenbogen-Testprogramm bei 50% Helligkeit zeigen. Dies kann zu einem späteren Zeitpunkt unter den Controllereinstellungen geändert werden.
- Page 11 Manual | Controller Software Bedienungsanleitung | Controller Software Setup your controller To setup your controller with correct IP- and ArtNet address connect your PC/ Mac to the ArtNetIn of the Controller. The controller has P 192.168.0.98, Subnet 255.255.255.0, Gateway 192,168.0.1 After a reset on the controller by pressing the reset button, you also get back to this adress.
- Page 12 Bedienungsanleitung | Controllersoftware Einrichten Ihres Controllers Um Ihren SlimPixx-Controller zu konfigurieren, verbinden Sie diesen über Netzwerk mit Ihrem PC/ MAC. Der Controller besitzt folgende Adresse: IP 192.168.0.98, Subnet 255.255.255.0, Gateway 192,168.0.1. Sollten Sie Ihren Controller mittels Resetbutton auf Werkseinstellung zurücksetzen, wird der Controller wieder auf diese Adresse eingestellt.
- Page 13 Any help in configuring ART-NET please go to https://artisticlicence.com/WebSiteMaster/User%20Guides/art-net.pdf Please confirm your settings with „submit“ to send them to your controller. „ART-NET“ window Anschliessen des SlimPixx Systems Ihr SlimPixx System bietet Ihnen diverse Möglichkeiten in Anzahlen der SlimPixx und Ausgängen. Die Limitierungen liegen in der Leistung des Netzteils max 400W/ 16,6A, 4096 Kanälen der Steuerplatine...
- Page 14 Manual | Controller Software Bedienungsanleitung | Controller Software Einrichten Ihres Controllers/ ArtNet-Ausgänge Um den Controller passend zu Ihren ArtNet-Einstellungen auf Ihrer Software oder Ihrem Lichtpult einzurichten, wechseln Sie bitte auf das Fenster „ART-NET“. Hier können Sie die Nets und Subnets, sowie die Ausgangsuniversen anpassen. Wenn Sie Hilfe beim Einrichten Ihres ArtNet-Systems brauchen, empfehlen wir Ihnen, sich auf der ArtNet-Seite zu informieren.
- Page 15 LichtLogistik LED Support GmbH will not take any responsibility for that usage. Below you can adjust the step width of your LED System, from 1 (single pixel) up to 8 (one RGB fixture on your software = 8 pixel on your SlimPixx-system.
- Page 16 Manual | Turn on Bedienungsanleitung | Inbetriebnahme Selection of LED type „OUTPUT“ window Selection for step width Output configuration...
- Page 17 Hier können Sie zunächst den zu steuernden LED-Typ einstellen. Im Fall von SlimPixx wählen Sie ws2812/ws2811/sk6812. Für andere 24V LED-Systeme wählen Sie den richtigen LED/ IC-Typ aus. Eine Nutzung des SlimPixx-Controllers mit Produkten, die nicht zur SlimPixx-Serie gehören, ist nicht empfehlenswert.
- Page 18 Manual | Turn on Bedienungsanleitung | Inbetriebnahme Auswahl LED-Typ „OUTPUT“ Fenster Schrittweitenauswahl Output Einstellungen...
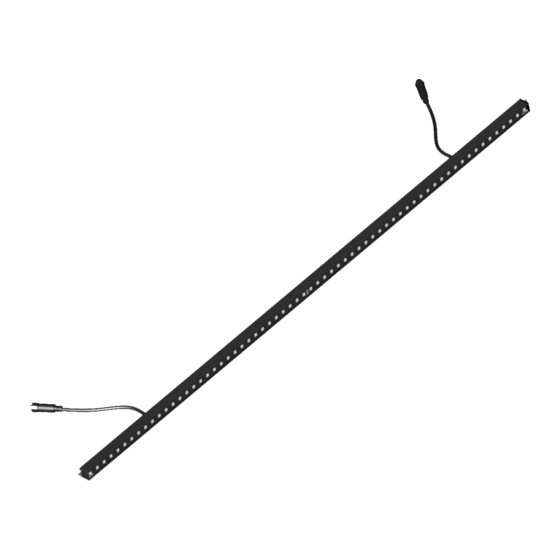
- Page 19 Your SlimPixx-stick Your SlimPixx-stick is an extremely small and compact LED Pixel effect. Provided in 1m and 0,5m version with blackface cover, you can even fit your SlimPixx with more different shapes of covers: Clear, roundcover, squarded cover. You can easily change the cover by opening the two screws of the end caps, remove end cap and cover.
- Page 20 Nutzen Sie hierfür einen SlimPixx Range Extender mit dazugehörigen Verlängerungskabeln oder SlimPixx Signalbooster. Des weiteren ist jeder SlimPixx-Stick mit zwei Nutensteinen mit je M3 und M6 Gewinde ausgestattet. Diese können Sie für eine einfache Montage nutzen. Auch besitzt jeder SlimPixx-Stick an den Enden ein Schnellverbindersystem.
- Page 21 10m. This is tested for original SlimPixx cables with diameter accordingly. The power for transmitter and receiver is provided by system voltage. No external power supply is needed. By using a range extender set max. 10pcs of SlimPixx-sticks can be connected in a row. Der Range Extender (IP20) Das Range Extender-Set bestehend aus Sender und Empfänger und ist zur Signalübertragung bei Strecken...
- Page 22 1-4m. Different to extender sets, the booster doesn’t chance signal protocol, it only refreshes the native SPI signal. The booster must be placed at the output of the last SlimPixx-stick. After that use a cable of max. 4m. SlimPixx-stick —> Signal Booster -> Cable —> SlimPixx-stick.
- Page 23 LED Signal is interrupted or stucking The SlimPixx-system is optimized for big matrix installations. The software is fitted with a sync function, in need of full ArtNet packages. As known for MA products they only send ArtNet changes. This may cause faults within the system.
- Page 24 Die SlimPixx-Sticks flackern, stocken oder ruckeln. Das SlimPixx-System ist für die Anwendung bei großen Matrizen konzipiert und deshalb mit einem internen Sync ausgestattet. SlimPixx benötigt daher komplette ArtNet-Datenpakete. Stellen Sie sicher, dass das von Ihnen gewählte Softwaresystem auch wirklich komplette Datenpakete und nicht nur ArtNet- Wertänderungen verschickt.
Need help?
Do you have a question about the SlimPixx and is the answer not in the manual?
Questions and answers