
Related Manuals for Synrad Pulstar P100 Series


Summary of Contents for Synrad Pulstar P100 Series
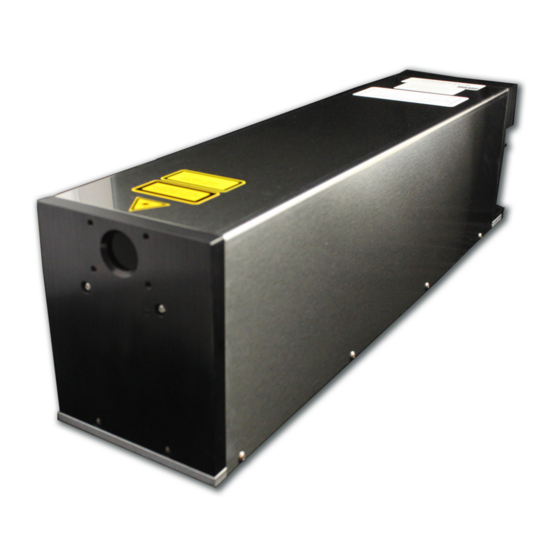
- Page 1 OEM p100 operator’s manual ® 4600 Campus Place Mukilteo, WA 98275 1.800.SYNRAD1 tel 1.425.349.3500 fax 1.425.349.3667 e-mail synrad@synrad.com web www.synrad.com...
- Page 3 Pulstar OEM p100 Operator’s Manual Version 1.0 Released April 2012 Part number 900-20388-01 ® 4600 Campus Place Mukilteo, WA 98275 1.800.SYNRAD1 tel 1.425.349.3500 fax 1.425.349.3667 e-mail synrad@synrad.com web www.synrad.com...
-
Page 5: Table Of Contents
Other connections ..................... Operation Controls and indicators ................2-2 OEM p100 front panel ....................OEM p100 rear panel ....................Start-up and pulsed operation ..............2-4 Initial start-up with UC-2000 Controller ..............Pulsed operation from PWM signal source ............... Synrad Pulstar p100 operator’s manual... - Page 6 Introduction ....................... Operational flowchart ....................4-10 Functional block diagram ..................4-11 Status LEDs ........................ 4-14 Laser fault indications ....................4-15 Resetting faults ......................4-17 General laser fault conditions ................... 4-21 Beam delivery optics ....................Index Synrad Pulstar p100 operator’s manual...
- Page 7 Figure 3-20 Pulstar p100 outline & mounting dimensions, sht 2 of 2 ..3-28 Figure 3-21 Pulstar p100 packaging instructions ........3-29 Figure 4-1 Output window replacement ..........4-6 Figure 4-2 Pulstar p100 operational flowchart ........4-9 Figure 4-3 Pulstar p100 functional block diagram ........4-10 Synrad Pulstar p100 operator’s manual...
- Page 8 Interlock open condition ............4-12 Table 4-6 Over Temperature fault ............4-13 Table 4-7 Shutter closed condition ............4-13 Table 4-8 No-Strike condition ...............4-13 Table 4-9 Pulstar p100 fault codes ............4-14 Table 4-10 Maximum duty cycle limits ...........4-21 Synrad Pulstar p100 operator’s manual...
- Page 9 Trademark/copyright information SYNRAD is a registered trademark of SYNRAD, Inc. All other trademarks or registered trademarks are the property of their respective owners. © 2012 by SYNRAD, Inc. All rights reserved. Synrad Pulstar p100 operator’s manual...
- Page 10 Warranty information This is to certify that Pulstar p100 lasers are guaranteed by SYNRAD, Inc. to be free of all defects in materials and workmanship for a period of one year from the date of purchase. This warranty does not ap- ply to any defect caused by negligence, misuse (including environmental factors), accident, alteration, or improper maintenance.
- Page 11 E-mail: synrad@synrad.com Sales and Applications SYNRAD’s Regional Sales Managers work with customers to identify and develop the best CO laser solu- tion for a given application. Because they are familiar with you and your laser application, use them as a first point of contact when questions arise.
- Page 12 This page intentionally left blank. Synrad Pulstar p100 operator’s manual...
-
Page 13: Terms
Enclose the beam path whenever possible. Exposure to direct or dif- fuse CO laser radiation can seriously burn human or animal tissue, which may cause permanent damage. This product is not intended for use in explosive, or potentially explosive, atmospheres. Synrad Pulstar p100 operator’s manual... - Page 14 Do not use air injury dusters containing difloroethane in any area adjacent to CO laser systems because difloroethane persists for long time periods over wide areas. Synrad Pulstar p100 operator’s manual...
-
Page 15: Other Hazards
This product contains components that are considered hazardous industrial waste. If a situation occurs where the laser is rendered non-functional and cannot be repaired, it may be returned to SYNRAD, Inc. who, for a fee, will ensure adequate disassembly, recycling and/or disposal of the product. -
Page 16: Pulstar P100 Label Locations
48 Volts March 07, 2012 This laser component does not comply with standards for complete laser products as specified by 21 CFR 1040.10 or IEC 60825-1. SYNRAD, Inc. 4600 Campus Place, Mukilteo WA 98275 425.349.3500 Bottom Rear GAS PURGE CLEAN AND DRY AIR... -
Page 17: Agency Compliance
Pulstar OEM p100 lasers are OEM products intended for incorporation as components in laser processing systems. As supplied by SYNRAD, these lasers do not meet the requirements of 21 CFR, Subchapter J without additional safeguards. In the U.S., the Buyer of these OEM laser components is solely responsible for the assurance that the laser processing system sold to an end user complies with all laser safety require- ments before the actual sale of the system. -
Page 18: European Union (Eu) Requirements
(ISM) equipment are fully described in 47 CFR, Part 18, Subpart C. SYNRAD’s Pulstar OEM p100 lasers have been tested and found to comply by demonstrating performance characteristics that have met or exceeded the requirements of 47 CFR, Part 18, Radiated and Conducted Emissions. - Page 19 OEM models Pulstar OEM p100 lasers are OEM products intended for incorporation as components in laser processing systems. As supplied by SYNRAD, these lasers do not meet the requirements of EN 60825-1 without additional safeguards. European Union Directives state that “OEM...
-
Page 20: Table 1 Class 4 Safety Features
Illuminates green when laser temperature is within operating limits, changing to red when thermal limits are exceeded. Warning Pulstar exterior labels Labels attached to various external housing locations to warn personnel of potential laser hazards. 1 Not available on OEM p100 lasers Synrad Pulstar p100 operator’s manual... -
Page 21: Figure 2 European Compliance Mark
Agency compliance When integrating SYNRAD’s Pulstar p100 OEM lasers, the Buyer and/or integrator of the end system is responsible for meeting all applicable Standards to obtain the CE mark. To aid this compliance process, SYNRAD’s testing program has demonstrated that Pulstar p100 lasers comply with the relevant require- ments of 2004/108/EC, the Electromagnetic Compatibility Directive, as summarized in Table 2 below. -
Page 22: Pulstar P100 Declaration Of Conformity
OEM lasers do not comply with EN 60825-1:2007, Safety of Laser Products. Buyers of OEM laser products are solely responsible for meeting applicable Directives and Standards for CE compliance and marking. Corporate Officer: European Contact: Synrad Europe Münchener Straße 2A D-82152 Planegg, Germany Dave Clarke, President of SYNRAD, Inc. Dated 6 April 2012 Synrad Pulstar p100 operator’s manual... -
Page 23: Getting Started
■ Inventory – displays and describes all components shipped with your p100 laser. ■ Mounting – describes how to attach your p100 laser to a mounting surface. ■ Connecting – explains how to connect cooling tubing, power, and control cabling. Synrad Pulstar p100 operator’s manual... -
Page 24: Introduction
Model numbers The Pulstar OEM p100 laser is the first in a new line of pulsed, high peak power lasers from SYNRAD. De- signed primarily for pulse operation, the p100 is still controlled by a PWM Command signal; however, the duty is limited to maximum duty cycle of 37.5% and a maximum pulse length of 600 microseconds (µs). -
Page 25: Unpacking
Upon arrival, inspect all shipping containers for signs of damage. If you discover shipping damage, document the damage (photographically if possible), then immediately notify the shipping carrier and SYNRAD, Inc. The shipping carrier is responsible for any damage occurring during transportation from SYNRAD, Inc. to your receiving dock. Packaging guidelines To prevent equipment damage or loss of small components, use care when removing packaging materi- ■... -
Page 26: Inventory
Gas Purge Kit ..........1 Quick Start Plug ........1 Cooling Kit ..........1 Cooling Tubing ........1 Spare Fuses (not shown) ......2 DC Power Cable Set (not shown) ..1 Final Test Report (not shown) ....1 Synrad Pulstar p100 operator’s manual... -
Page 27: Contents Description
12-mm metric cooling tubing. Spare Fuses (not shown) – fast-acting mini ATO-type fuses protects the p100’s internal circuitry. Final Test Report (not shown) – contains data collected during the laser’s final pre-shipment test. Synrad Pulstar p100 operator’s manual... -
Page 28: Mounting
Caution SYNRAD does not recommend mounting lasers in a vertical “head- down” or “tail-down” orientation. If you must mount your laser in possible this manner, please contact the factory for limitations as a vertical orientation increases the risk of damage to the laser’s output optic. -
Page 29: Mount From Above (Using Optional Mounting Feet)
(using optional mounting feet) To fasten the OEM p100 laser onto a mounting surface, you will need to purchase and install the optional p100 mounting kit, SYNRAD P/N 250-20440-01 (available separately from the factory). Attach the optional mounting feet To attach the optional mounting feet to the OEM p100 laser, perform the following steps: Carefully place the p100 laser upside down on a padded work surface with the beam exit facing towards the left. - Page 30 Insert three M6 × 1 ISO or 1/4–20 UNC fasteners through the slots/hole on the mounting feet into the corresponding threaded holes in the mounting surface. Turn the screws by hand until the threads engage. Evenly tighten all three fasteners to a maximum torque of 6.1 N m (54 in lb). Synrad Pulstar p100 operator’s manual...
-
Page 31: Connecting
If you must install new fittings, wrap the threads with teflon pipe tape and carefully tighten the fittings, making sure the maximum insertion depth is no more than 6.6 mm (0.26") into the cooling manifold. Synrad Pulstar p100 operator’s manual... - Page 32 Avoid glycol-based additives because they reduce the coolant’s heat capacity and high concentrations may affect power stability. For SYNRAD lasers, the minimum coolant setpoint is 18 °C (64 °F) so glycol is not necessary unless the chiller is subjected to freezing temperatures. If tap water is used, chloride levels should not exceed a concentration of 25 parts per million (PPM) and total hardness should be below 100 PPM.
- Page 33 70 °F (21 °C). Adjust the chiller’s temperature setpoint to 72 °F (22 °C) to prevent condensation from forming inside the laser. Caution Operating the laser at coolant temperatures above 22 °C (72 °F) may result in decreased performance and/or premature failure of electronic possible components. equipment damage Synrad Pulstar p100 operator’s manual...
- Page 34 Turn on the chiller and adjust the temperature setpoint to 18 °C to 22 °C. Regulate coolant flow to 5.7–7.6 lpm (1.5–2.0 GPM) at less than 414 kPa (60 PSI) of pressure. Closely examine all cooling connections and verify that there are no leaks. Synrad Pulstar p100 operator’s manual...
-
Page 35: 48 V Power Supply Connections
The OEM p100 laser requires a DC power source capable of supplying a minimum of 40 A at 48 VDC (65 A peak for a minimum of 800 µs). We recommend the SYNRAD PS-48 DC power supply, which can provide a maximum of 50 A at 48 VDC. AC input requirements for the PS-48 supply are 180–264 VAC, single-phase (1Ø), 12.2 A max (@ 208 VAC), 47–63 Hz. -
Page 36: Control Connections
All control connections to Pulstar p100 lasers are made through the 15-pin User I/O connector on the rear panel. The User I/O port receives power commands from SYNRAD’s UC-2000 Universal Laser Controller, or FH Flyer marking head, and also serves as the connection point for auxiliary signals between the laser and any parts handling, automation, or monitoring equipment. - Page 37 User I/O pinouts and signal descriptions. See Integrating Pulstar safety features, also in the Technical Reference chapter, for detailed instructions on integrating the Pulstar p100’s shutter, and remote interlock functions with automated control systems. Synrad Pulstar p100 operator’s manual...
-
Page 38: Other Connections
> 99.9996% purity; filtered to ISO Class 1 particulate level Compressed Instrument-grade air filtered and dried to ISO 8573-1:2010 Class 1, 2, 1 (< 10 1.0–5.0 µm particles/m ; < –40 °F dew point; < 0.01 mg/m oil vapor). Synrad Pulstar p100 operator’s manual... -
Page 39: Operation
Controls and indicators – displays and describes exterior controls and indicators on ■ Pulstar p100 lasers. Start-up and pulsed operation – explains how to start your Pulstar p100 laser while ■ verifying proper operation and how to operate the laser in pulsed mode. Synrad Pulstar p100 operator’s manual... -
Page 40: Controls And Indicators
Optical Accessories Mounting – provides four threaded holes (8–32 UNC) for mounting optional beam delivery components. Because excessive weight may damage the laser, consult SYNRAD before mounting components not specifically designed as Pulstar options. Refer to the OEM p100 package outline drawings in the Technical Reference chapter for mounting dimensions. -
Page 41: Oem P100 Rear Panel
15 WATER OUT Port – labeled OUT, this connection provides the coolant outlet from the laser’s cooling system using straight 1/2-inch fittings. When using metric tubing, first install the 90° tubing adaptors from the cooling kit. Synrad Pulstar p100 operator’s manual... -
Page 42: Start-Up And Pulsed Operation
In dirty environments, purge laser optics damage using filtered air or nitrogen to prevent vapor and debris from accu- mulating on optical surfaces. Synrad Pulstar p100 operator’s manual... -
Page 43: Initial Start-Up With Uc-2000 Controller
Do not use argon as a purge gas. Use only nitrogen or clean, dry air as damage described in Table 1-3, Purge gas specifications. Synrad Pulstar p100 operator’s manual... - Page 44 Reduce the PWM duty cycle to 0.0% and press the UC-2000’s Lase On/Off button to stop lasing. Lase indicators on the UC-2000 and the laser should both turn off. Remove DC power from the laser. Synrad Pulstar p100 operator’s manual...
-
Page 45: Pulsed Operation From Pwm Signal Source
Turn on the chiller and set a temperature setpoint between 18 °C–22 °C. Verify that the chiller is delivering a flow rate of 5.7–7.6 lpm (1.5–2.0 GPM) at less than 414 kPa (60 PSI) of pressure. Synrad Pulstar p100 operator’s manual... - Page 46 User I/O connector at pulse frequencies ranging from a single-shot to 100 kHz with pulse widths up to 600 microseconds (µs). Note: The Pulstar OEM p100 laser is limited to a maximum pulse width of 600 µs for any single pulse. Synrad Pulstar p100 operator’s manual...
- Page 47 Shut off gas purge flow to the laser. In dirty or dusty environments; however, it may be necessary to purge the laser continuously to prevent contamination of internal optics. If your Pulstar p100 laser fails to lase, refer to Troubleshooting in the Maintenance/Troubleshooting chapter for troubleshooting information. Synrad Pulstar p100 operator’s manual...
- Page 48 This page intentionally left blank. Synrad Pulstar p100 operator’s manual...
-
Page 49: Technical Reference
■ Pulstar p100 outline & mounting drawings – illustrate laser package outline and ■ mounting dimensions for OEM p100 lasers. ■ Pulstar p100 packaging instructions – illustrates how to package Pulstar p100 lasers for shipment. Synrad Pulstar p100 operator’s manual... -
Page 50: Technical Overview
Laser design The Pulstar p100 is a pulsed 100-watt laser based on SYNRAD’s popular ti-Series laser. While the average power of the p100 is similar to the ti100 at 100 W, the p100’s pulsed output power can be as high as 400 W. -
Page 51: Oem P100 Pulse Performance
Pulstar p100 pulse profile – 37.5% duty cycle at 625 Hz Figure 3-1 Typical Power Pulse – PWM: 37.5%, PRF: 1 kHz 1000 1200 Time (µs) Figure 3-2 Pulstar p100 pulse profile – 20% duty cycle at 1 kHz Synrad Pulstar p100 operator’s manual... -
Page 52: Figure 3-3 Pulstar P100 Pulse Profile - 37.5% Duty Cycle At 5 Khz
Pulstar p100 pulse profile – 37.5% duty cycle at 5 kHz Typical Power Pulse – PWM: 37.5%, PRF: 10 kHz Time (µs) Figure 3-4 Pulstar p100 pulse profile – 37.5% duty cycle at 10 kHz Synrad Pulstar p100 operator’s manual... -
Page 53: Optical Setup
The chosen focal length should create the smallest possible focused spot while providing the depth of field required for the material to be processed. Synrad Pulstar p100 operator’s manual... -
Page 54: Table 3-1 Assist Gas Purity Specifications
> 99.997% purity; filtered to ISO Class 1 particulate level Nitrogen Cutting/Drilling High Purity Grade > 99.9500% purity; filtered to ISO Class 1 particulate level Oxygen Cutting/Drilling Ultra Pure Grade > 99.9998% purity; filtered to ISO Class 1 particulate level Synrad Pulstar p100 operator’s manual... -
Page 55: Controlling Laser Power
(at a constant duty cycle). Pulstar p100 lasers are designed to operate at Command signal frequencies ranging from a single-shot up to 100 kHz; however, the choice of PWM frequency depends on the user’s specific application. Synrad Pulstar p100 operator’s manual... -
Page 56: Command Signal
If the duty cycle limit is reached, internal control circuitry limits the duty cycle applied to the RF driver and continues lasing. The laser will recover immediately and begin following the actual commanded duty cycle percentage when it is lowered below the limits shown in Table 3-2. Synrad Pulstar p100 operator’s manual... -
Page 57: Table 3-2 Pulse Frequency/Duty Cycle Range
Laser On +3.5 VDC (3 mA) +5.0 VDC +6.7 VDC (10 mA), continuous Frequency Range Single-shot — — 100 kHz Duty Cycle — — 37.5% 1 Varies by pulse frequency. Refer to Table 3-2 for details. Synrad Pulstar p100 operator’s manual... -
Page 58: User I/O Connections
Failure to do so may damage the laser. equipment damage Pin 1 Pin 9 Pin 15 Pin 8 Figure 3-7 User I/O connector pinouts Synrad Pulstar p100 operator’s manual... -
Page 59: User I/O Connection Summary
(TMP LED is red) or other improper operating condition (SHT indicator is flashing) exists. The output is open, in a high-impedance state, when laser operation is within limits (TMP LED green and SHT LED blue). Synrad Pulstar p100 operator’s manual... - Page 60 This bi-directional switched output is internally connected to Pin 13, Output Common, when remote interlock circuitry is open (INT indicator illuminated red), indicating that lasing is disabled. The output is open, in a high-impedance state, when lasing is enabled (INT indicator green). Synrad Pulstar p100 operator’s manual...
-
Page 61: Input/Output Signals
This pin is the only User I/O pin that is connected to the laser’s chassis ground. Do not use this pin for grounding if I/O circuits are powered from an external customer-supplied DC power source. Synrad Pulstar p100 operator’s manual... - Page 62 Shutter Open Request input is factory-jumpered on the Quick Start Plug. Be- cause all DC power is removed from the RF driver when this input is inactive, no lasing can occur until voltage is applied to Pin 10. See Table 3-5 for input circuit specifications. Synrad Pulstar p100 operator’s manual...
-
Page 63: Figure 3-9 Quick Start Plug Wiring Diagram
Pin 1 Pin 4 +5 VDC Pin 10 Shutter Open Request Pin 11 Input Common Pin 12 Aux. DC Power Ground PWM Input BNC Pin 15 Pin 9 Quick Start Plug wiring diagram Figure 3-9 Synrad Pulstar p100 operator’s manual... - Page 64 On state Vmin ±5.0 VDC @ 7 mA On state (continuous) Vmax ±24.0 VDC @ 40 mA Note: The Remote Reset/Start Request input must not be sent until Pulstar’s +5 VDC power supply has stabilized (approximately 200 ms after DC power-up). Synrad Pulstar p100 operator’s manual...
- Page 65 Shutter Open Request signal is present (SHT LED blue), indicating that lasing may be enabled if other operating conditions are met. This output is open, in a high-impedance state, when the laser is disabled (SHT LED Off). Refer to Table 3-6 for output circuit specifications. Synrad Pulstar p100 operator’s manual...
- Page 66 (13) OUTPUT COMMON 0.3 A FUSE, SELF-RESETTING Figure 3-11 Output equivalent schematic Output circuit specifications Table 3-6 Output Device Specifications Bi-directional MOSFET 2.5 Ohms Rdson 10 MOhms Off Voltage ±24 VDC, max. Current 50 mA, max. Synrad Pulstar p100 operator’s manual...
-
Page 67: Sample I/O Circuits
Pulstar’s input circuit. USER I/O PINS Close switch to enable interlock –12 VDC (3) REMOTE INTERLOCK INPUT 0 VDC (11) INPUT COMMON Customer-supplied interlock, negative voltage Figure 3-13 Synrad Pulstar p100 operator’s manual... -
Page 68: Figure 3-14 Plc Driven Interlock Signal
PLC’s output module. OUTPUT USER I/O PINS MODULE (11) INPUT COMMON (+5–24V) (2) REMOTE RESET/START REQUEST INPUT (3) REMOTE INTERLOCK INPUT (10) SHUTTER OPEN REQUEST INPUT Multiple PLC driven inputs Figure 3-15 Synrad Pulstar p100 operator’s manual... -
Page 69: Figure 3-16 Pulstar Output Driving Warning Lamp
Pulstar outputs. USER I/O PINS (5) +24 VDC AUXILIARY POWER (6) LASER ACTIVE OUTPUT (12) AUX.DC POWER GROUND (13) OUTPUT COMMON Pulstar output driving relay Figure 3-17 Synrad Pulstar p100 operator’s manual... -
Page 70: Figure 3-18 Pulstar Output Driving Plc Input Module
USER I/O PINS MODULE (13) OUTPUT COMMON (+5–24V) (6) LASER ACTIVE OUTPUT (7) FAULT DETECTED OUTPUT (8) LASER READY OUTPUT (14) SHUTTER OPEN OUTPUT (15) INTERLOCK OPEN OUTPUT Figure 3-18 Pulstar output driving PLC input module Synrad Pulstar p100 operator’s manual... -
Page 71: Integrating Pulstar Safety Features
Open output closes when a Shutter Open Request signal is present (SHT LED illuminated blue). The output is open (in a high-impedance state) and the SHT LED is Off when the Shutter Open Request signal is removed. Synrad Pulstar p100 operator’s manual... -
Page 72: Remote Interlock Functions
Pin 15, Interlock Open, and Pin 13, Output Common (see Figure 3-18). This output is closed when remote interlock circuitry is open (INT LED illuminated red). The output is open (in a high-impedance state) and the INT LED is green when interlock circuitry is closed. Synrad Pulstar p100 operator’s manual... -
Page 73: Pulstar P100 General Specifications
..........1.5–2.0 GPM, < 60 PSI (5.7–7.6 lpm, <414 kPa) Pressure Drop ......... 18 PSI @ 1.5 GPM/32 PSI @ 2.0 GPM (124 kPa @ 5.7 lpm/221 kPa @ 7.6 lpm) Coolant Temperature ......18–22 °C Synrad Pulstar p100 operator’s manual... - Page 74 8 At coolant temperatures above 22 °C, allow a 0.5 W/°C to 1W/°C power derating for coolant temperatures up to 30 °C. 9 Published specifications guaranteed at a temperature of 22 °C. Some performance degradation may occur in ambient temperatures above 22 °C. Typically, laser output power decreases 0.5–1% per degree Celsius increase in ambient temperature. Synrad Pulstar p100 operator’s manual...
- Page 75 Pulstar p100 outline & mounting drawings Pulstar p100 outline & mounting dimensions, sheet 1 of 2 Figure 3-19 Synrad Pulstar p100 operator’s manual...
-
Page 76: Pulstar P100 Outline & Mounting Drawings
Pulstar p100 outline & mounting drawings Figure 3-20 Pulstar p100 outline & mounting dimensions, sheet 2 of 2 Synrad Pulstar p100 operator’s manual... -
Page 77: Pulstar P100 Packaging Instructions
Pulstar p100 packaging instructions Figure 3-21 Pulstar p100 packaging instructions Synrad Pulstar p100 operator’s manual... - Page 78 This page intentionally left blank. Synrad Pulstar p100 operator’s manual...
-
Page 79: Maintenance
Use information in this chapter to perform maintenance or troubleshoot your Pulstar OEM p100 laser. This chapter contains the following information: Maintenance – describes typical Pulstar p100 maintenance procedures. ■ Troubleshooting – explains how to troubleshoot common Pulstar p100 problems. ■ Synrad Pulstar p100 operator’s manual... -
Page 80: Disabling The P100 Laser
Caution If you operate your laser or marking head in a dirty or dusty environ- ment, contact SYNRAD about the risks of doing so and precautions possible you can take to increase the longevity of your laser, marking head, and associated optical components. -
Page 81: Storage/Shipping
When finished, cap all connectors to prevent debris from entering the cooling system. When shipping SYNRAD lasers to another facility, we highly recommend that you ship the unit in its original SYNRAD shipping container. If you no longer have the original shipping box and inserts, contact SYNRAD Customer Service about purchasing replacement packaging. - Page 82 Latex gloves or finger cots Powder-free Air bulb Clean air bulb Ethyl or isopropyl alcohol Spectroscopic or reagent grade Acetone Spectroscopic or reagent grade Lens wipe (preferred) Optical (cleanroom) quality Cotton balls or cotton swabs High-quality surgical cotton/high-quality paper-bodied Synrad Pulstar p100 operator’s manual...
- Page 83 Carefully examine the optic under a good light. Certain contaminants or damage such as pitting cannot be removed. In these cases the optic must be replaced to prevent catastrophic failure. Repeat Steps 4 through 6 as required, removing all traces of contaminants and deposits. Synrad Pulstar p100 operator’s manual...
-
Page 84: Output Window Replacement
Contact SYNRAD Customer Service immediately so the laser can be returned for service. Continued operation may result in catastrophic damage to the laser. In addition to the Pulstar p100 Output Window Replacement Kit (SYNRAD P/N 95-18386-01), the fol- lowing items are required to replace the Pulstar OEM p100’s output window: ■... -
Page 85: Troubleshooting
Insert the three M3 × .5 × 6 mm flathead fasteners through the retainer and into the faceplate. Turn the screws by hand until the threads engage. Evenly tighten all three fasteners to a maximum torque of 1.8 N m (16 in lb). The output window replacement procedure is complete. Synrad Pulstar p100 operator’s manual... -
Page 86: Introduction
This section is designed to help isolate problems to the module level only. Problems on circuit boards or the laser tube are outside the scope of this guide because they are not user-serviceable assemblies; do not attempt to repair them. Contact SYNRAD or a SYNRAD Authorized Distributor for repair or replace- ment information. -
Page 87: Operational Flowchart
Apply tickle pulses or a PWM Command signal (Shutter) indicator (< 5% duty cycle) for Flashing? 30 to 60 seconds LASE indicator illuminates Red to indicate laser output Figure 4-2 Pulstar p100 operational flowchart Synrad Pulstar p100 operator’s manual... -
Page 88: Functional Block Diagram
Troubleshooting Functional block diagram Figure 4-3 is a functional block diagram illustrating the p100’s control architecture. Figure 4-3 Pulstar p100 functional block diagram Synrad Pulstar p100 operator’s manual... -
Page 89: Status Leds
Note: Pulstar p100 RDY and SHT LEDs denote separate control functions. Although the RDY lamp may light while the SHT LED is Off (Shutter Open Request signal missing), no power is applied to the RF driver until both RDY and SHT indicators are illuminated. Synrad Pulstar p100 operator’s manual... - Page 90 LED Status Signal Name User I/O Signal Status Interlock Open Closed Green Fault Detected Open Laser Ready Open Blue Shutter Open Closed LASE (tickle inactive) Laser Active Open LASE (if PWM applied) Off Laser Active Open Synrad Pulstar p100 operator’s manual...
-
Page 91: Table 4-6 Over Temperature Fault
LASE (if PWM applied*) Red Laser Active Closed * A continuously flashing SHT LED indicates a No-Strike condition and the laser is limited to a 5% duty cycle (at 5 kHz) until the fault clears. Synrad Pulstar p100 operator’s manual... -
Page 92: Laser Fault Indications
PWM duty cycle is lowered below 100%. The Fault De- tected output closes for a minimum of 50 ms or until the 100% duty cycle condition clears. Synrad Pulstar p100 operator’s manual... -
Page 93: Resetting Faults
Next, cycle DC power off and then on again. When the RDY LED illuminates, the Laser Ready output Closes, and lasing is enabled provided the SHT indicator is illumi- nated blue. Synrad Pulstar p100 operator’s manual... - Page 94 5% duty cycle) for 30 to 60 seconds. When the gas breaks down into a plasma state, the laser will recover and begin lasing immediately at the commanded power level without cycling DC power. If the No-Strike condition persists, contact SYNRAD or a SYNRAD Authorized Distributor. Common causes of No-Strike (gas breakdown) issues are environmental conditions–like cold overnight temperatures when the laser is powered down.
-
Page 95: General Laser Fault Conditions
Possible Causes: ■ Coolant temperature is above 30 °C (86 °F) or there is inadequate coolant flow through the laser. Verify that the chiller is maintaining a water temperature between 18 °C–30 °C (64 °F–86 °F). Synrad Pulstar p100 operator’s manual... - Page 96 DC power. Symptom: ■ The SHT LED is repeating a two-blink error code and the following status LED and I/O states exist: Synrad Pulstar p100 operator’s manual...
- Page 97 DB-15 connector so that Pin 11 (Input Common) is jumpered to Pin 12 (Auxiliary DC Power Ground) and Pin 10 (Shutter Open Request) is jumpered to Pin 4 (+5 VDC Auxiliary Power). Synrad Pulstar p100 operator’s manual...
- Page 98 When the maximum duty cycle for a given frequency range (shown in Table 4-10) is exceeded, the p100 laser continues lasing at the maximum duty cycle limit for that range. When the duty cycle drops below the limit, the laser will recover immediately and begin following the actual duty cycle. Synrad Pulstar p100 operator’s manual...
-
Page 99: Beam Delivery Optics
(99% duty cycle) conditions. ■ A fuse inside the laser may have blown. Contact SYNRAD Customer Service for information about accessing and replacing the fast-blow, 25 A mini automotive-type blade fuses (Littelfuse 997025 or equivalent) inside the Pulstar p100 laser. Beam delivery optics Warning The use of aerosol dusters containing difloroethane causes “bloom-... - Page 100 Troubleshooting Caution If you operate your laser or marking head in a dirty or dusty environ- ment, contact SYNRAD about the risks of doing so and precautions possible you can take to increase the longevity of your laser, marking head, and associated optical components.
- Page 101 A risk of exposure to toxic elements, like zinc selenide, may result when certain optical or beam delivery components are damaged. In serious the event of damage to laser, marking head, or beam delivery optics, contact SYNRAD, Inc. or the optics manufacturer for handling personal instructions. injury When the application requires air (instead of nitrogen) as an assist gas, we recommend the use of breath- ing quality air available in cylinders from a welding supply company.
- Page 102 This page intentionally left blank. Synrad Pulstar p100 operator’s manual...
- Page 103 Compliance 5–10 expander/collimator, 3-5 CDRH, 5 focusing optics, 3-5–3-6 Class 4 safety requirements, 8 inspection, 4-3 Declaration of Conformity, 10 radiation danger, 4-4, 4-22 EU, 6–9 troubleshooting, 4-21–4-23 FCC, 6 warning, 4-2, 4-21, 4-23 RoHS, 6 Synrad Pulstar p100 operator’s manual...
- Page 104 8 Copyright information vii European headquarters ix Customer Service ix European Union. See EU requirements Customer-supplied interlock 3-19 Expander/collimator 3-5 Customer-supplied interlock, negative voltage Eye protection 1, 3, 2-5, 2-7, 4-3, 4-4, 4-8, 3-19 4-22 Synrad Pulstar p100 operator’s manual...
- Page 105 PLC driven inputs, 3-20 PLC driven interlock signal, 3-20 PWM Input, 3-12, 3-14 Gas purge kit 1-4, 1-5, 1-16 PWM Return, 3-11, 3-14 Gas Purge port 1-18, 1-16, 2-3, 4-3 Remote Interlock, 3-11, 3-14 connecting, 1-16 Synrad Pulstar p100 operator’s manual...
- Page 106 Operator’s laser manual CD 1-4, 1-5 Laser Manual CD 1-4, 1-5 Optical accessories mounting 2-2 Laser Ready output 3-23, 4-11, 4-12, 4-13, Optical components 4-14, 4-15, 4-16, 4-17, 4-18, 4-19, cleaning, 4-3–4-5 4-20 cleaning materials, 4-4 Synrad Pulstar p100 operator’s manual...
- Page 107 PWM Return signal 2-7, 2-8, 3-8 instruction drawing, 3-29 signal description, 3-11, 3-14 PLC 3-17 PWM/pulse signal source 1-15, 2-7, 2-8, multiple inputs, 3-20 3-8, 3-12, 3-14, 4-11, 4-15, 4-16, multiple outputs, 3-22 4-17, 4-18, 4-20 Remote Interlock input, 3-20 Synrad Pulstar p100 operator’s manual...
- Page 108 3-2 optical setup, 3-5–3-6 RoHS compliance 6, 10 pulse performance, 3-3–3-5 RF/control circuitry, 3-2 Technical Support ix Safety features Temperature setpoint 1-10, 1-11, 1-12, 2-5, Class 4, 8 2-7, 4-15 integrating, 3-23–3-24 Safety precautions 1–3 Synrad Pulstar p100 operator’s manual...
- Page 109 Warning aerosol dusters, 2, 4-21 air contaminants, 2 definition, 1 electrical noise, 1-14, 3-8 hazardous radiation exposure, 2 laser output, 1-14, 2-6, 2-8, 3-8 laser radiation, 3-15, 4-15, 4-17 laser safety precautions, 2 lifting, 1-3 Synrad Pulstar p100 operator’s manual...
- Page 110 This page intentionally left blank. Synrad Pulstar p100 operator’s manual...
Need help?
Do you have a question about the Pulstar P100 Series and is the answer not in the manual?
Questions and answers