
Subscribe to Our Youtube Channel
Related Manuals for Rottler SAD Series


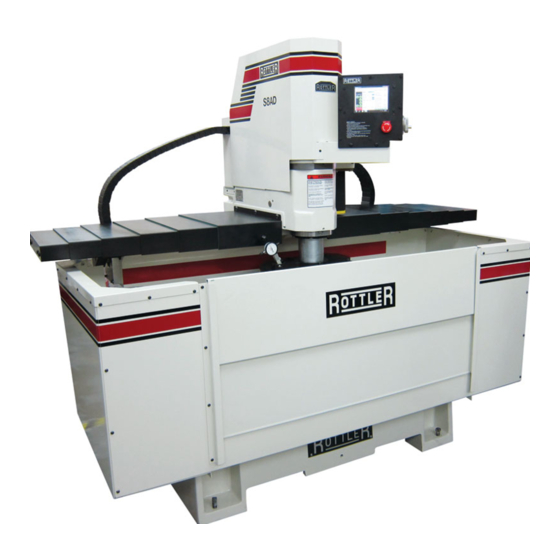
Summary of Contents for Rottler SAD Series
- Page 1 OPERATION AND MAINTENANCE MANUAL 8029 S 200th St. Kent, WA 98032 USA | www.rottlermfg.com | Ph: 253-872-7050 | Fax: 253-395-0230 16.03.2017...
- Page 3 Contact your regional Rottler sales rep for assistance in ordering optional equipment, replacement parts, or tooling. If you are unable to contact your regional Rottler sales rep, call the factory at 253-872-7050 and ask to speak to the parts sales specialist.
- Page 5 READ THE SAFETY CHAPTER BEFORE INSTALLING MACHINE. THOROUGHLY UNDERSTAND ALL SAFETY ISSUES BEFORE OPERATING MACHINE. ATTENTION OWNER/BUSINESS MANAGER To validate the warranty on your new Rottler machine, please be sure to sign and complete the “Installation Report” located in the Installation Chapter of this manual.
- Page 6 Disclaimer The S7AD & S8AD Manual (henceforth to be referred to as the “Manual”) is proprietary to Rottler Manufacturing LLC. (“Rottler Manufacturing”) and no ownership rights are hereby transferred. No part of the Manual shall be used, reproduced, translated, converted, adapted, stored in a retrieval system, communicated or transmitted by any means, for any commercial purpose, including without limitation, sale, resale, license, rental or lease, without the prior express written consent of Rottler Manufacturing.
- Page 7 Should a product not be as warranted, Rottler sole obligation shall be, at its option, to repair, correct or replace the product or to refund the amounts paid for the Product upon its return to a location designated by Rottler.
- Page 8 Section 1 Introduction S7AD / S8AD Manual www.rottlermfg.com...
- Page 9 Section 2 Installation S7AD / S8AD Manual INSTALLATION Contents ROTTLER S7/8AD SERIES INSTALLATION REPORT ..........2-2 Installation Procedure ....................2-6 Location ..........................2-6 Unpacking ..........................2-6 Shipping Hold Down Bolt ....................2-6 Leveling ..........................2-6 Air Supply ..........................2-6 Power Supply ........................2-7 Grounding ............................2-7...
- Page 10 Section 2 Installation S7AD / S8AD Manual ATTENTION OWNER/BUSINESS MANAGER To validate the warranty on your new Rottler machine, please be sure to sign the installation report after the installation technician has installed the machine and verified the machine is operating correctly and given the operators operation and maintenance training.
- Page 11 REV 031617 OFFICE USE ONLY Route to: Servicer Mgr Accounting Andy Accounting Warranty Exp Date ________ ROTTLER MANUFACTURING MUST HAVE THIS REPORT RETURNED TO PROPERLY QUALIFY WARRANTY ON EQUIPMENT Customer:____________________________ Address:_______________________________________ City:_________________________________ State:_____ Zip:_________ Phone:_______________ Country:______________________________ Machine Model:___________ Serial Number:__________ Representative:________________________ MACHINE INSTALLATION: Electrical information MUST be complete to validate this report.
- Page 12 The software on the machine will automatically connect to our server to send back useful information on machine status. ______Explain to the customer and the operator how the to log onto Skype and communicate with Rottler when needed.
- Page 13 Section 2 Installation S7AD / S8AD Manual ______Explain optional cutting inserts that are available and their correct application to the type of material being cut. Explain the use of one versus two inserts. ______Explain availability of optional tooling. STRESS CAUTION AND PERSONAL SAFETY ______Explain speeds required for carbide, coated carbides, CBN, etc., on specific work piece materials.
- Page 14 Instructions given to:___________________________________________________________________ Sales/Service Engineer: _______________________________________________ Date_____________ Shop Foreman/Superintendent or Owner: _________________________________ Date_____________ Once completed send this form to: Rottler Manufacturing attn: Service Manager Alternately you may send this form via fax or e-mail: 8029 S 200 St fax: [+1] 253-395-0230 Kent, WA 98032 USA e-mail: service@rottlermfg.com...
- Page 15 Section 2 Installation S7AD / S8AD Manual Installation Procedure Location The productivity of this machine will depend a great deal on it’s proper initial installation, particularly the means by which cylinder blocks/heads are lifted into the machine as well as the material handling to and from other operations in your shop.
- Page 16 Section 2 Installation S7AD / S8AD Manual Power Supply This machine has the following power requirements: • 208 to 240 VAC • Single Phase • 50 or 60 Hertz • 30 amps See illustration below for correct connection of “measured” incoming power. Connect single phase wiring to the main rear enclosure, located on the right rear of machine base.
-
Page 17: Table Of Contents
S7AD / S8AD Manual SAFETY Contents Safety Information .......................3-1 Safety Instructions for Machine Use .................3-1 Electrical Power ........................3-3 Machine Operator ......................... 3-5 Emergency Procedure ....................3-6 Computer and Controller System Safety ................3-6 Electrical Safety Features Of Rottler DM Controlled Machines ......3-7 www.rottlermfg.com... -
Page 18: Safety Information
Section 3 Safety S7AD / S8AD Manual Safety Information For Your Own Safety Read This Instruction Manual Before Operating This Machine. This is the safety alert symbol. It is used to alert you to potential personal injury hazards. Obey all safety messages that follow this symbol to avoid possible injury or death. DANGER indicates an imminently hazardous situation which, if not avoided, will result in death or serious injury. - Page 19 DO NOT MODIFY OR ALTER THIS EQUIPMENT in any way. If modifications are deemed necessary, all such requests must be approved and/or handled by Rottler Manufacturing. Unauthorized modifications could cause injury and/or damage to machine and will void the warranty.
-
Page 20: Electrical Power
Section 3 Safety S7AD / S8AD Manual When boring the machine is capable of throwing metal chips over 10- feet from the cutting area. Always use the guards. Eye protection must be worn at all times by the operator and all other personnel in the area of the machine. - Page 21 Section 3 Safety S7AD / S8AD Manual In the event of an electrical short, grounding reduces the risk of electric shock by providing a path of least resistance to disperse electric current. Electrocution or a fire can result if the machine is not grounded correctly. Make sure the ground is connected in accordance with this manual.
-
Page 22: Machine Operator
Section 3 Safety S7AD / S8AD Manual Machine Operator The operator of this machine should be a skilled machinist craftsman who is well versed in the caution, care, and knowledge required to safely operate metal cutting tools. If the operator is not a skilled machinist he/she must pay strict attention to the Operating Instructions outlined in this manual, and get instruction from a qualified machinist in both production and operation of this machine. -
Page 23: Emergency Procedure
Ethernet or Wireless using a USB wireless (Wi-Fi) adapter. Updating the Rottler software should ONLY be done when directed to do so by a Rottler service technician. Updating Rottler Software when not directed by Rottler personnel will result in a non-operational machine. -
Page 24: Electrical Safety Features Of Rottler Dm Controlled Machines
S7AD / S8AD Manual Electrical Safety Features Of Rottler DM Controlled Machines All Rottler machines that use the DM operational control system are designed to comply with all applicable safety standards. This includes but is not limited to the following systems: •... - Page 25 Section 4 Control Definitions S7-8AD Manual CONTROL DEFINITIONS Contents Control Definitions ......................4-1 Computer and Controller System Safety for DM Controlled Machines: ....4-1 COMMON INTERFACE NOTICE ..................4-2 Master Power On/Off Switch ....................4-2 Initialization Screen ......................4-3 General Information ......................4-3 Home ..............................4-3 Rapid Travel Buttons ......................
- Page 26 Section 4 Control Definitions S7-8AD Manual Spindle RPM .........................4-11 Operation Setup ........................4-11 START SPINDLE ......................... 4-12 START AUTOCYCLE ......................4-12 www.rottlermfg.com...
-
Page 27: Control Definitions
Ethernet or Wireless using a USB wireless (Wi-Fi) adapter. Updating the Rottler software should ONLY be done when directed to do so by a Rottler service technician. Updating Rottler Software when not directed by Rottler personnel could result in a non-operational machine. -
Page 28: Common Interface Notice
S7-8AD Manual COMMON INTERFACE NOTICE All Rottler machines using Direct Motion technology share a common control interface. This allows for a better environment for programing machine functions across a wide range of different machines. This also allows for easier deployment in shops already using Rottler Direct Motion machines. -
Page 29: Initialization Screen
Start the Rottler program by double tapping the Rottler_WPF icon on the desktop Once the program is started, the Rottler Program Select will appear. NOTE: Do not push any buttons or icons on the screen before the Rottler program starts or an error may be caused on the computer. -
Page 30: Feed Buttons
Section 4 Control Definitions S7-8AD Manual button and contact must be maintained or the travel will stop. Rapid Down will cause the spindle to move down quickly at a fixed rate of speed. The button is a momentary button and contact must be maintained or the travel will stop. Feed Buttons Feed Up button moves the spindle up at a fixed feed rate. -
Page 31: Program Select
Section 4 Control Definitions S7-8AD Manual Program Select This button will bring you back to the home screen. The Program Select section of the home screen is located above the spindle control buttons. This is where you create programs for different type of blocks. Pressing this button will cause a dialog box to appear. -
Page 32: Options
Section 4 Control Definitions S7-8AD Manual Options This will bring up the same dialog box as described above if any of the information needs to be changed. Delete This will delete whatever block program is selected. A dialog box will appear to ask you if you want that program deleted. -
Page 33: Mode Select
You can also create a new mode and rename if for a specific use. Pressing this button will bring up a dialog box with Rottler standard operations. Select the operation you want to create and then press OK. This will place a Mill operation under the Cylinder bore mode in the right hand section. -
Page 34: Std (Standard) Setup
To enter Mill mode highlight it and then press Select. This will take you to the operation screens that will be described later. Std (Standard) Setup Pressing this button will insert all the Rottler operations into the right hand section automatically. Delete Warning box will appear asking if you wish to delete all existing block data. Options This button is not used on this machine. -
Page 35: Select
Section 4 Control Definitions S7-8AD Manual Select Highlight the Mill Cycle function and then touch the Select button. This will bring up the Set Zero screen. www.rottlermfg.com... -
Page 36: Handwheel Buttons
Section 4 Control Definitions 4-10 S7-8AD Manual Handwheel Buttons .010 button allows the operator to use the hand wheel to move the spindle left or right at .010” per click in either direction. .001 button allows the operator to use the hand wheel to move the spindle left or right at .001” per click in either direction. -
Page 37: Move Buttons
Section 4 Control Definitions 4-11 S7-8AD Manual Move Buttons When pressed a pop up number pad will appear. By selecting function, a distance can be entered. Press Enter to make spindle move the selected distance. Spindle RPM Operator clicks the box to the right to enter desired spindle RPM. Operation Setup Press the Operation tab. - Page 38 Section 4 Control Definitions 4-12 S7-8AD Manual START SPINDLE This button causes the spindle to start rotating at the designated RPM. Pushing the button again will stop the spindle rotation. START AUTOCYCLE This button causes the spindle to move vertically to the Start Height position. Start Cutting Height, start spindle rotation, feed down to the Finish Cutting Depth, index the tool, and move the spindle vertically up to the selected SET position.
- Page 39 Section 5 Operating Instructions S7AD / S8AD Manual OPERATING INSTRUCTIONS Contents Operating Instructions ....................5-1 Manual Operation ......................5-2 Zero Vertical and Horizontal Position ................. 5-2 Automatic Operation ....................5-2 Zero Vertical and Horizontal Position ................. 5-3 Backing Up and Restoring Block Profiles..............5-4 General Insert Information..................5-11 Cutting Speed Calculation ....................5-11 Surfacing Inserts ........................
-
Page 40: Operating Instructions
Section 5 Operating Instructions S7AD / S8AD Manual Operating Instructions Included in this chapter is a general description of how to use this machine for surfacing, whether it cylinder head, block or other type of job. For details of operating specific fixtures available on this machine refer to the Optional Surfacing Fixtures and Tooling section of this manual. -
Page 41: Manual Operation
Section 5 Operating Instructions S7AD / S8AD Manual Manual Operation Press the Left rapid travel button and move the spindle over to the starting position. The starting position is just before the cutterhead guard passes over the work piece. Push the dial depth indicator, on the guard, down onto the top of the work piece. -
Page 42: Zero Vertical And Horizontal Position
Following is a description of the cutting inserts available from Rottler. The inserts have gone through extensive performance testing. To take full advantage of the capabilities of your Rottler machine, we highly recommend Rottler cutting tools be used. -
Page 43: Backing Up And Restoring Block Profiles
Section 5 Operating Instructions S7AD / S8AD Manual Backing Up and Restoring Block Profiles This section will explain how to back up and restore the operator created block profiles for DM controlled machines for archival purposes or to transfer to a different machine. First step is to open your file bowser locate the RottlerWPF file on the C disk drive. - Page 44 Section 5 Operating Instructions S7AD / S8AD Manual The following pop up box will appear on your screen. Click on the Open folder to view files option and the following screen will appear. This is the contents of the flash drive you just plugged in. www.rottlermfg.com...
- Page 45 Section 5 Operating Instructions S7AD / S8AD Manual Next resize and arrange both file browsers so that they are side by side. www.rottlermfg.com...
- Page 46 Section 5 Operating Instructions S7AD / S8AD Manual Block profiles are backed up each time the machine is run with the current profiles being shown in the RottlerWPF folder. All that needs to be done to back up the current profile is to simply drag it from the RottlerWPF folder to the flash drive folder.
- Page 47 Section 5 Operating Instructions S7AD / S8AD Manual To restore or add block profiles go through the first 5 steps explained previously. Highlight the block profiles file in the flash drive and drag it into the RottlerWPF folder on the local hard drive. www.rottlermfg.com...
- Page 48 Section 5 Operating Instructions S7AD / S8AD Manual You will get a pop up window about there being a file of the same name in the destination folder. Click on the Copy and Replace option. www.rottlermfg.com...
- Page 49 Section 5 Operating Instructions 5-10 S7AD / S8AD Manual The archived block profiles will now be installed. Close both browser windows and remove the flash drive. The restore process is now complete. www.rottlermfg.com...
-
Page 50: General Insert Information
S7AD / S8AD Manual General Insert Information Rottler CBN and PCD Inserts are laser marked with our part number on one side. On single sided inserts, the part number is on the back side of the insert. Rottler surfacing insert toolholders are designed so they can hold square and round inserts that are of the same basic size. -
Page 51: Surfacing Inserts
5-12 S7AD / S8AD Manual Surfacing Inserts Following are the inserts commonly used on Rottler machines in surfacing/milling applications. Please read carefully. 6303B A round 3/8” IC, double sided, CBN Insert. An excellent, long life insert for surfacing cast iron heads and blocks -round shape gives many cutting edges on each side of insert. -
Page 52: 1/2" (12.70Mm) Surfacing Inserts
The hardness of the diamond resists the abrasive nature of the silica in aluminum heads and blocks. RPM speeds with a 14” cutter range from 1000-2000 RPM. Requires the purchase of 1/2” negative rake tool holders. The standard Rottler 3/8” IC tool holders will not hold this insert. 6303Q A round 1/2”... -
Page 53: Cylinder Heads With Protruding Valve Seats
A round 3/8” IC, single sided, CBN Insert. For use on aluminum blocks with iron liners and aluminum heads with steel pre-combustion chambers. When cutting aluminum heads with pre-combustion chambers it is best to use Rottler’s spray mist coolant system or Goodson’s HPS-10 High Performance Resurfacing Spray. RPM speeds with a 14” cutter range from 650-750 RPM. -
Page 54: Special Toolholder And Insert
Section 5 Operating Instructions 5-15 S7AD / S8AD Manual Special Toolholder and Insert 7202X Holder Assembly, Fly Cutter Tool 3/8” (9.525mm) IC (for use with special insert for aluminum cylinder heads with pre-combustion chamber and cast iron heads with soft precups like Land Rover) for use with 7202Z insert only 7202Z Round Insert, 3/8”... - Page 55 Section 6 Maintenance S7AD / S8AD Manual MAINTENANCE Contents Maintenance .........................6-1 Lubrication ..........................6-1 Horizontal Ballscrew Nut ........................6-1 Vertical Ballscrew Nut ........................6-1 Outer Spindle ............................6-1 Inner Spindle .............................6-1 Cleaning The Way Surface .......................6-1 Lubrication – Quick Reference Chart: ................6-1 S7AD -S8AD Machine Lubrication Illustration ..............
- Page 56 Section 6 Maintenance S7AD / S8AD Manual Pneumatic Control Diagram ....................6-16 Cutterhead Tilt Adjustment ....................6-17 Outer Spindle Adjustment ....................6-18 Inner Spindle Adjustment ....................6-19 Replacing the Motherboard Battery .................. 6-20 Alignment Definitions for Angular Bearings and Belleville Washers ......6-23 Bearing Alignment ..........................6-23 Belleville Washer Alignment ......................6-23 Z-Axis Vertical Ballscrew Lower Bearing Stacking Order ..........
-
Page 57: Maintenance
Section 6 Maintenance S7AD / S8AD Manual Maintenance Lubrication Refer to the illustrations on the following pages. Horizontal Ballscrew Nut The horizontal ballscrew nut is located under the Spindle base inside the Main Base. Every 175 hours, Grease the ball screw nut using NLGI #2 White Lithium Grease. Wipe a small amount of grease on the screw just ahead of the nut. -
Page 58: S7Ad -S8Ad Machine Lubrication Illustration
Section 6 Maintenance S7AD / S8AD Manual S7AD -S8AD Machine Lubrication Illustration www.rottlermfg.com... -
Page 59: Axis Universal Machine Table 7119Q - Lubrication Illustration
Section 6 Maintenance S7AD / S8AD Manual 2 Axis Universal Machine Table 7119Q – Lubrication Illustration www.rottlermfg.com... -
Page 60: Setting Cutting Tool Inserts
Section 6 Maintenance S7AD / S8AD Manual Setting Cutting Tool Inserts Press the Mill button. Travel the spindle base approximately to the center of the main base. Turn off all power to machine before proceeding. Remove vacuum housing from chip shield. Attach a dial runout indicator to a cylinder head or engine block, etc. -
Page 61: Dial Indicator Setting
Section 6 Maintenance S7AD / S8AD Manual Dial Indicator Setting If chip shield, cutting insert, or dial indicator have been moved, the dial indicator should be reset. To reset press the up/down adjust button. With the surfacing cutter in the fore and aft position, press the left travel button until the cutterhead overlaps a test piece by about 1/2”... -
Page 62: Vertical Travel Belt Removal, Replacement And Adjustment
Section 6 Maintenance S7AD / S8AD Manual Vertical Travel Belt Removal, Replacement and Adjustment Turn off all power to the machine before continuing. Remove six screws from the belt housing cover, and lift it off. Remove the access panel at the rear of the machine shroud. Remove the six screws mounting the shroud to the machine. -
Page 63: Vertical Travel Belt
Section 6 Maintenance S7AD / S8AD Manual Vertical Travel Belt Loosen the four bracket mounting bolts. Loosen the locking Jam nut. Turn the Belt Tension adjustment bolt CW until you can slide the mounting bracket all the way forward. Remove belt. Follow this procedure in reverse order to install the belt. -
Page 64: Drive Belt Replacement
Section 6 Maintenance S7AD / S8AD Manual Drive Belt Replacement Turn off all power to the machine before continuing. Remove the access panel at the rear of the machine enclosure. Remove the six screws mounting the enclosure to the machine. Four screws are located inside the enclosure and are accessed through the rear opening. -
Page 65: Drive Sprocket / Motor Removal And Replacement
Section 6 Maintenance S7AD / S8AD Manual Drive Sprocket / Motor Removal and Replacement Turn off all power to the machine before continuing. Removal of Drive Sprocket (Small sprocket) • Remove the upper housing cover, and drive belt. • Place something under the spindle drive motor to support it. Remove the four 3/8 -16 motor mounting screws from inside the upper housing. -
Page 66: Driven Sprocket Removal And Replacement
Section 6 Maintenance 6-10 S7AD / S8AD Manual Driven Sprocket Removal and Replacement Turn off all power to the machine before continuing. Removal of Driven Sprocket • Remove the upper housing cover, and drive belt. • Remove the adjusting nut using a 5/32 (4mm) diameter Rod through the slot in the upper housing. Once the nut is removed the index bushing and the sprocket can be lifted off. -
Page 67: Cutterhead And Chip Guard Removal
Section 6 Maintenance 6-11 S7AD / S8AD Manual Cutterhead and Chip Guard Removal Turn off all power to the machine before continuing. • Mark cutterhead and spindle so they can be reassembled in the same position. • Remove cutterhead by removing its four 3/8-16 screws. Remove chip guard by removing its two 1/4- 20 set screws that go into the clamp ring at an angle, and loosen the 3/8-16 cap screw in the split line of clamp ring. -
Page 68: Upper Housing Removal
Section 6 Maintenance 6-12 S7AD / S8AD Manual Upper Housing Removal Turn off all power to the machine before continuing. • Remove the Drive Belt, Motor and Driven Sprocket and described earlier in this chapter. • Remove the shoulder bolts holding the top of the air cylinder to the upper housing. Compress the air cylinder and lay it out of the way. -
Page 69: Inner Spindle Removal
Section 6 Maintenance 6-13 S7AD / S8AD Manual Inner Spindle Removal Turn off all power to the machine before continuing. • Remove the upper housing cover, and drive belt. • Remove the driven sprocket. • Remove the cutterhead and chip guard. •... -
Page 70: Horizontal Ball Screw And Belt Alignment And Adjustment
Section 6 Maintenance 6-14 S7AD / S8AD Manual Horizontal Ball Screw and Belt Alignment and Adjustment Turn off all power to the machine before continuing. • The Way Covers do not need to be removed to align the ballscrew or adjust the belt tension. They can be accessed underneath the way covers at each end. -
Page 71: Air Adjustment Of The S7Ad-S8Ad Machine
Section 6 Maintenance 6-15 S7AD / S8AD Manual Air Adjustment of the S7AD–S8AD Machine The Regulator for the counter balance air cylinder is located in the Spindle Base. Remove the rear cover to access the regulator. This pressure should be approximately 9 to 15 PSI. Note: Maximum 20 PSI Air Adjustments Illustration www.rottlermfg.com... -
Page 72: Pneumatic Control Diagram
Section 6 Maintenance 6-16 S7AD / S8AD Manual Pneumatic Control Diagram www.rottlermfg.com... -
Page 73: Cutterhead Tilt Adjustment
Section 6 Maintenance 6-17 S7AD / S8AD Manual Cutterhead Tilt Adjustment Remove all work pieces, fixturing and parallels, from the lower surface of the main base. Travel the spindle unit over to the center of the main base. Turn off all power to the machine before continuing. Remove one tool holder from the cutterhead. -
Page 74: Outer Spindle Adjustment
Section 6 Maintenance 6-18 S7AD / S8AD Manual Outer Spindle Adjustment The main spindle bearings are tapered split cast iron rings, held in a seat by an adjustment nut. These bearings normally require no adjustment for many surfacing cycles. CAUTION: Be careful not to over tighten these bearings. An over tight condition only serves to wear out the machine and make control operation difficult. -
Page 75: Inner Spindle Adjustment
Section 6 Maintenance 6-19 S7AD / S8AD Manual Inner Spindle Adjustment Turn off all power to the machine before continuing. Remove the two screws holding the small nameplate (502-1-19C) to the front of the upper housing. Inside the exposed opening is the spindle adjustment nut (7020). The spindle adjustment nut has holes drilled around its perimeter to accept an adjustment rod. -
Page 76: Replacing The Motherboard Battery
Section 6 Maintenance 6-20 S7AD / S8AD Manual Replacing the Motherboard Battery If computer fails to boot up and you get a CMOS error message on the screen, then the battery on the computer motherboard has failed and needs to be replaced. The following is the procedure for replacing the motherboard battery. - Page 77 Section 6 Maintenance 6-21 S7AD / S8AD Manual Locate the computer and check to see that the power light is not on. If it is on turn off the power switch. Note: On some machines it may be necessary to unbolt the computer from the enclosure in order to gain access to the cover screws.
- Page 78 Section 6 Maintenance 6-22 S7AD / S8AD Manual Locate the battery on the motherboard. Push the battery retention clip away from the battery. When the clip is released the battery will pop up. Remove the battery and place new battery in the battery holder.
-
Page 79: Alignment Definitions For Angular Bearings And Belleville Washers
Section 6 Maintenance 6-23 S7AD / S8AD Manual Alignment Definitions for Angular Bearings and Belleville Washers Bearing Alignment Belleville Washer Alignment www.rottlermfg.com... -
Page 80: Z-Axis Vertical Ballscrew Lower Bearing Stacking Order
Section 6 Maintenance 6-24 S7AD / S8AD Manual Z-Axis Vertical Ballscrew Lower Bearing Stacking Order Z-Axis Vertical Ballscrew Lower Bearing Section View www.rottlermfg.com... -
Page 81: Inner Spindle Upper Section Belleville Washer Stacking Order
Section 6 Maintenance 6-25 S7AD / S8AD Manual Inner Spindle Upper Section Belleville Washer Stacking Order Inner Spindle Upper Section Belleville Washer Section View www.rottlermfg.com... -
Page 82: Inner Spindle Lower Section Bearing Stacking Order
Section 6 Maintenance 6-26 S7AD / S8AD Manual Inner Spindle Lower Section Bearing Stacking Order www.rottlermfg.com... -
Page 83: Inner Spindle Lower Section Bearing Section View
Section 6 Maintenance 6-27 S7AD / S8AD Manual Inner Spindle Lower Section Bearing Section View www.rottlermfg.com... - Page 84 Section 6 Maintenance 6-28 S7AD / S8AD Manual www.rottlermfg.com...
- Page 85 Please visit the service tab of our web page at Send a Service Request www.rottlermfg.com or contact the Rottler Factory Service at service@rottlermfg.com for assistance and your service request. You may also call Rottler at 1-800-452-0534 or 1-253-872-7050 Please ensure you have the Machine Model and Serial Number available when contacting Rottler for Service www.rottlermfg.com...
- Page 86 Section 7 Troubleshooting S7AD / S8AD Manual www.rottlermfg.com...
- Page 87 Section 8 Machine Parts S7AD / S8AD Manual MACHINE PARTS Contents Machine Parts ......................8-1 Front / Right Side View S7AD-S8AD ................... 8-1 Pneumatic Assembly......................8-2 Electrical Enclosure ......................8-3 Electrical Wiring Diagram ....................8-4 650-7-1 Computer Assembly ....................8-5 Upper Housing ........................8-6 Spindle Base Front Section ....................
-
Page 88: Machine Parts
Section 8 Machine Parts S7AD / S8AD Manual Machine Parts Front / Right Side View S7AD-S8AD www.rottlermfg.com... -
Page 89: Pneumatic Assembly
Section 8 Machine Parts S7AD / S8AD Manual Pneumatic Assembly www.rottlermfg.com... -
Page 90: Electrical Enclosure
Section 8 Machine Parts S7AD / S8AD Manual Electrical Enclosure www.rottlermfg.com... -
Page 91: Electrical Wiring Diagram
Section 8 Machine Parts S7AD / S8AD Manual Electrical Wiring Diagram A scalable version of this wiring diagram is located on the manual CD. PENDANT ASSEMBLY HANDWHEEL EMERGENCY STOP 6428 6389D MONITOR THERMAL SWITCH THERMAL SWITCH N.C. N.C. Z-AXIS MOTOR X-AXIS MOTOR BSM80C-375AB2 BSM80C-375AB2... -
Page 92: 650-7-1 Computer Assembly
Section 8 Machine Parts S7AD / S8AD Manual 650-7-1 Computer Assembly www.rottlermfg.com... -
Page 93: Upper Housing
Section 8 Machine Parts S7AD / S8AD Manual Upper Housing www.rottlermfg.com... -
Page 94: Spindle Base Front Section
Section 8 Machine Parts S7AD / S8AD Manual Spindle Base Front Section www.rottlermfg.com... -
Page 95: Inner / Outer Spindle Assembly
Section 8 Machine Parts S7AD / S8AD Manual Inner / Outer Spindle Assembly www.rottlermfg.com... -
Page 96: Spindle Base Bushings
Section 8 Machine Parts S7AD / S8AD Manual Spindle Base Bushings www.rottlermfg.com... -
Page 97: Spindle Base Assembly
Section 8 Machine Parts 8-10 S7AD / S8AD Manual Spindle Base Assembly www.rottlermfg.com... -
Page 98: Left Ballscrew Support
Section 8 Machine Parts 8-11 S7AD / S8AD Manual Left Ballscrew Support www.rottlermfg.com... -
Page 99: Right Ballscrew Support
Section 8 Machine Parts 8-12 S7AD / S8AD Manual Right Ballscrew Support www.rottlermfg.com... -
Page 100: Home And Limit Switches
Section 8 Machine Parts 8-13 S7AD / S8AD Manual Home and Limit Switches www.rottlermfg.com... -
Page 101: Pendant Assembly
Section 8 Machine Parts 8-14 S7AD / S8AD Manual Pendant Assembly www.rottlermfg.com... -
Page 102: Spindle Base
Section 8 Machine Parts 8-15 S7AD / S8AD Manual Spindle Base www.rottlermfg.com... -
Page 103: Chip Shield
Section 8 Machine Parts 8-16 S7AD / S8AD Manual Chip Shield www.rottlermfg.com... -
Page 104: 14" Fly Cutter
Section 8 Machine Parts 8-17 S7AD / S8AD Manual 14” Fly Cutter www.rottlermfg.com... -
Page 105: Chip Chute
Section 8 Machine Parts 8-18 S7AD / S8AD Manual Chip Chute www.rottlermfg.com... -
Page 106: Waycovers And Optional Chip Catcher Assembly
Section 8 Machine Parts 8-19 S7AD / S8AD Manual Waycovers and Optional Chip Catcher Assembly www.rottlermfg.com... -
Page 107: Riser Set
Section 8 Machine Parts 8-20 S7AD / S8AD Manual Riser Set www.rottlermfg.com... - Page 108 Section 8 Machine Parts 8-21 S7AD / S8AD Manual www.rottlermfg.com...
- Page 109 Section 9 Options S7AD / S8AD Manual OPTIONS Optional Equipment Optional Equipment Catalog and Parts Manual are located on the Manual CD shipped with machine. www.rottlermfg.com...
- Page 110 Section 9 Options S7AD / S8AD Manual www.rottlermfg.com...
- Page 111 A complete list of the Material Data Safety Sheets of substances and materials used by Rottler Manufacturing during manufacturing, testing, and shipping is located on the Manual CD shipped with the machine. Material Data Safety Sheets are also located on the company web site: http://www.rottlermfg.com/documentation.php...
- Page 112 Section 10 Material Data Safety Sheets 10-2 S7AD & S8AD Manual www.rottlermfg.com...
- Page 113 Section 10 Material Data Safety Sheets 10-3 S7AD & S8AD Manual www.rottlermfg.com...
- Page 114 Section 10 Material Data Safety Sheets 10-4 S7AD & S8AD Manual www.rottlermfg.com...
Need help?
Do you have a question about the SAD Series and is the answer not in the manual?
Questions and answers