Advertisement
Quick Links
Z22
Technical instructions
TECHNICAL INSTRUCTIONS FOR JUICE EXTRACTOR Z22
INDEX:
1.-
Disassemble machine
2.-
Dismantling and change motor
3.-
Closing machine
4.-
Grating disc change
5.-
Electric diagram
6.-
Troubleshooting
1.- Disassemble machine
1.1.
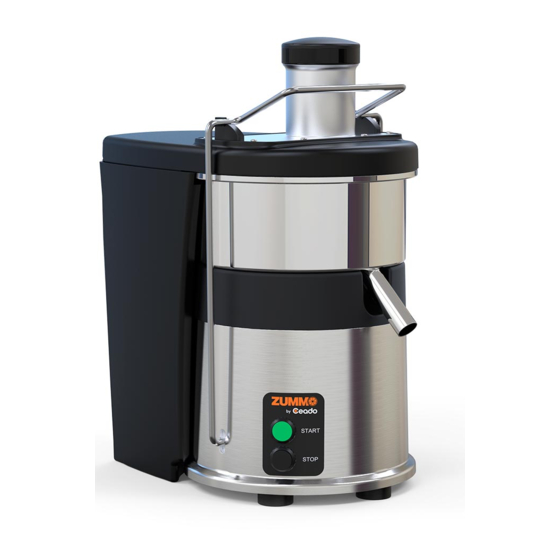
This juicer machine has a metallic locking arm, that allows locking the machine up while
working. When the locking arm is unlocked, turns a micro-switch off and it makes that the
juicer doesn't works and we can work safety. (Otherwise we should disconnect the mains
before doing anything with the machine)
011319-03
1
Advertisement

Subscribe to Our Youtube Channel
Summary of Contents for Zummo Z22
- Page 1 Technical instructions TECHNICAL INSTRUCTIONS FOR JUICE EXTRACTOR Z22 INDEX: Disassemble machine Dismantling and change motor Closing machine Grating disc change Electric diagram Troubleshooting 1.- Disassemble machine 1.1. This juicer machine has a metallic locking arm, that allows locking the machine up while working.
- Page 2 Technical instructions 1.2. When we have the locking arm unlocked we proceed to remove the juicer cover and pull the bowl out and all the pieces from the basket. Be careful for not to cut you off with the grating disc.
- Page 3 Technical instructions 2.- Dismantling and change motor 2.1.- Fist of all, we must lay the machine down and remove 4 screws that fixes the base to the housing. There are two screws that you see at first sight but another 2 are under the rubber feet.
- Page 4 Technical instructions 2.3. Straightaway, disconnect both connectors of the capacitor and proceed for its discharge for security (please touch both connectors at the same time with an insulated screwdriver). Next step is to remove the locking arm; first we unscrew two hexagon socket screws on both sides and then by stretching both sides of the locking arm out.
- Page 5 Technical instructions 2.4. Once we have the locking arm removed and the guideway that fix it too, we proceed to dismantling the motor and, before that, we need to ensure that there is nothing that disturb at the rear of the motor, so that we would have free access to handle the motor (it’s highly important to take care that all the wires below don’t disturb us before trying to dismantle the motor).
- Page 6 Technical instructions 2.6. After removing the drive disc, we have to remove the rubber cover below the bowl. We have to stretch from the slot that we have on the side; then we have to stretch slowly for avoid that we break the cover.
- Page 7 Technical instructions 2.8. For assembling the new motor, you should fit it in the housing and then tightening the 4 Allen screws again. Next step will be fitting again the rubber cover. Pay attention that the cover fits on the machine; first on the slot and after on all the sides, and the with the help of a flat screwdriver fit the center of the cover in the hole of the joints.
-
Page 8: Closing The Machine
Technical instructions 3.- Closing the machine 3.1. After checking that the locking arm is fitted on the right position*, we proceed to fix it to the mobile guideway in both sides, then we put the rubber washer and the bolt that fits the guideway on the motor. - Page 9 Technical instructions Before proceeding the machine assembling, the ground must be connected ALWAYS at the hexagon socket screw of the locking arm fitting and to the chassis also with a screw. (see green marks) 4.- Grating disc change: 4.1.- For changing the grating disc we must disconnect the mains and then proceed to remove all the stuff of the bowl as shown on the picture below: Fig.2.
-
Page 10: Electric Diagram
Technical instructions 5.- Electric diagram 011319-03... -
Page 11: Troubleshooting
Technical instructions 6.- Troubleshooting In case that we have a breakdown at the machine Z22, we must proceed to look over the machine following next guidelines. 1. The motor doesn’t run: a. Check if the machine is connected to the mains. - Page 12 Technical instructions In case there will be a contact damaged we will proceed to change it with a flat screwdriver pressing down the plastic lever (yellow arrow) and the contact will drop down. After turning half a round, the small torx socket screw (yellow circle) the button could be separated from the contact box.
- Page 13 Technical instructions e) If the latest steps are ok; next verification, should be to measure the capacitor’s capacity to rule out if the capacitor is working properly or not. For doing this verification we will use the voltmeter with the capacity measure option (green mark) and we have to measure between both connections of the capacitor (yellow mark).


Need help?
Do you have a question about the Z22 and is the answer not in the manual?
Questions and answers