
Subscribe to Our Youtube Channel
Related Manuals for Fayat Group SCARAB M6


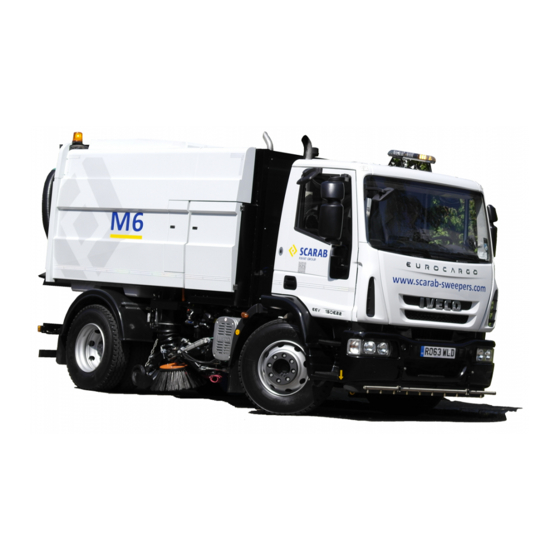
Summary of Contents for Fayat Group SCARAB M6
- Page 1 SKID - MOUNTED SWEEPING MACHINES Technical operating and basic maintenance instructions This document contains important Health and Safety advice and must remain with the Machine at all times...
- Page 2 Operating Instructions Scarab M6 1. Access door to electrics, pneumatics, hydraulic oil tank & auxiliary engine fuel tank 2. Locker 3. LP water pump & valves 4. Water tank 5. Auxiliary engine access ladder (orientation determined by driving side) 6. Central brush (Wide sweep) 7.
- Page 3 ENGLISH Scarab M6 Operating Instructions for Scarab M6 Skid Mounted Road Sweeper Incorporating Basic Operator’s Maintenance Information When re-ordering this document, please quote the following Part Number: Part No. SCAZ042891 Version 1.3.4..........August 2018 This manual is published by the Technical Publications Department of Scarab Sweepers Ltd. and every effort is made to ensure that the information it contains is correct at the time of publication.
-
Page 4: General Information
If this type of information is required, please contact our APPLICABILITY Technical Sales staff giving details of your intended chassis and any other relative information. This manual covers the operating requirements of the Scarab M6 & FS6000 sweeper with the CANbus 3 operating system. TOWING CUMMINS AUXILIARY ENGINE SERIOUS DAMAGE TO THE TRANSMISSION COULD RESULT IF THE MACHINE IS TOWED WHILE THE GEARBOX IS ENGAGED. -
Page 5: Table Of Contents
Operating Instructions Scarab M6 TABLE OF CONTENTS Para Title Page Para Title Page GENERAL INFORMATION ........-1 USING THE DUST SUPPRESSION SYSTEM . -
Page 6: Health & Safety Advice
Operating Instructions Scarab M6 HEALTH & SAFETY ADVICE IN THE INTERESTS OF YOUR HEALTH AND SAFETY, IT IS IMPORTANT THAT THE FOLLOWING POINTS ARE OBSERVED AT ALL TIMES: • KEEP LONG HAIR, LOOSE CLOTHING AND HANDS AWAY FROM MOVING • ONLY TRAINED OPERATIVES SHOULD BE ALLOWED TO DRIVE OR WORK ON PARTS. - Page 7 Operating Instructions Scarab M6 HAZARD AWARENESS All operators and workshop personnel should be aware of the physical and biological risks that are inherent in the operation of a road sweeper. The risk falls into two main categories as follows: • Risks represented by the sweeper and its various systems.
-
Page 8: Operating Advice
Operating Instructions Scarab M6 OPERATING ADVICE Please remember, the information provided in this handbook is designed to ensure that the Scarab sweeper operates both safely and efficiently. The design of this machine is for the removal of spoil on traffic or pedestrian areas also litter collection using the wander hose. -
Page 9: Safety Props
Operating Instructions Scarab M6 DOOR SAFETY PROP HOPPER SAFETY PROP Ensure the prop is completely unlatched when the hopper is in the raised position. Never work under a partially raised hopper or if the hopper prop is latched When inserting the... -
Page 10: The Canbus System
Operating Instructions Scarab M6 THE CANbus SYSTEM The CANbus system comprises two control panels (main and auxiliary) an LCD monitor and a number of control nodes. The system controls and monitors all sweeper functions and maintains a log of various operating parameters such as operating hours and any fault conditions that might occur. -
Page 11: Main Control Panel Switch Functions
Operating Instructions Scarab M6 Main control panel switch functions Switch functions are described from Left to Right and Top to Bottom. F1/2/3/4 - Press to activate special options. SYSTEM-START - Press to start/stop auxiliary engine and sweep mode. SIDE BRUSH PRESSURE DOWN - Press to increase brush pressure. -
Page 12: Auxiliary Control Panel Switch Functions
Operating Instructions Scarab M6 Auxiliary control panel switch functions HIGH-PRESSURE WATER PUMP (Option) - Press to start. SUCTION FAN - Press to start the Suction Fan (approximately 1650 RPM). NOT APPLICABLE NOZZLE TILT (LOCKING MODE) - Press to tilt the suction nozzle for larger items. -
Page 13: Remote-Control Switch Box Functions
Operating Instructions Scarab M6 Remote-control switch box functions The hopper Raise/Lower and rear door Open/Close switches are located in the remote control box. This is stowed in the cab, between the driver’s seat and door and is connected to a socket via a coiled lead. -
Page 14: The Lcd Monitor
Operating Instructions Scarab M6 THE LCD MONITOR The sweeping monitor displays information on the current status of the sweeper while it is in sweep mode, by indicating which items of equipment are active, plus other relevant information ie: fluid levels, fan speed and temperatures, it also alerts the user to any warnings by means of appropriate flashing symbols and, when appropriate, a warning buzzer. -
Page 15: Additional Controls & Instruments
Operating Instructions Scarab M6 Additional controls & instruments Do not exceed a pressure of 2.5 bar when adjusting brush pressure settings. Failure to comply will result in drastically reduced brush life. AIR-PRESSURE REGULATOR - Used to adjust the amount of up/down-thrust applied to the brush(es). -
Page 16: Operating In Sweep Mode
Operating Instructions Scarab M6 OPERATING IN SWEEP MODE REFER TO THE HEALTH & SAFETY INFORMATION ON Page 6 REDUCING NOISE LEVELS & FUEL CONSUMPTION: Although it is important to always operate within the engine’s optimum speed range, there are times when it is possible to reduce engine speed to the lower end of this, thereby reducing noise levels. This is most beneficial when sweeping at night, or in areas sensitive to noise pollution. -
Page 17: Suction Fan Boost Setting
Operating Instructions Scarab M6 Suction fan boost setting When required a boost setting is available for the suction fan. This increases fan speed and is used when sweeping heavy material. To operate the fan at the Boost setting, carry out the following procedure: 1. -
Page 18: Exiting Sweep Mode/Stopping The Auxiliary Engine
Operating Instructions Scarab M6 Exiting sweep mode/stopping the auxiliary engine 1. Press the suction fan switch to stop the fan. The suction fan symbol on the LCD monitor will change from GREEN to WHITE. 2. Move the Multi-Function Switch (located on the lower extension of the auxiliary control panel) to the ‘Sweep Master Switch OFF position. -
Page 19: Discharging The Hopper (Tipping)
Operating Instructions Scarab M6 DISCHARGING THE HOPPER (TIPPING) Ensure that all personnel are clear of the door. Ensure that the suction fan is turned OFF and that there is room for the door to open fully. 1. With the machine correctly positioned in the discharge area. -
Page 20: Rear Door Operation
Operating Instructions Scarab M6 Rear Door Operation Ensure that all personnel are clear of the rear door and there is enough room for it to open fully. Rear Door Prop Ensure that the suction fan has been switched off. When working with the door in the fully raised position ensure that the door safety prop has properly deployed. -
Page 21: Using The Auxiliary Hand Pump
Operating Instructions Scarab M6 USING THE AUXILIARY HAND PUMP 1. Engine OFF. Handbrake ON. HOPPER RAISE/LOWER VALVE 2. Turn ON the ignition (do not start the engine). Select sweep mode (main panel). 3. Insert the pump handle. 4. Press the required function button on the remote control and hold, while operating the pump handle. -
Page 22: Rear-Mounted Wander Hose
Operating Instructions Scarab M6 REAR-MOUNTED WANDER HOSE The rear-mounted wander hose arrangement is permenantly fitted. The weight of the hose/nozzle is supported by a gas strut attached to the boom assembly. 1. Vehicle engine stopped. Handbrake ON. Auxiliary WANDER BOOM STOWAGE HOOK engine ON. -
Page 23: Using The Dust Suppression System
Operating Instructions Scarab M6 USING THE DUST SUPPRESSION SYSTEM Filling the water tank Attach the appropriate coupling and water hose to the filler aperture (1) situated in the right hand tool locker, and fill until the blue float reaches the top of the water level sight tube (2)situated on the left hand side of the machine (use clean water). -
Page 24: Using The High-Pressure Water System (Option)
Operating Instructions Scarab M6 USING THE HIGH-PRESSURE WATER SYSTEM (OPTION) High pressure water can be hazardous, always wear goggles or suitable eye/face protection. Exercise extreme care when using the lance, do not direct the jet at other people or electrical connections. -
Page 25: Clearing A Blockage In The Suction Path
Operating Instructions Scarab M6 CLEARING A BLOCKAGE IN THE SUCTION PATH A blockage in the suction path will be indicated by a trail of material behind the Machine. The most likely cause is an obstacle either in the suction nozzle, or the trunking immediately above it, around which other material collects as sweeping progresses. It is important that such problems are rectified as soon a possible. - Page 26 Operating Instructions Scarab M6 AREA MOST LIKELY TO SUFFER A BLOCKAGE Part No. SCAZ042891 1.3.4 E&OE...
-
Page 27: Recommended Operator's Routine Maintenance
Operating Instructions Scarab M6 RECOMMENDED OPERATOR’S ROUTINE MAINTENANCE It is important that the following routine maintenance procedures are carried out as directed. This will help to ensure that your Scarab sweeper performs at the optimum level of safety and efficiency. Refer to the paragraphs immediately following this schedule and to the Table of Contents for more detailed information. -
Page 28: Key Maintenance Procedures
Operating Instructions Scarab M6 It is vital that the water system is drained totally if the air temperature is expected to fall to 0°C or below. In frosty weather leave the hopper slightly raised with the rear and side door partially open. -
Page 29: Auxiliary Engine
Operating Instructions Scarab M6 Auxiliary engine The auxiliary engine is the responsibility of the operator, as is the chassis engine. The following instructions should be followed as detailed in the maintenance schedule on Page 27 and in the manufacturer’s recommendations. -
Page 30: Engine Coolant Level
Operating Instructions Scarab M6 Engine coolant level It is advisable to top-up the coolant level when the engine is cold. If topping-up is required when the coolant is hot adequate precautions must be taken, as an overpressure will have built up in the system. -
Page 31: Hydraulic Oil Tank
Operating Instructions Scarab M6 Hydraulic oil tank It is advisable to top-up the Hydraulic oil level when the system is cold. The hydraulic oil tank gauge is fitted with low level sensor. If the oil level drops too low the engine will cut-out preventing damage to the hydraulic pump. -
Page 32: Suction Nozzle Clearances
Operating Instructions Scarab M6 Suction nozzle clearances TOWPOINT Inspect the suction nozzle flaps to verify that they are in good condition and do not show excessive wear. Adjust as necessary to achieve the correct flap to ground clearances. The factory settings are: •... -
Page 33: Removing & Cleaning The Water Pump Element(S)
Operating Instructions Scarab M6 Removing & cleaning the water pump element(s) Both the low-pressure and, if fitted, the, high-pressure water pump are fitted with strainers to ensure that foreign matter does not enter the pump. The following steps detail the recommended cleaning procedure. -
Page 34: Manual Greasing & Lubrication
Operating Instructions Scarab M6 Manual greasing & lubrication Carry out manual greasing in accordance with the appropriate schedule (Page 27) and by referring to the accompanying diagrams shown here. SUCTION NOZZLE ASSEMBLY SIDE BRUSH ASSEMBLIES Door Hinge x3 BOTH SIDES... -
Page 35: Lcd Monitor - Options Screen
Operating Instructions Scarab M6 LCD monitor - Options screen To access the option screen mode from the start-up screen press button Button function 1. Display: Press to change background colours (black/white). 2. Menu: Press to access option screen mode (illustrated). - Page 36 Operating Instructions Scarab M6 Hours worked Driver fault codes Displays the working time of various functions. Highlight either the CAN or desired Node. Service Hours only display when activated. Press the encoder to enter. Part No. SCAZ042891 1.3.4 E&OE...
- Page 37 Operating Instructions Scarab M6 CAN error screen Driver fault codes Identifies location of system errors. Entering a Node screen allows Pin-Contact view. Highlighted in red when active. Pin numbers with an active fault are highlighted in RED. = Open Circuit = Short Part No.
- Page 38 Operating Instructions Scarab M6 Screen Settings Displays the following current conditions: Highlight the desired panel and press the encoder to enter the setting screen. • Engine Speed • Battery Voltage • Coolant Temperature • Turbo Boost Pressure • Turbo Air Pressure •...
- Page 39 Operating Instructions Scarab M6 Screen brightness setting Time/date setting Rotate the encoder to adjust the screen brightness (2% increments). Rotate the encoder to the desired panel and press. Rotate to the correct, Year, Day, Hour, etc and press the set button.
- Page 40 Operating Instructions Scarab M6 Rear camera Information Enable/disable rear camera. When fitted. Displays current Node program version. A green tick displays in the centre of screen icon when camera is Press button (1) to access the PDF viewing screen. Follow the on activated.
- Page 41 Operating Instructions Scarab M6 Button checks Main control panel button check Highlight the appropriate panel and press the controller. Press the appropriate button on the main control panel. As each button is pressed the corresponding graphic will illuminate. A beep will sound if the function is fitted.
- Page 42 Operating Instructions Scarab M6 Auxiliary control panel button check Use the main control panel instructions to test buttons and joystick. Part No. SCAZ042891 1.3.4 E&OE...
-
Page 43: Screen Menu Description
Operating Instructions Scarab M6 Operator’s notes Part No. SCAZ042891 1.3.4 E&OE... - Page 44 Operating Instructions Scarab M6 Operator’s notes Part No. SCAZ042891 1.3.4 E&OE...
- Page 45 Scarab M6 Operating Instructions Part No. SCAZ042891 1.3.4 E&OE...
- Page 46 Scarab M6 Operating Instructions Scarab Sweepers Limited Pattenden Lane, Marden, Kent TN12 9QD Telephone: 01622 831 006 Fax: 01622 832 417 International: +44 (0) 1622 831 006 International +44 (0) 1622 832 417 e-mail: scarab@scarab-sweepers.com Website: www.scarab-sweepers.com Part No. SCAZ042891 1.3.4...
Need help?
Do you have a question about the SCARAB M6 and is the answer not in the manual?
Questions and answers