Table of Contents
Advertisement
Quick Links
Advertisement
Table of Contents

Subscribe to Our Youtube Channel
Related Manuals for Acuity AccuRange AR3000


Summary of Contents for Acuity AccuRange AR3000
- Page 1 AccuRange AR3000™ Distance Measurement Sensor User’s Manual LLL003001 – Rev. 1.2 For use with AR3000™ August 25, 2020 Acuity A product line of Schmitt Industries, Inc. 2765 NW Nicolai St. Portland, OR 97210 www.acuitylaser.com AR3000 User’s Manual Rev 8/25...
- Page 2 Limited Use License Agreement YOU SHOULD CAREFULLY READ THE FOLLOWING TERMS AND CONDITIONS BEFORE OPENING THE PACKAGE CONTAINING THE COMPUTER SOFTWARE AND HARDWARE LICENSED HEREUNDER. CONNECTING POWER TO THE MICROPROCESSOR CONTROL UNIT INDICATES YOUR ACCEPTANCE OF THESE TERMS AND CONDITIONS. IF YOU DO NOT AGREE WITH THEM, YOU SHOULD PROMPTLY RETURN THE UNIT WITH POWER SEAL INTACT TO THE PERSON FROM WHOM IT WAS PURCHASED WITHIN FIFTEEN DAYS FROM DATE OF PURCHASE AND YOUR MONEY WILL BE REFUNDED BY THAT PERSON.
- Page 3 Procedures for Obtaining Warranty Service 1. Contact your Acuity distributor or call Schmitt Industries, Inc. to obtain a return merchandise authorization (RMA) number within the applicable warranty period. Schmitt Industries will not accept any returned product without an RMA number.
- Page 4 AR3000 User’s Manual LLL003001 – Rev 2/10...
-
Page 5: Table Of Contents
User’s Manual for the AR3000™ Series Distance Measurement Sensors Rev. 1.9 For use with AR3000 Table of Contents INTRODUCTION ............................... 1 1.1........................... 1 ENERAL VERVIEW 1.2..........................2 EFINITION OF ERMS 1.3........................2 UICK TART NSTRUCTIONS 1.3.1. Mounting and Power connection ......................2 1.3.2. - Page 6 5.1.4. Baud Rate (BRx) ..........................18 5.2. (SD, SF, TE) ......................19 ERIAL UTPUT 5.2.1. Serial Data Format (SDx y) ......................... 19 5.2.2. Data Units Scale Factor (SFx.xxxxxx) ....................20 5.2.3. Serial Output Termination Character (TEx) ..................21 5.3............................21 RROR ESSAGES 5.4.
-
Page 7: Introduction
Measurement output is in the form of serial data (RS232 or RS422 models) and analog output (4- 20mA current loop). Special order sensors include Profibus®, or SSI interfaces. Those interface configurations are not discussed in this manual. Contact Acuity for details. AR3000 User’s Manual... -
Page 8: Definition Of Terms
Do not point the pilot laser at any person, particularly a person’s eyes or face. Do not attempt to disassemble the sensor. Improper disassembly will destroy the optical alignment of the sensor and necessitate factory repairs. Do not operate the sensor in areas where the sensor case is exposed to direct sunlight for extended periods or where the air temperature is more than 60C (140F) or less than -40°C (-40°F). -
Page 9: Serial Data Wires
1.3.2. Serial Data Wires Quick suggestion: Connect the wires to a 9 pin D-SUB male connector that can be plugged into a COM port of a PC (RS232): Black (Ground) to pin 5, White (Transmit) to pin 2, and Brown (Receive) to pin 3. Start a HyperTerminal program on the PC and set it for that COM port at 115200 baud, 8 bit, 1 start, parity: none, 1 stop, no flow control. -
Page 10: General Description
2. General Description The AR3000 is a laser diode based distance measurement sensor for ranges up to 980 feet (300m) on regular surfaces and up to 9800 feet (3000 m) using a reflective target. The accuracy is generally specified with a linearity of +/- 0.8 inches (20mm) at 100 Hz. Linearity will vary depending on pulse frequency, distance averaging, temperature and surface reflectivity of the target surface. -
Page 11: Installation
2.3. Installation The AR3000 sensor is typically installed by affixing the sensor to a machined bracket with threaded bolts through the three mounting holes on either of the sensor’s sides or the bottom. Their location is shown in the mechanical drawing of Figure 1. The laser should be aimed at a target such that the distance from the sensor face to the target can be meausured. -
Page 12: Pilot Laser
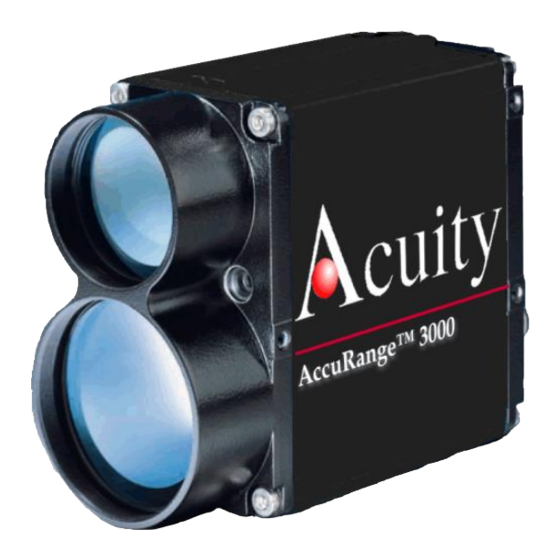
2.5. Pilot Laser The Class 2 visible pilot laser is emitted from a small window between the two large lenses on the front of the AR3000 distance measurement sensor. Its purpose is to help users aim and align the sensor to a distant target. In the factory default startup mode, the pilot laser is enabled and flashes at a frequency of 2 Hz. -
Page 13: Laser Beam Profile
at 1 m at 25 m at 5 m at 50 m at 10 m Figure 5 Tolerance of 10 mrad Pilot Laser location relative to the infrared measurement laser 2.6. Laser Beam Profile The invisible measurement laser beam emitted from AR3000 sensor has a rectangular profile that expands (diverges) as its distance from the sensor increases. -
Page 14: Installation And Checkout
3. Installation and Checkout 3.1. Mounting Mount the sensor in such a way that the case is not twisted or warped. Using three hard points along the front and back edges or a slightly compliant mounting system are the best methods. Do not clamp or squeeze the sensor case excessively. -
Page 15: Standalone Cabling
In the next configuration screen, set to 115200 baud, 8 bits, no parity, 1 stop bit and no flow control to communicate with a sensor in the default configuration. Free demonstration software is also available through the Acuity website. RS232 model: A 9-pin serial D-sub serial female connector can be attached to the serial output wires to connect the AR3000 directly to an IBM-PC compatible 9-pin serial port. -
Page 16: Power On
RS422 model: An RS422 adapter must be used to connect the AR3000 to an IBM-PC compatible computer. The RS422 wires are as follows: white brown green yellow grey pink blue black violet grey/pink (tan) red/blue (orange) Figure 9- Wiring configuration for RS422 serial communications 3.3. - Page 17 Verify that the target is of sufficient reflectance by verifying that the “TARGET” LED on the rear of the sensor is Yellow or Green. Do not use retro reflective targets if the “TARGET” LED becomes RED in color when the sensor is aimed at the target. Distance offset settings may alter the values output by the sensor.
-
Page 18: Signal And Power Interface
4. Signal and Power Interface The AR3000 has a multipurpose cable (sensor cable) with solder tail wires. Connection and termination according to the instructions is essential for correct sensor operation. Read the wire descriptions for connection information. Figure 10 AR3000 multipurpose cable with 12 conductors plus shield and corresponding pin arrangements 4.1. -
Page 19: Shield (Clear)
The Blue wire is the Power Supply Input to the sensor. The sensor requires +24 VDC power and consumes <5 W without the heater and 11.5 W when the automatic heater is on. Power supplies from 10 VDC to 30 VDC may be used. Higher voltages will result in excessive current drawn by the over-voltage protection circuitry and may cause permanent damage. -
Page 20: Analog Output (Yellow, Gray/Pink Or Tan)
4.1.4. Analog Output (Yellow, Gray/Pink or Tan) The Gray/Pink wire (or alternate Tan in some cables) is the return signal for the Analog Output. It is also the power supply ground. The analog signal for distance is a 4-20 mA current loop. -
Page 21: Alarm Outputs (Red/Blue Or Alternate Orange, Violet)
4.1.5. Alarm Outputs (Red/Blue or alternate Orange, Violet) The Red/Blue or alternate Orange (Q1) and Violet (Q2) wires are the Alarm Outputs. See Alarm Output Operation (section 6) for operation options and details. The Alarm Outputs are open collector PNP transistor switches to the positive power supply (VCC). -
Page 22: Laser Trigger (Green)
4.1.6. Laser Trigger (Green) The Green wire is the Trigger input. It is normally left unconnected to enable the laser. The trigger input is intended for triggering a distance measurement with an external signal that is applied as a voltage on the green wire. A voltage between 3.0 V and 30 V is a HIGH input and a voltage between 0 V and 1.5 V is a LOW input. -
Page 23: Serial Interface Operation
5. Serial Interface Operation 5.1. Serial Hardware Interface The serial port is available as either an RS232 or RS422 model, which must be selected when placing an order for the AR3000 sensor. 5.1.1. Communications Protocol The easiest way to configure the AR3000 is by using a PC with a serial (RS232 or RS422) communication port and a terminal emulation program. -
Page 24: Show Model Identifications (Id)
Queries / sets scale factor Queries / sets user-specified offset Sets current distance as negative offset Queries / sets measurement window Queries / sets sampling frequency Queries / sets number of samples to be averaged before outputting a result Queries / sets trigger delay Queries / sets error mode (0, 1, 2) Queries / sets Alarm 1 output Queries / sets Alarm 2 output... -
Page 25: Serial Data Output (Sd, Sf, Te)
5.2. Serial Data Output (SD, SF, TE) The Serial Data Format units, and errors are selectable using the Serial Output Control command. Serial data is transmitted from the AR3000 as characters (bytes) of 8 data bits with no parity and 1 stop bit. -
Page 26: Data Units Scale Factor (Sfx.xxxxxx)
Velocity command reports the velocity as the first number (if velocity commanded). sign (space or ‘-’), 4+3 decimal digits plus space -0123.456 Decimal 24 bit 2’s complement number plus space FFFFFE Hexadecimal 21 bit 2’s complement number Binary 1BBBBBBB 0BBBBBBB 0BBBBBBB The Distance is reported in units determined by the scale factor (see section 5.2.2). -
Page 27: Serial Output Termination Character (Tex)
5.2.3. Serial Output Termination Character (TEx) This parameter specifies the output termination for the serial transmission. The factory default setting is Carriage Return Line Feed (TE0). Type TE<Enter> to display the current termination character code. Type TE x<Enter> to specify the serial output termination setting. The serial port will respond by displaying the new value. -
Page 28: Displaying, Configuring And Resetting Parameters
5.5.2. Show Hardware Status (HW) Type HW<Enter> to display a specific list of diagnostic information for the AR3000 sensor. The information can be interpreted by a technician at Acuity. 5.5.3. Show Internal Temperature (TP) Type TP<Enter> to display the sensor’s internal temperature. -
Page 29: Auto Start (Asx)
5.5.6. Auto Start (ASx) Autostart defines the command that will be activated when the AR3000 is powered on. The factory default command for Autostart is ID. Type AS<Enter> to display the Autostart command. Type ASx<Enter> to set a new Autostart command. The serial port will respond by displaying the new command. -
Page 30: Analog Output Operation (Qa, Se)
Analog Output Operation (QA, SE) The analog output uses two wires in the basic configuration see section 4.1.4. The analog output is updated with each sample result according to combination effected by the measurement frequency and the sample averaging. The analog output will deliver a current which increases linearly from 4 mA at the Zero-point to 20 mA at the Span-point. -
Page 31: Alarm Output Operation (Q1, Q2, Se)
6. Alarm Output Operation (Q1, Q2, SE) The AR3000 comes standard with two, dedicated digital alarm switches. See the wiring in section 1.3.4 Alarm outputs operation may also be referred to as digital or limit outputs. Users of the AR3000 laser sensor may wish to monitor the position of an object and receive an alarm if it moves beyond set distance limits. -
Page 32: Error Mode Behavior For The Alarm Switches (Se0, Se1 Or Se2)
6.2. Error Mode behavior for the alarm switches (SE0, SE1 or SE2) This parameter specifies the behavior of the AR3000 alarm output signals during error conditions E02 (common) and E04 (See Error Messages section 5.3 for more information). The default setting is SE1. -
Page 33: Performance And Optimization
7. Performance and Optimization 7.1. Measurement Modes The AR3000 will not begin measuring and reporting until the user selects a measurement mode. Once initiated, the distance will be measured, and when a sample result is computed, it will be sent on both the serial, analog, and alarm signals. See section 5.2 to specify the serial format, section 5.6 to specify the analog behavior, and section 6 to specify the alarm behavior. -
Page 34: Start Velocity Tracking Mode (Vt) (
Type VM<Enter> to initiate a single velocity measurement. This command does not change any configuration settings. The time required for each measurement depends on the number of averaged samples (SA) and the preset measuring frequency (MF). With the factory default settings the VM command takes 250 ms to complete.To Stop) -
Page 35: Measurement Window (Mwx Y)
Examples: MF1000, SA1000 sample time = 1 second rate = 1 sample/second MF2000, SA1000 sample time = 0.5 second rate = 2 samples/second MF2000, SA20000 sample time = 10 second rate = 0.1 sample/second 7.4. Measurement Window (MWx y) This sets a window of allowed sample results for the AR3000. Targets detected outside the limits x and y will return an error (E02 - no target). -
Page 36: External Trigger Operation
8. External Trigger Operation The AR3000 can operate with a hardware trigger that has been connected according to the diagram in Section 4.1.5. To operate with an external hardware trigger, the AR3000 must operate in the Trigger Measurement Mode, started by the Start Trigger command (DF). The Trigger Delay (TD) settings affect the External Trigger operation. -
Page 37: Hardware Status Display
Target of return signal Yellow Signal (1000-1500) Green, steady Ideal signal (1500 – 3400) Green, pulsed Strong signal (>3400) Not ready Operational Status Sensor defect, contact Acuity readiness state Green Ready Alarm 1 Yellow Active Alarm 2 Figure 17- Rear... -
Page 38: Serial Command Quick Reference
10. Serial Command Quick Reference AR3000 Configuration Data Settings (Serial) Factory Default Serial Command Name Serial Code / Function / Setting Command Displays the sensor’s manufacturing data and serial numbers Model identification Show’s menu of possible configurations Online Help Menu Distance tracking mode Start continuous Measurement Tracking (<Esc>...
Need help?
Do you have a question about the AccuRange AR3000 and is the answer not in the manual?
Questions and answers