Table of Contents
Advertisement
Advertisement
Table of Contents
Troubleshooting

Related Manuals for Sooil Diabecare Dana-i


Summary of Contents for Sooil Diabecare Dana-i
- Page 2 Sooil Development Co.,Ltd. 62, Yonggu-dearo 2325beon-gil, Giheung-gu, Yongin-si, Gyeonggi-do, 16922, Republic of Korea Tel: 82-2-3463-0041 Fax: 82-2-3463-7707 E-mail: sooil@sooil.com http://www.sooil.com MT Promedt Consulting GmbH Altenhofstrasse 80, 66386 St. Ingbert, Germany Tel: 49-6894-851020 Local Distributor / pump specialist...
-
Page 3: Table Of Contents
Table of Contents Introduction ..............5 Diabecare DANA-i Insulin Pump Introduction .......... 5 Explanation of Warning Symbols ............5 Indications for Use ................6 Contradiction ..................6 Potential Risks ..................6 Precautions ..................7 Getting Started ..............9 Components of Diabecare DANA-i System ..........9 ➢... - Page 4 Using DANA Auto Setter : ..............34 ➢ Inserting the Reservoir into the Insulin Pump ........35 Connecting the Infusion Set to the Insulin Pump ........36 Refill ....................37 Prime the Infusion Set Tubing ............. 38 PRIME procedure: ................38 ➢...
- Page 5 Stop an Extended Bolus ..............68 ➢ Dual Pattern Bolus ................69 Starting a Dual Pattern Bolus .............. 69 ➢ Stopping a Dual Pattern Bolus ............. 70 ➢ Alarm, Error and Alert ............ 71 ALARM Message ................72 ➢ ERROR Message ................77 ➢...
- Page 6 Cyber Security ................97 Wireless communication ..............98 DATA Security ................... 98 ➢ Declaration of EMC compatibility ............98 ➢ Explanation of Universal Symbols ............. 99 11. Index ................101 12. Warranty ..............103...
-
Page 7: Introduction
1. Introduction Diabecare DANA-i Insulin Pump Introduction The Diabecare DANA-i Insulin Pump herein after will be referred to as ‘Insulin Pump’ throughout the manual. Warning The Diabecare DANA-i system is only to be used by patients who have received training from a certified diabetes educator and/or insulin pump trainer and by advice from a physician. -
Page 8: Indications For Use
Indications for Use The Diabecare DANA-i Insulin Pump is intended for the subcutaneous delivery of insulin, at set and variable rates, for the management of diabetes mellitus in persons requiring insulin. The pump is able to reliably and securely communicate with compatible, digitally connected devices, including automated insulin dosing software, to receive, execute, and confirm commands from these devices. -
Page 9: Precautions
3.3 u/h The pump is indicated for use with U-100 insulin. The other insulins have not been tested and may not be compatible for use with the Diabecare DANA-i insulin pump. Change the reservoir and the Infusion Set regularly, as recommended by healthcare professionals. - Page 10 11. Remove the battery for long-term storage. 12. If remote control is not intended to be used, it is suggested to turn the BLE off by activating ‘Airplane Mode’ to prevent unintentional delivery.
-
Page 11: Getting Started
2. Getting Started To make proper use of Diabecare DANA-i Insulin pump, additional accessories and other components are required. ➢ Components of Diabecare DANA-i System Insulin Pump (1) DANA Auto Setter (1) Syringe Cap (2) Battery Cap (2) Linking Screw (2) -
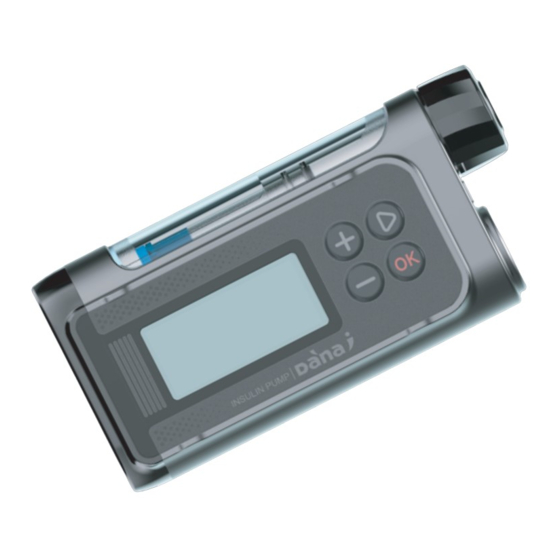
Page 12: Getting To Know The Dana Insulin Pump
Getting to know the DANA Insulin Pump ➢ Diabecare DANA-i Insulin Pump 1. Reservoir Cap The reservoir and linking screw are inserted in this compartment. Turn the reservoir cap clockwise ¼ turn to open. 2. Battery Cap The battery is inserted in this compartment. -
Page 13: Installing A Battery
Installing a battery 1. Open the battery cap and turning clock- wise 45 degrees. Tip To open the battery cap, use a coin. Place the edge of the coin in the slot of the battery cap. 2. Insert the battery with the positive (+) at top and insert the negative (-) into the Insulin Pump. - Page 14 For accurate reading of the remaining battery charge, check the battery display ⚫ following the delivery of a bolus Notice The Diabecare DANA-i Insulin Pump is powered by an external battery. Notice SOOIL recommend using either a ‘Duracell Gold’ alkaline AAA battery or an ‘Energizer Advanced’ alkaline AAA battery.
-
Page 15: Display Screen
Display Screen ➢ Initial Screen The initial screen is the first menu display. Enter by depressing any key from battery save mode Current date and time Time system option 12/24 available Month/day/Year hh:mm am/pm Refer to 3.1 Setting the time and date Notice When the time is set to ‘12’, “AM/PM”... - Page 16 Button lock Appears on the screen when it is locked. Refer 6.3 Button Lock Insulin remaining volume Displays volume of insulin in the reservoir. Notice Low Reservoir indicator will flash when insulin volume remaining is low. Refer to chapter 7. Alarms and Error messages. Extended bolus status This icon (EXTENDED x.xxu/h) will be displayed only when extended bolus is active.
-
Page 17: Remote Control Mode
➢ Remote control mode Remote control mode When the compatible device (e.g. mobile applications) is connected to the pump, the pump screen is displayed as shown in the figure. In this state, the button of the pump does not work. Caution If the following screen is displayed even you do not intend to connect with a... -
Page 18: Patient Education
Patient Education Follow up education is recommended for all insulin pump user. When starting on insulin pump therapy, the patient should have daily contact with the pump trainer and/or medical professional. Visit with the Endocrinologist, Diabetologist or Advanced Practice Nurse within 3-7 days. -
Page 19: Programming The Insulin Pump
3. Programming the Insulin Pump ➢ Structure of DIABECARE DANA-i Menu Warning Follow the training and advice of a pump specialist Healthcare professional and certified Insulin pump trainer whilst inputting the initial settings. Incorrect settings may cause serious harm. -
Page 20: Adjust The Time
-11 hour Samoa +12 hour New Zealand Notice Changing 12 or 24hour clock format refer to 3.4 Setting User Options. Notice The Diabecare DANA-i Insulin Pump has UTC time. Setting the date and time is only completed within the Dr Mode. -
Page 21: Setting The Basal Rate
Setting the Basal Rate Basal settings must be programed before using the insulin pump. Basal insulin is required to maintain an ideal glucose level while fasting. Basal insulin infusion rates are specific to individual patients. There are 24 hourly rates each day, these may increase or decrease to match personal insulin resistance and other factors. -
Page 22: Description Of Basal Graph
➢ Description of Basal Graph: ① Basal rate bar graph per hour The graph consists of 24 bars, and each bar represents each hourly basal rate. In the graph, this bar starts with 00 and display until 24 (12:00AM). When the specific time period is selected, the color of that bar changes to black. -
Page 23: How To Edit The Basal Rate
➢ How to edit the Basal Rate: 1. Within MAIN MENU scroll through and select BASAL with 2. Select EDIT BASAL and press 3. The current Basal Profile is displayed, confirm the selection with 4. The edit basal screen is displayed. The default time is 00-01. - Page 24 6. Use the to adjust the End time. press to move to the Basal rate. 7. Use the buttons to adjust the Basal rate for the selected time. Press to save the basal rate or press button to move to the start time (step.5). 8.
-
Page 25: View Basal Rate
View Basal Rate The view basal rate is used to view the current profile's time-specific settings. 1. Select VIEW BASAL RATE in BASAL's sub menu and press 2. The current Basal Profile letter is displayed, confirm the selection with 3. The cursor is positioned at the current time. Press to see the next time value. -
Page 26: Setting User Options
Setting User Options The user can change the settings related to pump usage through the User option. 1. Select OPTION in main menu and press 2. Select USER OPTION in OPTION’s sub menu and press 3. Use the buttons to set the user option. -
Page 27: User Options
➢ User Options 1. TIME DISPLAY Adjust the time display as 12hour or 24hour. 2. BUTTON SCROLL When ON holding the buttons adjusts the value quickly. 3. BEEP Key Beep ON/OFF enables an audio tone when buttons are depressed. 4. ALARM Change between SOUND, VIBRATION or BOTH for alerts and pump alarms. - Page 28 8. GLUCOSE UNIT Adjust the unit of measure for Glucose results between ML (mmol/L) or MG (mg/dL). Warning Using wrong unit of measure could lead to Glucose results being misinterpret. 9. SHUTDOWN This is a safety setting, where if no buttons are depressed after the time set (0 –...
- Page 29 ➢ User Options 12. CANNULA VOLUME: Soft needle cannula has a pre-assigned volume that needs to be filled with insulin before delivery. Set the pre-set the required volume here for the specific cannula used. (Refer to 10.3 Prime Volume of infusion sets) 13.
-
Page 30: More Information Screen
More Information Screen The More Information screen provides a quick review of: Active Insulin from a previous bolus. ⚫ Extended bolus information (if active). ⚫ The most recent bolus delivery information including how many minutes ago ⚫ the bolus was delivery and the volume of the bolus. 1. -
Page 31: Loading Insulin Into The Pump
4. Loading Insulin into the Pump Preparation Loading and refilling the Insulin Pump with insulin is a technical process which involves medication (insulin) and sterile components. It is recommended that: Retrieve the insulin vial from the refrigerator and let it warm up to room ⚫... - Page 32 This page left blank intentionally...
-
Page 33: Filling The Reservoir With Insulin
Filling the Reservoir with Insulin 1. Remove the round cap at the backend of the reservoir plunger and discard. A small white reservoir cap needs to be removed from the plunger–keep this cap for later use. Pull back on the plunger to the line marked with the 3 ml. - Page 34 6. Place the clear needle protective cover back onto the needle. Gently tap the reservoir with your finger in order to make the air bubbles rise to the top of the reservoir. And push the plunger up gently to remove the air bubbles from the reservoir.
-
Page 35: Adjust Length Of Linking Screw With Auto Setter
Adjust length of linking screw with Auto Setter The DANA Auto Setter is intended for adjusting the length of linking screw, measuring the amount of insulin in the reservoir and sending it to the pump with the wireless communication. DANA Auto Setter Insert a battery into Auto Setter Open the battery compartment. -
Page 36: Using Dana Auto Setter
➢ Using DANA Auto Setter : 1. Loosen the linking screw until the shaft cap part is covered by the head part (blue part). This is important to adjust the length accurately. 2. Insert a reservoir filled with insulin into the DANA Auto Setter and turn on by pressing the button. -
Page 37: Inserting The Reservoir Into The Insulin Pump
Inserting the Reservoir into the Insulin Pump 1. Insert the reservoir with linking screw into the Insulin Pump as shown. TIP! When inserting the reservoir, rotate the reservoir 45 degrees until the notch on the side of the reservoir slide into place within the pump. -
Page 38: Connecting The Infusion Set To The Insulin Pump
Connecting the Infusion Set to the Insulin Pump Attach the Infusion Set Tube counter clockwise into the reservoir compartment until it is firmly in place. TIP! The DANA insulin pump uses a proprietary LH (Left Hand) lure connection between the insulin pump and the Infusion Set tubing. -
Page 39: Refill
Refill With the refill input, pump get to know exactly what the insulin amount is. 1. Move to REFILL, press 2. Select REFILL menu, press 3. Adjust the insulin amount directly using the and buttons 4. To confirm the insulin amount press button. -
Page 40: Prime The Infusion Set Tubing
Prime the Infusion Set Tubing Prime every new Infusion set tube to displace air from within the tubing. Visually confirm that all bubbles are primed from the Infusion Set tubing. Upon completion of refill process confirm the basal is active and correct. Warning It is important to properly prime the Tube and ensure all air is removed from the system. -
Page 41: Prime Procedure
PRIME procedure: 1. From the main menu select REFILL and press 2. Select PRIME from the REFILL's sub menu and press 3. From the PRIME menu press to start. Warning It is very dangerous to start a Prime whilst the Infusion set is connected to the body. 4. - Page 42 6. The PRIMING display will show the volume of insulin delivered. Notice During PRIME the pump may BEEP or VIBRATE after every unit of Insulin is primed. 7. When droplets of Insulin appear at the end of the TUBE press to PAUSE.
-
Page 43: Prime The Cannula
Prime the Cannula When using an infusion set with a soft needle/cannula, the hollow area within the cannula requires PRIME CANNULA after completing tube prime. 1. After inserting the cannula into the body (following the cannula instructions) connect the infusion set tube to the infusion set after priming all bubbles out from the tube. - Page 44 6. The PRIME CANNULA window displays the delivery. Notice Cannula fill volume is set in the USER OPTION menu. Cannula fill can be set between 0.1 – 0.9 units. Read cannula instructions to determine individual requirements for filling.
-
Page 45: Reloading The Pump
Reloading the pump The above instructions from (4.1 Preparation) provide details for loading the insulin pump. After usage – prior to loading it is necessary remove the old reservoir by opening the reservoir compartment. 1. To disconnect the catheter, gently squeeze the tabs on both sides of the cap while pulling it out. -
Page 46: Connection Of Pump & Reservoir
➢ Connection of Pump & Reservoir The following is structure of pump and reservoir through linking screw. Connection Success Connection Fail If after a new refill, insulin pump If the linking screw is too short, it primes the tubing properly and won’t engage with the pump insulin droplets appear at the motor and insulin delivery fails. -
Page 47: Inserting Infusion Set
Inserting Infusion set Refer to instructions for the specific Infusion Set you (the patient) are using. Each Infusion Set/Cannula is made of different material and some have auto insertion tools to help with the Cannula insertion. It is also recommended that cannula/infusion sites are inserted following a warm shower to ensure the area is clean and assist with adhesion. -
Page 48: Recommending Insertion Site Location
➢ Recommending insertion site location Recommended Possible It is recommended to rotate the location of Infusion Set sites to minimize skin damage and enable longer healing times. Consult a healthcare professional about the infusion site rotation. It is recommended that good rotation between 4 separate areas on the body –... -
Page 49: Delivering A Bolus
5. Delivering a Bolus The DANA Insulin Pump can deliver a bolus of insulin using different user input parameters to calculate the bolus volume. ➢ Bolus calculation parameter Step Bolus (Quick): This standard bolus option can be calculated by either. ⚫... -
Page 50: Three Type Of Bolus Delivery
➢ Three type of Bolus Delivery After selecting one of the options on previous page to assist with calculating the required dosage - the DANA Insulin Pump can deliver three types of bolus: After a suggested bolus amount is shown press to select the bolus type: Step Bolus (Refer to chapter 5.1) ⚫... -
Page 51: Bolus (Quick Bolus)
Bolus (Quick Bolus) This bolus can be used to cover the carbohydrate in a meal or snack. ➢ How to start the (Quick) bolus delivery: 1. Select BOLUS from the BOLUS Sub menu press 2. Adjust the grams of carbohydrate with . -
Page 52: Stop Delivery During Bolus
5. The INSULIN INJECT screen is displayed during the delivery and the motor can be heard as the bolus is being delivered. Notice The Insulin Pump beep or vibrate for every 1.0 unit while a bolus is being delivered. 6. After the BOLUS has completed the delivery the DELIVERED BOLUS message displays the BOLUS amount. -
Page 53: Bolus Calculator (Smart Bolus)
BG Bolus Calculator (Smart Bolus) This type of BOLUS will calculate an estimate of insulin required for a correction bolus and/or food bolus and adjusts the suggested dose to compensate for residual Active Insulin from previous Bolus delivery. 1. From MAIN MENU select BG BOLUS CALCULATOR with button. - Page 54 4. Start the BOLUS with button. Within the BOLUS review display the following values are displayed Is the Bolus dose to adjust Glucose = (BG-IDEAL)/CF Is the Bolus dose to cover Carbohydrate in the meal = CARBO/CIR Is the residual Active insulin calculated from previous boluses. It is called "Active Insulin"...
-
Page 55: Bolus Setting
Bolus Setting The Bolus Setting menu enables personalization of all Bolus features within the insulin pump. 1. Select BOLUS SETTING from within the BOLUS MENU press 2. The bolus setting menu is shown 3. Press buttons so adjust the BOLUS SETTING. -
Page 56: Bolus Setting
➢ Bolus Setting 1. CIR/CF SETTING Select CIR or CF Press button adjust (correction factor) or press the button to adjust the CIR (carb to insulin ratio). From within the CIR or CF option, it is then necessary to adjust the ratio for every hour 00- 01, 01-02, 02-03 etc for each hour to 23-24. - Page 57 ➢ Bolus Setting 2. DUAL/EXTENDED BOLUS Adjust between extended and dual bolus ON/OFF. 3. BOLUS CALCULATOR Setting changes CARB, UNIT or BOTH CARB = Bolus requests grams entered UNIT = Bolus by adjusting units entered BOTH = every bolus asks which option? 4.
-
Page 58: Pre-Set Bolus
➢ Pre-set Bolus The value of pre-set bolus is a default value which will first appear in the bolus menu. Set the size for breakfast, lunch and dinner bolus’s as an option within Bolus setting menu. Pre-set meal boluses are set following by these time periods. -
Page 59: Advanced Features Within Pump
6. Advanced features within Pump Temporary Basal Rates The temporary basal rate feature is useful to manage blood glucose levels during unexpected and unusual short-term activities (sport or exercise) or conditions of illness or stress. Using the temporary basal rate enables changes to be temporary and to automatically revert to usual rates upon completion. -
Page 60: Review Temporary Basal Rate Whilst In Operation
➢ Review Temporary Basal Rate Whilst in Operation 1. From the Home Screen a flashing indicates that a Temporary Rate is active. 2. Select TEMPORARY BASAL from the MAIN MENU. 3. TEMP BASA is displayed. ① Time Temporary rate has been running ②... -
Page 61: Stopping A Temporary Basal Rate
➢ Stopping a Temporary Basal Rate 1. Select TEMPORARY BASAL from the main menu. 2. The TEMP. STATE screen is displayed, press to STOP the TEMPORARY RATE. 3. Confirm the STOP TEMP. RATE with Caution Consult Healthcare Professional, Nurse or Doctor for advice about Temporary Basal rates prior to using them. -
Page 62: Suspend
Suspend To stop the Insulin Pump with the suspend function. Suspend stops all insulin delivery including basal and bolus. The Suspend must be off to resume basal delivery or to deliver a bolus. 1. Select SUSPEND from the MAIN MENU. 2. -
Page 63: Button Lock
Button Lock Button lock prevents accidental Insulin Pump keypad presses. It is particularly useful for: Pediatric patients who are not able to program their own pump. ⚫ Patients whilst sleeping. ⚫ 1. Select BUTTON LOCK from the MAIN MENU. 2. The BUTTON LOCK symbol is displayed on the Main Menu. -
Page 64: Change Profile
Change Profile The adjusted basal rates can be saved as 4 different profiles. These are useful for sport days, sick days or specific events that may affect your insulin sensitivity. 1. Select CHANGE PROFILE from the BASAL sub menu. 2. Select the Profile that is to be selected 3. -
Page 65: History : Displays All The Pump History
HISTORY : Displays all the Pump History History and pump memory can be viewed within the Insulin Pump 1. Select REVIEW from the MAIN MENU then select HISTORY from the REVIEW sub menu. 2. The Use scroll up/down. button to next menu. ➢... - Page 66 3. DAILY TOTAL HISTORY History of last 60 day’s delivery totals Displayed as date with Basal / Basal +Bolus 4. REFILL HISTORY History of when pump has been refilled, time and volume of Insulin loaded. 5. PRIME HISTORY History of Pump Prime’s, Date, Time, Volume Notice In volume, “C”...
-
Page 67: Shipping Information
SHIPPING INFORMATION This displays the country that the pump was originally shipped to after manufacture. Also displayed is the date of manufacture, pump serial number and the firmware version installed. From MAIN MENU select REVIEW screen then open SHIPPING INFORMATION from the sub menu. -
Page 68: Airplane Mode
Airplane mode Diabecare DANA-i is designed for remote control in conjunction with smartphone app. However, since it always transmits Bluetooth signal, it is necessary to switch to airplane mode when it is necessary to turn off the electronic signals such as when boarding an airplane. -
Page 69: Extended Bolus
Extended Bolus Extended or Dual bolus can be used for: Meals with slow absorption (high fat) i.e. pizza or lasagna ⚫ Insulin Pump users who have other conditions such as gastroparesis which can ⚫ delay/slow the absorption of carbohydrate. Refer to a Healthcare Professional about this condition and treatment. -
Page 70: Review Extended Bolus
➢ Review Extended Bolus 1. Extended state shown on the initial screen. 2. From MAIN MENU select BOLUS. From BOLUS sub menu select Bolus icon. The three bolus types are displayed, select Extended press 3. The EXT. BOLUS displays the current active Extended Bolus. -
Page 71: Dual Pattern Bolus
Dual Pattern Bolus Dual Pattern bolus delivers a combination of a Step Bolus followed by an Extended Bolus. A Dual Pattern bolus is useful for meals with a combination of fast and slow absorbed carbohydrate. ➢ Starting a Dual Pattern Bolus 1. -
Page 72: Stopping A Dual Pattern Bolus
➢ Stopping a Dual Pattern Bolus To stop the extended part of a Dual Bolus from the EXT Bolus status menu. 1. Dual state shown on the initial screen. 2. From EXT BOLUS status screen press 3. Confirm the BOLUS STOP with Notice If Step Bolus is selected while an Extended Bolus or Dual Pattern Bolus is being delivered an “ADD... -
Page 73: Alarm, Error And Alert
7. Alarm, Error and Alert This chapter describes insulin pump Alarm, Error, Alert messages and how to solve them. Type Message LOW BATTERY EMPTY RESERVOIR SHUTDOWN OCCLUSION ALARM CHECK ERROR (High Priority) SYSTEM ERROR ... -
Page 74: Alarm Message
➢ ALARM Message LOW BATTERY The low battery screen will appear when the battery level is not sufficient to operate the pump and deliver insulin. How to solve: Silence the alarm by pressing any button and replace the new AAA battery as soon as possible. - Page 75 ➢ ALARM Message EMPTY RESERVOIR When the reservoir volume is zero (0u), all delivery is stopped and this screen will be shown with a sound alarm. How to solve: Silence the alarm by pressing any button. Immediately replace the reservoir and refill the pump Warning The pump displaying "NO...
- Page 76 OCCLUSION This alarm occurs if the Insulin Pump has an occlusion or a problem which disturbs insulin delivery. How to solve: An occlusion alarm will occur when the Insulin Pump detects a blockage and cannot deliver insulin. Check for blocked or folded areas and replace the reservoir or infusion set if necessary.
- Page 77 ➢ ALARM Message CHECK ERROR This alarm occurs if the Insulin Pump suspects an internal signal defect. SYSTEM ERROR This alarm occurs when the Insulin Pump detects any unusual movement of the controller. How to solve: If/when either of these alarms, removal of the battery will silence the alarm. Reinsert the battery after 10 seconds and the pump will perform a full self-check procedure.
- Page 78 BASAL MAX The Pump will automatically give an alarm sound when the total basal dose per hour reach to allocated basal maximum amount pre-set in Dr. Mode. When Warning is activated, the basal during that hour will be restricted. How to solve: Silence by pressing any of the buttons.
-
Page 79: Error Message
➢ ERROR Message LOW RESERVOIR When the reservoir volume is below the 'Low Reservoir' configured in the user options, this screen will be shown with either beep or vibrates. How to solve: The pump will revert to the Initial Display and the reservoir icon will blink/flash. After checking the actual remaining insulin volume of the reservoir in the pump, replace the reservoir and refill the pump if necessary. - Page 80 DELIVERY LESS THAN BASAL SET RATE If the basal is skipped and delivered less than 80% of the basal setting, this alarm will be generated. How to solve: Silence the alarm by pressing any button. When adjusting within any pump delivery menu, intermittent delivery interval basal may occasionally skip.
-
Page 81: Alert Message
Alert Message ➢ MISSED BOLUS If a bolus was missed during the set time period - the Insulin Pump will give an alert together with a message. Refer to 5.3 Bolus Setting-MISSED BOLUS How to solve: Silence the alert by pressing any button. Follow the prompt by determining if a food bolus was missed and administer if necessary. - Page 82 CHECK GLUCOSE This message is a reminder to check blood glucose level after a bolus. How to solve: Silence the melody by depressing any button and checking blood glucose level. Notice The default is 0 hours and can be adjusted by a healthcare professional within the Dr.
- Page 83 ➢ Alert Message NO DELIVERY The pump cannot deliver insulin for one or more of different reasons. This message is shown on initial display and may blink/flash with additional information How to solve: Detail message will blink alternately. Refer to follow Reason of NO DELIVERY. ※...
- Page 84 This page left blank intentionally...
-
Page 85: Troubleshooting
8. Troubleshooting Hypoglycemia (low blood glucose) ➢ What is hypoglycemia (low blood glucose)? Hypoglycemia occurs when the blood glucose level is low. Anyone using insulin should be familiar with the symptoms and treatment of hypoglycemia. The symptoms could include: Headache and dizziness ⚫... -
Page 86: Troubleshooting For Hypoglycemia
➢ Troubleshooting for Hypoglycemia POSSIBLE CAUSE SUGGESTED RESPONSE Consult with a healthcare professional to make Increased physical adjustments for increased physical activity. Modify activity temporary basal rates or decrease meal boluses prior to activity. Consult with a healthcare professional to adjust basal Eating less rates or meal boluses to more accurately reflect meal intake. -
Page 87: Hyperglycemia (High Blood Glucose)
Hyperglycemia (high blood glucose) ➢ What is hyperglycemia (high blood glucose)? Hyperglycemia (high blood glucose) can occur due to any interruption in the delivery of insulin. It is important to know that if there is no insulin delivery or maybe experiencing an increase in blood glucose level which, if undetected or untreated, may cause DKA (diabetic ketoacidosis). -
Page 88: Troubleshooting For Hyperglycemia
➢ Troubleshooting for Hyperglycemia POSSIBLE CAUSE SUGGESTED RESPONSE Visually check display screen for remaining insulin and Empty reservoir also visually check reservoir in Pump. Replace reservoir if required. Examine infusion site to make sure that there is no Insulin leakage at leakage. -
Page 89: Occlusion Alarm
Occlusion Alarm The causes of occlusion alarms vary. The tube may be blocked by uncertain materials or maybe caused by other external factors. The various causes of occlusion are described as follows… ➢ Real Occlusion (Usually within the Cannula or tube) OCCLUSION CAUSES WHAT TO DO Use of the reservoir or Infusion Set for... -
Page 90: Occlusion Caused By External Factor
➢ Occlusion caused by external factor OCCLUSION CAUSES WHAT TO DO Wash linking screw in warm water Linking screw has previously been with mild detergent, thoroughly dry affected by insulin leakage. (seldom) then reinstall the linking screw into the pump. Adjust and fully loosen the linking The end of insulin delivery. -
Page 91: Troubleshooting The Insulin Pump
Troubleshooting the Insulin Pump PROBLEM CORRECTIVE ACTION An abnormal LCD can occur when the battery charge is low. Check the remaining battery charge after administering a bolus dose. The life span of the battery is between 3-6 weeks, but varies amongst users. Some batteries are known to still Abnormal LCD show a full charge after two months. -
Page 92: Troubleshooting The Auto Setter
Troubleshooting the Auto Setter Error PROBLEM CORRECTIVE ACTION Code Enter the “Refill” menu on your insulin Can not transfer the value to pump to get the value from the Auto the insulin pump. Setter. The hexagonal part of the linking screw does not engage Lengthen linking screw and reinsert it. -
Page 93: Taking Care Of The System
Taking care of the System Cleaning the System Use a soft cloth or tissue to wipe the exterior of the Insulin Pump. If necessary, a small amount of mild alcohol on a soft cloth or tissue may be used. Organic solvents such as benzene, acetone and household industrial cleaners can cause irreparable damage to the Insulin Pump. -
Page 94: Storing The System
Storing the System For safe transport and storage of the Diabecare DANA-i Insulin Pump kit avoid the following conditions: Storage Temperatures below -20°C (-4°F) or above 50°C (122°F). ⚫ Operation Temperatures below 1°C (34°F) or above 40°C (104°F). ⚫ Humidity above 95%. -
Page 95: Specification
10. Specification Insulin Pump SPEC INSULIN PUMP Size 3.8 × 1.8 × 0.8 inch (97 × 47 × 22mm) **including reservoir cap Net Weight 75g (without battery), 86g (including battery) Insulin Reservoir 3mL (300 Units) insulin compatible reservoir Meal Bolus Setting 0.05 - 80u Basal Rate Setting 0, 0.04 - 16.0 u/h... -
Page 96: Infusion Sets
Infusion Sets DANA Soft- Soft- Easy Super Line Inset Ⅱ Release-0 Release-ST Release Needle gauge Stainless Stainless Needle type Teflon Teflon Teflon Steel Steel Insertion 90° 15-30° 0°, 90° 90° 90° angle Disconnect Notice Each type of Infusion Set is unique. Healthcare Professional and an Insulin Pump Trainer will help provide assistance with the most appropriate Infusion Set to use. -
Page 97: Prime Volume Of Infusion Sets
Prime Volume of Infusion Sets New unopened Infusion Sets are sterile and the tubing is filled with air/empty. Once connected to the Insulin Pump it is necessary to prime the tubing (fill it with insulin and remove the air) before the tube is connected to the Cannula or patient. The following shows the estimated volume of insulin required to fill tubing for each of the Infusion Sets below: Notice... -
Page 98: Delivery Accuracy
Delivery accuracy Delivery Intervals: 4 minutes when a basal setting is not lower than 0.1u/h 60 minutes when basal delivery setting is 0.04 - 0.09u/h Delivery Accuracy: ± 4% Trumpet Curve for Delivery Accuracy (0.8 %) at the basal setting of 8u/h (the intermediate rate) -
Page 99: Classification And Compliance With Standards
‘Safety Ratio’ can be turned on in Doctor Mode. Additionally, the DANA-i Insulin Pump includes safety limits to bolus size, Basal rate, and Daily total Dose. These should be personalized by a healthcare professional in DR Mode. The Diabecare DANA-i Insulin Pump only allows pairing with one device at a time. -
Page 100: Wireless Communication
Wireless communication ➢ DATA Security The Diabecare DANA-i system ensure data security via proprietary means and ensure data integrity using error checking processes, such as cyclic redundancy checks. ➢ Declaration of EMC compatibility The Diabecare DANA-i insulin pump is intended for use in the electromagnetic environment and comply with the United States Federal Communications Commission and international standards for electromagnetic compatibility. -
Page 101: Explanation Of Universal Symbols
Explanation of Universal Symbols On the packaging and on the type plate of Diabecare DANA-i System you may encounter the following symbols shown here with their meanings: Follow instructions for use Caution. Refer to safety-related notes in the manual accompanying this instrument... - Page 102 Disposal (WEEE marking) Non-Pyrogenicity Keep dry Storage temperature range Do not use if package is damaged Storage humidity range Atmospheric pressure limitation...
-
Page 103: Index
11. Index Accessories Edit Basal Active Insulin Error message Airplane Mode Extended Bolus Alarm and Error Alert message Auto Setter Glucose Unit Change Basal Profile Basal Setting Battery History Installing a battery Hyperglycemia Bolus Hypoglycemia Step Bolus(Quick) BG Bolus Calculator(Smart) Bolus Setting Button lock Infusion Sets... - Page 104 Occlusion Warning 74, 87 User option Option View Basal Rate Password Volume of infusion set Preset Bolus Prime the cannula Prime the infusion sets Refill procedure Remote Control mode Reservoir (Filling with insulin) 31 Review Shipping Information Specification Suspend Symbol Temporary basal Time and date setting Transport and storage...
-
Page 105: Warranty
• Modifications or changes to the System by the user or any other person after the date of manufacture. • A force majeure or other event beyond the control of SOOIL or acts of negligence, misuse, or mishandling of the System by the user or any other person including but not limited to physical abuse of the product such as dropping or otherwise damaging the DANA Diabecare System. - Page 107 IFU-130-EN (rev.0_200708) SOOIL DEVELOPMENT Co.,LTD...
Need help?
Do you have a question about the Diabecare Dana-i and is the answer not in the manual?
Questions and answers