Table of Contents
Advertisement
Quick Links
Advertisement
Table of Contents

Subscribe to Our Youtube Channel
Summary of Contents for Sencor SDF1080
- Page 1 SDF1080 User manual...
- Page 2 EN Manufacturer: CZ Výrobce: SK Výrobca: HU Gyártó: PL Producent: GR Κατασκευαστής: CR Proizvođač: RS Мануфацтурер: Fast ČR, a.s. , Černokostelecká 1621, CZ 251 01 Říčany...
-
Page 3: Care And Maintenance
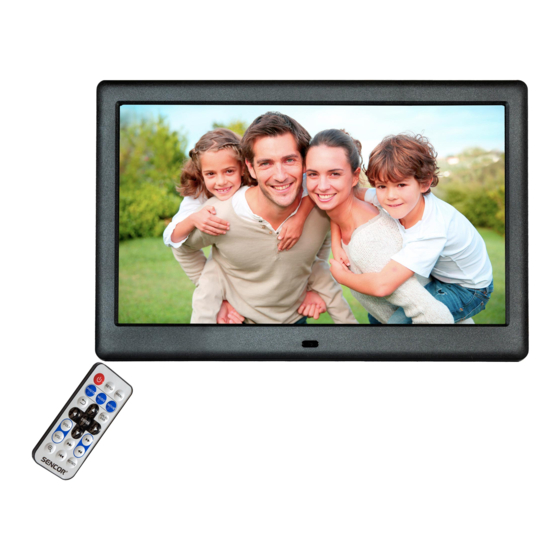
INTRODUCTION ►Thanks you for buying your new digital photo frame . We wish you enjoy using it. It is a multimedia photo frame with ultra slim design and 10,1” high resolution IPS LED screen for exceptional picture quality. You can enjoy and share your photos, music and video from a pendrive USB or memory cards. -
Page 4: Main Features
► Keep the device clean and dust free with a soft and dry cloth. We recommend you to use the provided cleaning cloth. ► Clean the unit while it is turned off and unplugged from electric power. ► Do not disassemble the device. MAIN FEATURES ►... - Page 5 ► Compatible with memory cards: MMC / SDHC / SDXC (up to 32 Gb). ► Built-in speaker 1W. ► Selection of pictures by miniatures on screen and starting Slide Show from the selected picture. ► Several time intervals for the Slide Show (5/15/30 sec., 1/15 min.). ►...
-
Page 6: Product Content
► 6 levels of zoom available. ► File browser function. ► Information of each file is shown. ► Slim remote control featuring all the frame functions. ► OSD languages: EN/CZ/SK/HU/PL/GR/HR/RS/DE/ES/FR/PT/RU ► AC/DC power adapter (Europlug). 100-240V 50/60Hz; 5,0V/1.2A. PRODUCT CONTENT ►... - Page 7 A. Remote sensing K1. Power B. Card K2. Forward C. 3. 5MM headphone output port K3. Volume+ (right) D. USB 2.0 port K4. Next (down) E. Mini USB2.O port K5. Return F. DC power input port K6. Volume- (Left) G. speaker K7.
-
Page 8: Remote Control
REMOTE CONTROL... - Page 9 ON/OFF: turn on/off the digital photo frame. SETTING: Access to the settings menu. MENU: Access to the main menu from everywhere. PHOTO: Access to the Picture player. MUSIC: Access to the Music player. VIDEO: Access to the Video player. RETURN: Returns to the previous menu.
- Page 10 VOL+: Volume up. DOWN: Goes down one position in the current menu / Moves the current view down when applying zoom to an image. FAST FORWARD: Makes a video or a song play faster. VOL -: Volume down. NEXT: Shows the following picture or track. REWIND: Moves the current video or song move to an early position.
-
Page 11: Switching On/Off
SWITCHING ON / OFF To power on your Photo Frame just plug in the provided power adapter to a 100-240V AC source. To turn off your photo frame, simply press the ON/OFF button on the back side of the frame or press the ON/OFF button from remote control. -
Page 12: Slideshow + Music
PHOTO You can use 4 display modes: “Slideshow”, “Slideshow + Music”, “Browse mode” and “Thumbnail”. SLIDESHOW This is the display mode by default (it is automatically activated when inserting a SD card or a pendrive containing pictures) playing the pictures in full screen mode. You can also start the Slide show by pressing the ENTER button from the THUMBNAIL list. - Page 13 VIDEO You can access directly to this function from the main menu, by selecting the “VIDEO” icon or pressing the “VIDEO” button in the remote control. The Photo Frame will show a video files list loaded from the memory device (SD card or pendrive). Pressing the PREVIOUS / NEXT buttons for selecting file or folder and pressing the ENTER button to play or pause the video.
-
Page 14: Photo Setup
File This function you can explore the folders and the multimedia files stored in the memory device. SETTINGS To modify the system settings just select the “SETTINGS” option from the main menu, by using the PREVIOUS / NEXT buttons and the PLAY/PAUSE button. When entering this function, the current month calendar will be shown on the screen with the current time indication, along with a slideshow using the pictures loaded from the memory. - Page 15 Original Size: The image is shown in the screen respecting the original proportions. *Full screen: The image expands horizontally to fit the (full) screen. Background Music: Enable or disable, it allows you to choose if music is played at the ►...
-
Page 16: Date And Time
DATE& TIME Set Date: Allows updating the date used by the system. ► Clock mode: Allows setting the time format between 12 hours and 24 hours. ► Set Time: Allows updating the clock time used by the system. ► Alarm Set: Allows setting ON/OFF the alarm. -
Page 17: Music Setup
Full screen: The image expands horizontally to fit the (full) screen. Original Size: The image is displayed in the screen respecting the original proportions. Scale: The image is cut in top and buttom side to fit the screen,without modifying the original appearance. - Page 18 Power OFF: Allows enabling or disabling the automatic turning OFF of digital photo frame. ► Auto Shut Time: Allows choosing the Time for Auto-OFF. ► Auto-Power Frequency: Allows adjusting what frequency (days of the week) the Auto- ON/ ► OFF is activated with. Volume: Allows setting the volume by default.
- Page 19 Is in compliance with the essential norms and standards of the Directiveof the European Parliament and of the Council . This symbol on the product or the instructions means that your electrical and electronic equipment should be disposed at the end of life separately from your household waste. For more information, please contact the local authority or dealer where you purchased the product.


Need help?
Do you have a question about the SDF1080 and is the answer not in the manual?
Questions and answers