Advertisement
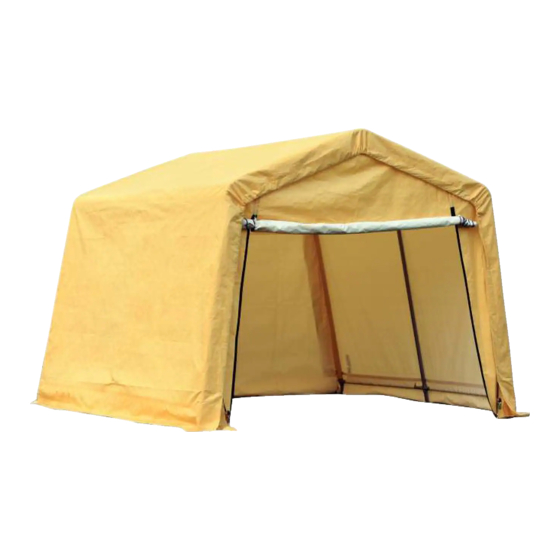
General Purpose Shelter
10' x 10' x 8' (3 x 3 x 2.4 m)
ASSEMBLY MANUAL
Model NO.:037-1112-2
CAUTION!
Please read and understand this manual before any assembly or use of this product.
Before beginning assembly of the product, make sure all parts are present. Compare parts with
packaging contents list. If any part is missing, or if you have any questions, contact the vendor's
customer service department at:
Version: 04
Last updated: May 2016
1-866-567-4089
(Monday-Friday 8:00am-7:00pm EST)
(Saturday 9:00am - 7:00pm EST)
DO NOT RETURN TO STORE!
TM
Advertisement
Table of Contents

Subscribe to Our Youtube Channel
Related Manuals for Weather Fast 037-1112-2


Summary of Contents for Weather Fast 037-1112-2
- Page 1 General Purpose Shelter 10' x 10' x 8' (3 x 3 x 2.4 m) ASSEMBLY MANUAL Model NO.:037-1112-2 CAUTION! Please read and understand this manual before any assembly or use of this product. Before beginning assembly of the product, make sure all parts are present. Compare parts with packaging contents list.
-
Page 2: Table Of Contents
TABLE OF CONTENTS Important safety instructions ...........................................2 Intended use ..............................................2 Parts list ................................................ 3 Assembly preparation ............................................ 4 Assembly ..............................................4 - 8 Cleaning and maintenance ........................................... 9 Limited warranty ............................................9 IMPORTANT SAFETY INSTRUCTIONS WARNING! Read all safety instructions to reduce the risk of injury or death. -
Page 3: Parts List
PARTS LIST Description Illustration Upright Pole with Dimples Corner extension tube Bent Corner Leg Center extension tube Cross Rail with dimples Rafter Pole Cross Rail - male union Cross Rail with punched hole 3-Way Side Connector - Left 3-Way Side Connector - Right 4-Way Side Connector 3-Way Peak Connector 4-Way Peak Connector... -
Page 4: Assembly Preparation
ASSEMBLY PREPARATION ● Place all parts from the packaging box in a cleared area and arrange them on the ground in front of you. ● Remove all packaging materials and place them back in the box. Do not dispose of the packaging materials until assembly is complete. ●... -
Page 5: Assembly
ASSEMBLY Step 1: Assembling roof frame Step 2: Attaching legs ● ● Lay out the roof frame parts as shown below (fig. 1). Assemble the legs (fig. 5). Leg type Connect to Upright pole (1), Corner legs Corner extension tube (2), Bent corner leg (3) Upright pole (1), Center Legs... - Page 6 ASSEMBLY Step 2: Attaching legs Step 4: Squaring up frame ● ● Repeat the same procedure on the opposite side. (fig. 8). Be sure the frame is standing at the desired location. ● Level the frame both end-to-end and side-to-side. ●...
- Page 7 ASSEMBLY Step 6: Installing front door and back panels fig.17 fig.18 ● Install the front door panel (22) first. During installation, ensure the zipper of the front door panel (22) is closed, for easier installation (fig. 13). Front door panel (22) fig.19 (inside view) ●...
- Page 8 ASSEMBLY ● Repeat the same procedure to install the back panel (23) to its proper Make sure the cross rails (7,8) are level and horizontal. ● position. Step 7: Installing roof tarp NOTE: ● The roof tarp (21) is pre-assembled with tube sleeves along its lower part on each side.
-
Page 9: Cleaning And Maintenance
CLEANING AND MAINTENANCE ● DO NOT apply any polishing or protective products to the roof tarp and panels, or use harsh abrasives, bleach or cleansers. The roof tarp and panels can be easily cleaned with mild soap and water. Handle mildew and mould stains with mild soap. ●...
Need help?
Do you have a question about the 037-1112-2 and is the answer not in the manual?
Questions and answers
High, Can order parts 9, 10 (3 way) and 11 (4 way) side connector. on page three parts manual.
Can I order parts 9, 10 (3 way) and 11 (4 way) side connector on page three manual parts of 037-1112-2
Im Looking at replacing my roof tarp only on my 037-1112-2 model. I was wondering if you sale it?
Yes, the parts list in the manual for model 037-1112-2 includes a "Roof Tarp" (Part 21), indicating that Weather Fast provides a roof tarp for this model.
This answer is automatically generated
Hi there, I have a WeatherFast General Purpose Shelter Model no. 037-1112-2 and require a replacement door and canopy. Are these available for this model? Thanks.