Table of Contents
Advertisement
Quick Links
Advertisement
Table of Contents

Related Manuals for DoKaSch Opticooler

Summary of Contents for DoKaSch Opticooler
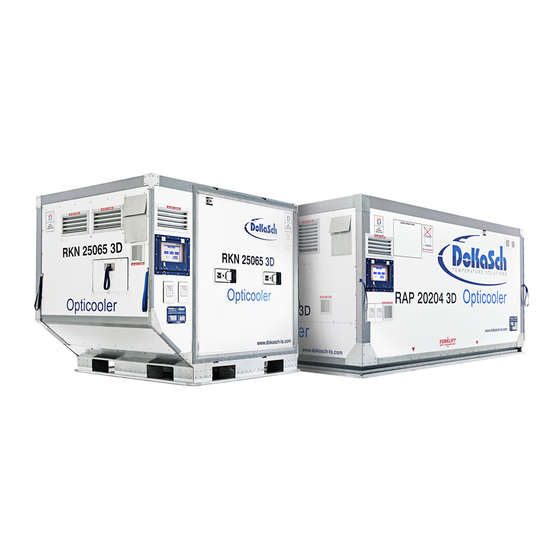
- Page 1 Opticooler © TEMPERATURE. THAT ARRIVES. Quick User Guide...
- Page 2 20.June. 2018 All Pages 1.20 20.September. 2018 Pages: 14; 15; 16 & 17 1.30 05.October.2020 Document audited DoKaSch TEMPERATURE SOLUTIONS GmbH Mönchhofallee 7 | 65451 Kelsterbach | Germany Phone: +49 6142 836 938-0 | Telefax: +49 6142 836 938-99 info@dokasch-ts.com www.dokasch-ts.com...
-
Page 3: Table Of Contents
Agenda Chapter Slides Start Operation / Operation Alerts 10-11 End Operation External Power / Battery Charging 13-15 Important – Preparation of Active Shipments Important - During Active Shipments Contacts RAP Details 19-24 RKN Details 25-28 Control Panel RAP / RKN... - Page 4 How To Operate The Opticooler This “Quick User Guide” does not replace the Operations Manual. Please, do also read and follow the Operations Manual. Leading is always the Operations Manual in it’s latest edition. Download at www.dokasch-ts.com/manual...
-
Page 5: Start Operation / Operation
Start Operation Step 1: Quick visibility check ✓ No physical damages ✓ Both charging cables are available and plugged in ✓ Cargo compartment is clean ✓ Door(s) can be closed properly... - Page 6 Start Operation Step 2: Switch on the container The container is switched off when delivered. ✓ Press green button ✓ Green light indicates that the container is running ✓ Control-unit boots now (approx. 60 sec.) ✓ „Start screen“ appears and the container is ready for operation, without active temperature program Do not switch off the container as long as the...
- Page 7 Start Operation Step 3: Select the temperature at the start screen → 2° - 8°C P1 Set 5°C → 15° - 25°C P2 Set 20°C → individual temperature P3 Set variable between +2° and +30°C with a range of +/- 3°C Press the relevant button to select temperature range.
- Page 8 Start Operation Step 4: Confirm temperature program ✓ Confirm by pressing YES within 10 sec. ✓ Screen changes into program mode ✓ Container starts cooling down or heating up immediately ✓ If you press NO or wait more than 10 sec. ; Container does not start any program and returns to the „start screen“...
- Page 9 Unit Is Running And Cooling Pre-conditioning ✓ „ ON / PROGRAMMED“ must be displayed on the screen now ✓ Check selected temperature program ✓ Container regulates temperature to selected temperature range ✓ Temperature must remain constant at the selected set-point for 1 hour before loading the goods Goods must be pre-conditioned exactly.
-
Page 10: Alerts
Alert Before / While loading Alert priorities: 1. Temperature deviation 2. Door open 3. Low battery (below 20%) ✓ Yellow light starts flashing and alarm is displayed ✓ 1. Press „Quit Alarm“ to stop the flash light ✓ 2. If the cause has been solved (doors are closed, temperature within the range), quit the alert. - Page 11 Alert While Running If an alert appears, while cargo is loaded and a temperature program is running, identify the alert and take action. 1. Low battery: Plug in the container immediately and ensure if the container is charging 2. Open door: check doors and ensure they are closed properly 3.
-
Page 12: End Operation
End Active Temperature Program ✓ End program after cargo has been removed from the container and the container is empty ✓ Push button „END PROGRAM“ and confirm next screen with YES ✓ Close the doors and recharge the container up to 100% and switch it off afterwards Plug in the container at mains power to avoid... -
Page 13: External Power / Battery Charging
✓ Container is equipped with two charging units and two plug sockets ✓ It is possible to use just one cable or both in parallel (DoKaSch recommends to use both) ✓ Plug in one end at the container and the... - Page 14 External Power / Battery Charging ✓ The container is equipped with four adapters (2ea per type) ✓ Cables are five meters long (black / red) and local extensions can be used ✓ Fixed cables: Type-F: Europe (except the UK and Ireland) Adapters: Type-B: USA, Canada, Mexico, Japan...
- Page 15 External Power / Battery Charging ✓ Do not use damaged cables ✓ Plug in both charging cables ✓ Ensure that the notification „charging“ and the flash symbol are displayed. ✓ Monitor the charging status. If battery capacity does not increase, unplug cables for safety reasons and inform your supervisor.
-
Page 16: Important - Preparation Of Active Shipments
Important – Preparation Of Active Shipments Cargo must be loaded on pallets in a way that a free airflow is ensured: Throughout pallet itself in all directions Between the spacers at all sides At the air inlets and the air outlets If the cargo on the pallet is shrink-wrapped, keep the pallets itself totally clear from any foil or carton Avoid cold traps when packing the cargo... -
Page 17: Important - During Active Shipments
Important – During Active Shipments Do NOT open doors Do NOT end or change temperature program Do NOT switch off the container, while goods are loaded Reduce exposure to direct sunrays to the greatest possible extend Move the container to an environment which is close to the set temperature To secure a high charging level, plug in the container with two cables whenever possible... -
Page 18: Contacts
24/7 Hotline for urgent operational issues: Phone: +49 6142 836 938-11 E-Mail: help@dokasch-ts.com Availability checks, rental requests and bookings shall be addressed to Dokasch-TS at normal business hours (Mo.-Fr. 09:00 – 17:00 LT-FRA): E-Mail: request@dokasch-ts.com Phone: +49 6142 836 938-12 Fax:... - Page 19 RAP And RKN Payload Securing Payload securing Payload could be tied down by straps at six points on all four sides.
-
Page 20: Rap Details
RAP Details... - Page 21 Left / Back side control panel space for labels document pouch cable bin charging sockets...
- Page 22 Front view space for door locker labels door handle hand strap 270° door opening...
- Page 23 Front view 270° door opening...
- Page 24 Air circulation Four fans with heating and cooling technologies are located at each fan unit, where airflow is passing by – ensuring accurate tempering. Air is being sucked at the bottom of the rear wall.
-
Page 25: Rkn Details
RKN Details... - Page 26 Left / Back side control panel door handle document pouch cable bin charging sockets hand strap...
- Page 27 Door open 270° door opening...
- Page 28 Air circulation Three fans with heating and cooling technologies are located at each fan unit, where airflow is passing by – ensuring accurate tempering. Air is being sucked at the bottom of the side wall.
-
Page 29: Control Panel Rap / Rkn
RAP And RKN Control Panel control panel continuously displayed during operation no screen saver flashing light for optical alarm brackets for sealing control panel cover...
Need help?
Do you have a question about the Opticooler and is the answer not in the manual?
Questions and answers