Table of Contents
Advertisement
Operation
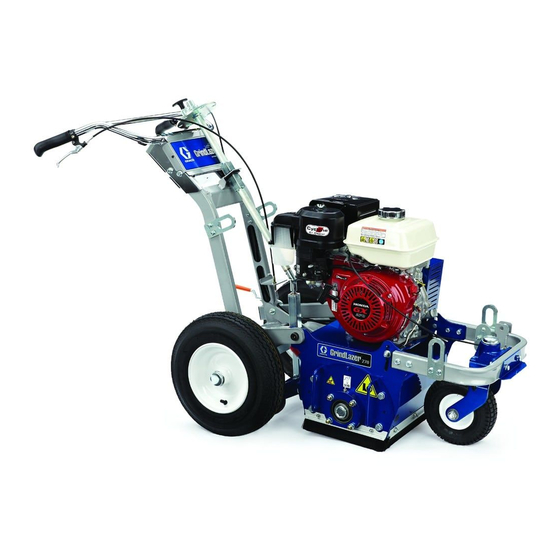
GrindLazer
Designed to grind flat, horizontal concrete or asphalt surfaces. For removal of materials
from concrete and asphalt surfaces. For professional outdoor use only
Model 571002 - Forward cut
GrindLazer 270 (270 cc / 9 hp)
Model 571003 - Forward cut
GrindLazer 390 (390 cc / 13 hp)
Model 571004 - Reverse up-cut (Must be used with LineDriver
GrindLazer 480 (480cc / 16 hp)
Model 571260 - Reverse up-cut (Must be used with LineDriver
GrindLazer 630 (627 cc / 21 hp)
IMPORTANT SAFETY INSTRUCTIONS
Read all warnings and instructions in this
manual. Save these instructions.
Related Manuals:
Repair - 3A0102
Parts - 3A0103
™
GrindLazer 270 and 390
(Drums, cutters, and LineDriver
™
)
™
)
ti14752a
™
sold separately)
3A0101F
ti14763a
ti25371a
GrindLazer 630
EN
Advertisement
Table of Contents

Related Manuals for Graco GrindLazer 270

Summary of Contents for Graco GrindLazer 270
- Page 1 Designed to grind flat, horizontal concrete or asphalt surfaces. For removal of materials from concrete and asphalt surfaces. For professional outdoor use only Model 571002 - Forward cut GrindLazer 270 (270 cc / 9 hp) Model 571003 - Forward cut GrindLazer 390 (390 cc / 13 hp) ™...
- Page 2 Warnings Warnings The following warnings are for the setup, use, grounding, maintenance, and repair of this equipment. The exclamation point symbol alerts you to a general warning and the hazard symbol refers to procedure-specific risk. Refer back to these warnings. Additional, product-specific warnings may be found throughout the body of this manual where applicable.
- Page 3 Warnings WARNING FIRE AND EXPLOSION HAZARD Flammable fumes, such as solvent and paint fumes, in work area can ignite or explode. To help prevent fire and explosion: • Use equipment only in well ventilated area. • Do not fill fuel tank while engine is running or hot; shut off engine and let it cool. Fuel is flammable and can ignite or explode if spilled on hot surface.
-
Page 4: Component Identification
Component Identification Component Identification 270 and 390 Models ti14753a 480/630 Models Component Description Engine Throttle Lever Adjusts engine speed. Engine Stop Switch Supplies power to Engine Emergency Shut-Off Clamps onto the operator and shuts engine off if cord is disconnected during operation. -
Page 5: Operation
The GrindLazer is designed to plane flat, horizontal con- crete or asphalt slabs. GrindLazer 270 (270 cc) and GrindLazer 390 (390 cc) models are designed to be operated by a single operator positioned at the back of the unit, or in conjunction with LineDriver. - Page 6 Operation Drum Installation/Replacement Installation 3. Lower Drum Adjustment Dial (D) and pull Drum Engage Lever (E) so drum rests on ground. NOTE: Carbide Flail Cutter drums do not require specific orientation or direction. Carbide Millers and Diamond Blades are directional. They should be stacked so that the arrows on the Millers and Blades face the same direction as the rotation of the drum.
- Page 7 Operation Starting the Engine 7. Start Engine: a. Move fuel valve to open. 3. Engage Rear Wheel Brake (G) to prevent Grin- dLazer from moving. ti5248a ti15091a 270/390 Models 480 Models b. Move choke to closed. ti14754a ti5249a 4. 480/630 Models Only: Attach LineDriver to 630 Models 270/390 Models 480 Models...
- Page 8 Operation Cutting Material 5. Push down on handle bars, pull engagement lever, and lower drum into DOWN position. 1. Start Engine, see page 7. 2. Connect Emergency Shut-Off Cord (C) to operator. ti14755a 6. Rotate Drum Adjustment Dial (D) until drum comes into contact with surface and desired depth is ti14762a reached.
- Page 9 Operation Depth Control Wheels 3. Loosen (but do not remove) three bolts (T) on Depth Control Wheel plate. Using Depth Control Wheels as a 5 in. or 10 in. Wide Cutting Guide To make a 5 in. cut, install two spacers (S) on outside of Depth Control Wheels (K).
- Page 10 Operation Stop Cutting Material 3. Turn Engine Power Switch (B) OFF. ti15176a ti15177a 1. Push down on handle bars until drum is locked into UP position. 270 & 390 Models 480/630 Models Clean Up Clean the entire exterior of the machine after it has cooled at the end of each work day.
-
Page 11: Handlebar Adjustment
Cutting Drum Assemblies Cutting Drum Assemblies NOTE: Each increment on Drum Adjustment Dial (D) is 0.010 in. (0.25 mm) depth change of cutting drum. Avoid touching or handling drum after use until it has completely cooled. Different drum configurations can be used for different applications. -
Page 12: Maintenance
Maintenance Maintenance EVERY 40-50 HOURS OF OPERATION: • Change engine oil (see engine manual) • Grease wheel bearings Avoid touching engine and drum after use until they have completely cooled. AS REQUIRED: • Check drive belt and tension and tighten or replace as needed The following steps should be performed to maintain proper operation and sustain the life of the GrindLazer. -
Page 13: Technical Data
Technical Data Technical Data GrindLazer 270 (Model 571002) Dimensions Unpackaged Packaged Height in./cm: 46 (116.8) 50.5 (128.3) Width in./cm: 28 (71.1) 37 (94.0) Length in.cm: 62 (157.5) 73 (185.4) Weight lb/kg: 300 (136) 400 (181) Noise (dBa) Sound Power per ISO 3744: 107.3... - Page 14 Technical Data GrindLazer 630 (Model 571260) Dimensions Unpackaged Packaged Height in./cm: 46 (116.8) 50.5 (128.3) Width in./cm: 28 (71.1) 37 (94.0) Length in.cm: 62 (157.5) 73 (185.4) Weight lb/kg: 338 (153) 438 (199) Noise (dBa) Sound Power per ISO 3744: 108.6 Sound Pressure measured at 92.1...
- Page 15 Notes Notes 3A0101F...
-
Page 16: Graco Standard Warranty
With the exception of any special, extended, or limited warranty published by Graco, Graco will, for a period of twelve months from the date of sale, repair or replace any part of the equipment determined by Graco to be defective.
Need help?
Do you have a question about the GrindLazer 270 and is the answer not in the manual?
Questions and answers