Table of Contents
Advertisement
POWERSPORTS
OWNER'S MANUAL
Always wear a helmet it could save your life!
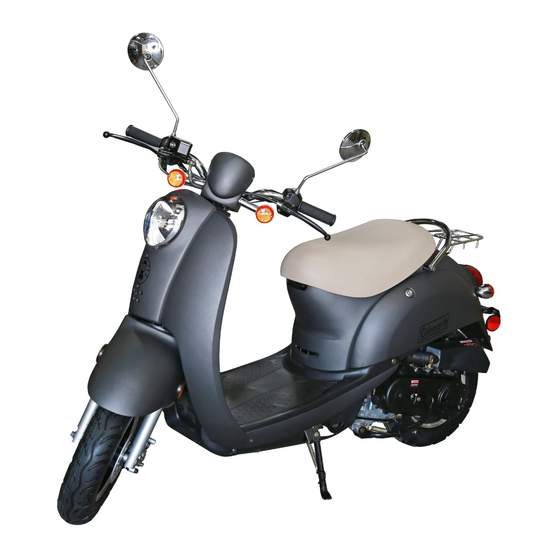
Model: JL50QT-14
READ THIS MANUAL CAREFULLY!
Provincial / Municipal governments have different
regulations pertaining to owning and operating a
49.3cc scooter, learn the regulations in your area.
(888)-405-8725 Coleman Powersports
92811
364 S Smith Rd. Tempe, AZ. 85281
REV 122618
www.colemanpowered.com
Advertisement
Table of Contents

Subscribe to Our Youtube Channel
Related Manuals for Coleman Powersports JL50QT-14


Summary of Contents for Coleman Powersports JL50QT-14
- Page 1 POWERSPORTS OWNER’S MANUAL Always wear a helmet it could save your life! Model: JL50QT-14 READ THIS MANUAL CAREFULLY! Provincial / Municipal governments have different regulations pertaining to owning and operating a 49.3cc scooter, learn the regulations in your area. (888)-405-8725 Coleman Powersports 92811 364 S Smith Rd.
- Page 2 To the Owner Congratulations on your purchase of a Coleman Powersports Scooter. This Owner’s/Operator’s manual will provide you information regarding safe operation, operational instructions, maintenance and care. Fully understanding this manual and following all of the instructions herein will provide the knowledge needed to have safe and enjoyable Scooter operation.
- Page 3 The third part will describe HOW TO AVOID THE HAZARD. Coleman Powersports is concerned about the environment and believes in conserving and protecting all natural resources. For this reason, owners should recycle, trade in, or dispose as appropriate, oil and tires.
- Page 4 WARNING The engine exhaust from this Scooter contains chemicals known to the state of California to cause cancer, birth defects or other reproductive harm.
-
Page 5: Table Of Contents
TABLE OF CONTENTS COLEMAN POWERSPORTS WARRANTY.1 ENGINE OIL .......... 19 SAFETY ............3 CHECKING........ 19 DESCRIPTION AND PART LOCATIONS... 4 CHANGING........ 19 DESCRIPTION AND PART FUNCTIONS.. 5 CLEANING OIL FILTER ......20 IGNITION SWITCH........ 5 TRANSMISSION OIL......20 ON/OFF SWITCH........5 IDLE SPEED ADJUSTMENT....21 IGNITION BUTTON........ -
Page 6: Coleman Powersports Warranty.1
/ dealer. Please do not return the product to the retailer where the product was purchased unless instructed to do so by Coleman Powersports. The retailer of this product does not make any warranty of its own and has no authority to implement this war- ranty on behalf of Coleman Powersports without the approval of Coleman Powersports. - Page 7 Length of Implied Warranties Any implied warranties are limited to the duration set forth in this warranty. Coleman Powersports does not make any claim as to the merchantability or fitness for a particular purpose which would extend longer than the dura- tion of this written warranty.
-
Page 8: Safety
SAFETY 1. Always read and understand 10. In general your actions should the Owner’s/Operator’s manual be smooth. Sudden acceleration, and warnings before starting the sudden braking or turning may Scooter for the first time cause loss of control, especially when riding in wet conditions or on 2. -
Page 9: Description And Part Locations
DESCRIPTIONS AND PART LOCATIONS Front fender Headlight Mirrors Seat Ignition switch Fuel cap under seat Cargo rack Muffler Rear wheel 10. Front wheel 11 Seat latch lock 12. Rear blinker 13. Rear brake adjustment 14. Transmission fluid cap and drain bolts 15. -
Page 10: Description And Part Functions
DESCRIPTION AND PART FUNCTIONS Ignition key switch (Fig 1.) Start position Oil fill Plug/Dip In this position engine can start Stick when the ON/OFF switch is in the “ON” position and the ignition button is depressed and the left brake lever is pulled in. . Off Position “OFF”... -
Page 11: Turn Signal Switch
DESCRIPTION AND PART FUNCTIONS Turn Signal switch (fig3) When switch (1) is placed to the position, the left blinker will illumi- nate. When switch is placed to the position, right blinker will illuminate. Depressing the center button switch will turn the blinker off. -
Page 12: Seat Lock
DESCRIPTION AND PART FUNCTIONS Seat Lock (fig 5) To unlock seat, locate seat lock key receptical(1) on left side of scooter, insert key and turn key left. Note: Lifting up seat will give Fig 5 access to fuel tank cap, carburetor and storage. -
Page 13: Fuel And Oil
FUEL AND OIL FUEL WARNING Never use leaded gasoline in this Fuel and fuel vapor are highly product. Leaded fuel could affect flammable and toxic. You can the engine’s emissions and damage be burned or poisoned while the engine. refueling. Scooter requires clean unleaded regular gasoline with a minimum Before refueling make sure to... -
Page 14: Pre Ride Inspection
PRE-RIDE INSPECTION Inspecting and checking the condition of the Scooter before each WHAT TO CHECK FOR ride is important. Following the CHECK pre-ride check list will help insure Steering • Smoothness the you do not have mechanical • No restriction of problems which could result in movement injury or becoming stranded. -
Page 15: Operating The Scooter
OPERATING THE SCOOTER HELMET, EYE PROTECTION, PROTECTIVE CLOTHING Always wear a DOT or Snell certified helmet (1). A helmet helps protect against serious head injuries in the event of an accident. A helmet is the most important safety gear item you can wear. Consult with a motorcycle dealer for the correct size and type of helmet that is right for you. -
Page 16: Starting The Engine
OPERATING THE SCOOTER STARTING ENGINE To start the engine 1. Place the ignition key to the “ON” (1) position. (Fig 10) 2.. Set the ON/OFF switch (2) located on the handlebars to the on position ( Fig. 11) 3. Pull in the left brake handle lever (3) (Fig 12) 4. -
Page 17: Starting Off
OPERATING THE SCOOTER STARTING OFF 1. Start and warm up the engine according to the instructions in this manual. 2. Place the side/center kick stand in the WARNING up position. Removing hands from the handlebars 2. Apply the throttle gradually to start and/or feet from the footrest while riding. -
Page 18: Load Guidelines
Distribute the weight of cargo evenly tion or accessory, contact your and low so the center of gravity is dealer or call Coleman Powersports. not adversely affected. Do not add any accessory or cargo to the handlebars that could... -
Page 19: Break In Period
OPERATING THE SCOOTER BREAK IN PERIOD Observe your initial and most critical maintenance service The initial 300 miles of operation is most The initial service( break in maintenance) important in the life of your scooter . is the most important service for your Proper operation during this break in pe- scooter. -
Page 20: Maintenance
MAINTENANCE For maintenance, your scooter may be maintained by an authorized Coleman Powersports service dealer or a repair shop of your choosing. Following the proper maintenance procedures and time table for CAUTION maintenance listed in this manual is Failing to perform recommend- important for the safety of the ed maintenance on this scooter operator and the life span of the... -
Page 21: Maintenance Chart
MAINTENANCE Maintenance periodic table I: Inspection, inluding check, clean, lubricate, add oil or fluid, repair or replace if necessary. A: Adjust C: Cleaning R: Replace T: Tighten Odometer (Miles) Maintenance Every Day period check 1200 1800 2400 3000 3600 4200 4800 5400 6000... -
Page 22: Air Filter
MAINTENANCE AIR FILTER CAUTION The air cleaner element needs to be cleaned or replaced periodically Clean air filter more frequently if (see chart for cleaning/replace- Scooter is ridden in wet, muddy ment intervals). The air filter or dusty conditions. element will need to be cleaned more often if scooter is ridden in Driving in the above conditions muddy, wet, or dusty conditions. -
Page 23: Spark Plug
MAINTENANCE SPARK PLUG This scooter comes equipped with an A7RTC spark plug. (Fig 16) To inspect the spark plug, remove the plug cap then remove the spark plug from the engine with the spark plug tool provided. Inspect the plug for carbon deposits and clean if necessary with a wire brush. -
Page 24: Engine Oil
MAINTENANCE ENGINE OIL 6. Re- install fill cap, Start engine The proper amount and grade of and allow to run for a few minutes, engine oil will have a great impact Re-check oil level and fill on the life of the engine. Checking accordingly. -
Page 25: Cleaning Oil Filter
CLEANING OIL FILTER SCREEN 1. Remove oil drain plug (1) (Fig 19 )located on bottom left side of engine and drain oil in an appropriate container. Once oil is drained, re-install drain plug (1) Note: Always dispose of used oil at an oil Fig 19 reclaim facility. -
Page 26: Idle Speed Adjustment
MAINTENANCE IDLE SPEED ADJUSTMENT To adjust the idle speed: (Fig 23) 1. Locate the idle adjustment screw (1) located on the carburetor. 2. Allow the engine to warm up approximately 5 minutes 3. With the engine running, turn the idle adjustment screw in or out at small increments until the correct idle is achieved. -
Page 27: Brakes
MAINTENANCE 0.39 - 75 inches BRAKE MAINTENANCE (10-20mm) Free Play WARNING Failing to inspect brakes before each use could be hazardous Inspect brakes before each use according to the Pre ride check list, make sure to follow the maintenance schedule and procedures. -
Page 28: Battery Installation And Maintenance
BATTERY INSTALLATION AND MAINTENANCE Battery This battery is a Gel cell sealed type battery, there is no adding electrolyte to the battery. Note: Never attempt to open caps. This is a sealed battery with no maintenance. - Page 29 CHARGING THE BATTERY Note: Do not turn the charger on before attaching the charger clips to the battery terminals. The standard charging rate is 0.7A x WARNING 5 -10 hours. Maximum charging rate is 3A x 1hour If not performed the correct way, 1.
-
Page 30: Tires
MAINTENANCE TIRES Minimum tread 4mm (.16 in.) Inspect tires before each ride, this should include the following: 1. Inspect for cracks or leaks 2. Inspect tread depth. If tread depth is below 4mm (.16 in.) replace the tire. (Fig 30) 3. -
Page 31: Storage
MAINTENANCE STORAGE Returning to service If the scooter is left unused for an extended period of time proper 1. Wash scooter thoroughly. storage maintenance is required. Note: Keep water away from air 1. Wash scooter thoroughly, then wax intake and muffler outlet while painted parts with a non abrasive washing to avoid water from enter- auto wax. -
Page 32: Washing The Scooter
MAINTENANCE WASHING THE SCOOTER 1. Wash mud and dirt off scooter with low water pressure from a hose. 2. Wash scooter using a mild de- tergent or car soap using a sponge, soft rag or brush. Do not use any cleaning materials that could scratch the finish. -
Page 33: Troubleshooting
TROUBLESHOOTING Trouble Possible cause Solution Engine will • Air filter dirty • Clean or replace air not start. filter • Low fuel • Fill with fresh fuel • Stale (old) or contaminated • Have a service center fuel. flush and fill with fresh fuel. -
Page 34: Specifications
SPECIFICATIONS Engine Braking Model 1P39QMB Rear Brake Manual Drum Displacement 49.3cc Front Brake Hydraulic Disc Max HP: 2.0kw /6500rpm Max Torque 1.9lb ft (2.6Nm) Tires @ 6000rpm Front Tire Size 3.5-10 Bore x Stroke 1.54 x 1.6 inches Rear Tire Size 3.5-10 (39mm x 41.3mm) Tire pressure 36psi (248 kpa) -
Page 35: Location
VEHICLE IDENTIFICATION NUMBER LOCATION The Vehicle identification and engine number is needed when calling for parts, service center help or when registering your Go Kart. Locate the numbers and list below for your reference. The 17 digit Vehicle Identification Number (VIN) is stamped on the metal frame under the center frame cover. -
Page 36: Emission Control System. Parts
EMISSION CONTROLS Part Nomenclature Part Number Catalytic Converter OX3512-5321-40 Charcol Canister Secondary Air injection Carburetor PD18J Muffler ZOUTS ZONKO Spark plug A7RTC Fuel Tank Fuel Tank Cap Cover Air Cleaner Fuel line 15 grams/m2/dav EPAJ30... -
Page 37: Emission Control Warranty
EMISSION CONTROL SYSTEM WARRANTY YOUR WARRANTY RIGHTS AND OBLIGATIONS The emission control system warranty period for this vehicle begins on the date the vehicle is delivered to the ultimate purchaser, continues for 60 months after that date, or (Class I, 12,000 km; Class II, 18,000 km; Class III, 30,000 km) which ever comes first, provided there has been no abuse, neglect improper maintenance of your vehicle. - Page 38 Your emission control system warranty covers components whose failure would increase an engine’s emission, including electronic controls, fuel injection system, carburetor, the ignition system, catalytic converter, or any other system utilized in this vehicle to control emissions as originally equipped. Also included may be hoses, connectors and other emission-related assemblies.
- Page 39 • Replacements of parts and other services and adjustments for required maintenance. • Any vehicle equipped with an odometer or hour meter where the reading is altered so that actual mileage cannot be readily deter- mined. • Repairs or replacements as a result of: o Accident o Misuse o Use of replacement parts or accessories not conforming to the original specifications which adversely affect performance...
- Page 40 &EXPORT LLC at 1-855-859-3772 or the California Air Resources Board, 9528 Telstar Avenue, El Monte, CA 91731 (for California registered vehicles only).
- Page 41 NOTES...
- Page 42 POWERSPORTS 1775 E. University DR. Tempe, AZ. 85281 PHONE: Toll Free 888-405-8725 https//www. colemanpowered.com https//www.facebook.com/Colemanpowersportusa https//www.instagram.com/colemanpowersports_usa...
Need help?
Do you have a question about the JL50QT-14 and is the answer not in the manual?
Questions and answers
Have power to fuel Guage and turn signals No power to brake light nor ignition I know brake has safety switch for ignition to work. Won't kick start either.
Possible causes of no power to the brake light and ignition on a Coleman Powersports JL50QT-14 include:
1. ON/OFF switch is in the “OFF” position.
2. Ignition key switch is in the “OFF” or “SHUT” position.
3. Electrical system problem.
4. Low battery or disconnected wiring.
If basic checks do not resolve the issue, the vehicle should be taken to a service center for diagnostics and repair.
This answer is automatically generated