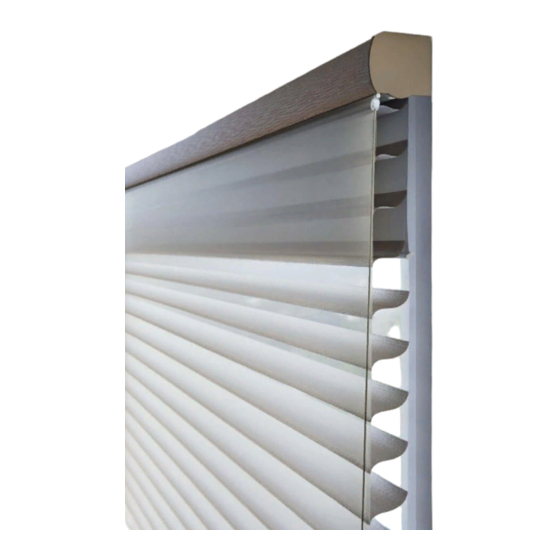
HunterDouglas Silhouette Installation And Care
Window shadings, privacy arches and angles
Hide thumbs
Also See for Silhouette:
- Installation manual ,
- Installation and operation manual (32 pages) ,
- Installation operation care (28 pages)

Related Manuals for HunterDouglas Silhouette


Summary of Contents for HunterDouglas Silhouette
- Page 1 Installation and Care Silhouette and Nantucket ® ™ Window Shadings Privacy Arches and Angles...
-
Page 2: Table Of Contents
CONTENTS Getting Started: Product View ..............1 Tools and Fasteners Needed .......... 2 Installation: Installation Overview ............. 3 Privacy Arch Shadings..........4 Install the Keyhole Fabric Clips ........4 Install the Mounting Screws ........4 Install the Privacy Arch ..........5 Adjust the Privacy Arch .......... -
Page 3: Getting Started
GETTING STARTED Product View Headrail Installation Brackets Privacy Angle Keyhole Fabric Clips Slots Bottom Rail Plastic Support Privacy Arch Bottom Rail Not Shown: Privacy Extended Arch... -
Page 4: Tools And Fasteners Needed
GETTING STARTED Thank you for purchasing Hunter Douglas Silhouette or Nantucket window shadings. With ® ™ proper installation and care, your new shadings will provide years of beauty. Please thoroughly review this instruction booklet and the enclosed packing list before beginning the installation. -
Page 5: Installation
INSTALLATION Installation Overview Installation Brackets. For angle shadings, your order will include the correct number of ■ installation brackets for your shading width, as shown in the table below. Headrail Brackets Width Required 12" – 40" Keyhole Fabric Clip Angle "... -
Page 6: Privacy Arch Shadings
INSTALLATION — PRIVACY ARCH SHADINGS Install the Keyhole Fabric Clips Privacy Arch window shadings can only be mounted on the inside of the window casement. CAUTION: Handle the fabric carefully throughout the installation process. Clear a flat, clean workspace. ■ Insert and center both keyhole fabric ■... -
Page 7: Install The Privacy Arch
INSTALLATION — PRIVACY ARCH SHADINGS Install the screws where marked. ■ Drill the screw holes using a " drill bit. ➤ Install the screws at an angle perpendicular ➤ to the mounting surface. Leave the screw head partially unscrewed, approximately ". -
Page 8: Adjust The Privacy Arch
INSTALLATION — PRIVACY ARCH SHADINGS Adjust the Privacy Arch The shading should be level and hang straight for the best appearance. To Level or Straighten Slots Slide the fabric clips in the slots to ■ straighten the shading. Be careful not to detach the shading from the clips. - Page 9 INSTALLATION — PRIVACY ARCH SHADINGS Raise the slider on the end of the support clip and place both fabric facings into the opening ■ on the end of the clip. Window Casement Line up Fabric Slider Insert Back with Flat Front Fabric only Fabric Fabric...
-
Page 10: Privacy Angle Shadings
INSTALLATION — PRIVACY ANGLE SHADINGS Mount the Installation Brackets Privacy angle window shadings can only be mounted on the inside of the window casement. Mark 3" from each jamb for installation bracket location. ■ If three installation brackets came with your order, space the additional bracket evenly ➤... -
Page 11: Install The Privacy Angle Shading
INSTALLATION — PRIVACY ANGLE SHADINGS Slide the headrail on from the lower side of the angle up ■ to the top of the angle. CAUTION: Gently slide the headrail to avoid ripping or tearing the fabric. Insert end caps and gently tap them onto the end of ■... -
Page 12: All Shadings
INSTALLATION Troubleshooting Problem The Privacy Arch will not fit into the screws. Solution Verify that the screw placement is accurate. Adjust if necessary. See “Install the Keyhole Fabric Clips” on page 4. Problem The Privacy Arch is puckering or sagging. Solution Slide the fabric clips in the plastic support. - Page 13 INSTALLATION Problem The Privacy Angle will not fit into the installation brackets. Solution Loosen the tab screw on the installation brackets. Check that the brackets are aligned. Shim the brackets, if necessary. Check that the headrail is completely inserted into the brackets. See “Install the Privacy Angle Shading”...
-
Page 14: Care
Unscrew the tab screw on each bracket to release ■ Headrail the headrail. Screw Cleaning Procedures Silhouette and Nantucket window shadings are made of 100% polyester, which means they ™ ® are inherently durable and resilient. However, care must be taken to avoid wrinkling the fabric, particularly where the vanes meet the facings. - Page 15 These may stain or destroy the finish. A Note About Silhouette and Nantucket Fabrics As with all textiles, Silhouette and Nantucket fabrics are subject to some variations. Slight wrinkling, puckering, or bowing is inherent to this textile product and should be considered normal, acceptable quality.
-
Page 16: Warranty
If you are not thoroughly satisfied, simply contact Hunter Douglas at (888) 501-8364 or visit hunterdouglas.com. In support of this policy of consumer satisfaction, we offer our Lifetime Limited Warranty as described below.
Need help?
Do you have a question about the Silhouette and is the answer not in the manual?
Questions and answers