Advertisement
Quick Links
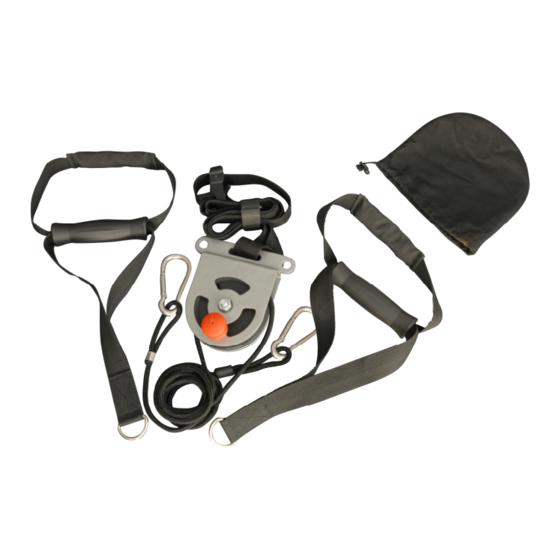
3D STS Suspension Training System
AF5004
SAFETY PROCEDURES & INSTRUCTIONS
1. As this equipment involves advanced exercise routines, consult your
physician before beginning this or any type of exercise program.
2. Inspect the Machine daily AND before each and every time you use the
Machine. Tighten all loose connections/ropes/belts/carabiners/handles/
accessories and replace worn parts immediately. Failure to do so may
result in serious injury.
3. Always attach the Machine to a secure, strong and stable anchor point
that is able to easily support your body weight. When using the Machine
on any piece of fitness equipment (or any object not already
permanently attached to the ground, wall, ceiling, etc.), make sure that
piece is bolted to the floor or similar permanent anchor point so that it
cannot tip. Always perform a weight test to determine the strength /
integrity of your chosen anchor point BEFORE using the Machine.
4. Always begin in Locked-N-Loaded mode for added stability and
perform exercises in a slow, controlled manner at all times. Always
begin with little or no body angle.
5. It is suggested that MINORS do not use this equipment without adult
supervision. The Machine is not a toy and should not be treated as such.
6. Make sure when adjusting the length of the rope, or when clipping the
handles into the openings in the top of the pulley housing, that all excess
rope is completely out of the way of the users body at all times during
exercising. The excess rope can usually be restrained using the Velcro
tabs of the support strap.
7. When attaching the adjustable pulley strap, make sure to feed end of
strap through the back of the buckle ONLY. This is the side opposite of
where the cleat opens. Feeding strap through the front (where the cleat
opens and is visible) will not allow the cleat to lock in place and WILL
NOR hold the user's weight and may cause the pulley to fall from the
point of attachment.
1
Advertisement

Subscribe to Our Youtube Channel
Related Manuals for Insportline AF5004


Summary of Contents for Insportline AF5004
- Page 1 2. Inspect the Machine daily AND before each and every time you use the AF5004 Machine. Tighten all loose connections/ropes/belts/carabiners/handles/ accessories and replace worn parts immediately. Failure to do so may result in serious injury.
- Page 2 8. DO NOT use on or near a wet or slippery surface. Be sure of your installed Machine Wall/Ceiling Anchor Mount. footing before you begin exercising. 12. Door Anchor Use and Installation – Warning!: Do not use the door 9. Safeguard the Machine from them elements when not in use. Prolonged anchor on sliding doors, glass doors, lightweight closet doors , double exposure to sunlight, dampness, inclement or severe weather conditions, doors or doors that have a large gap between door and frame.
- Page 3 Positions: Adjusting the length of the rope *Neutral: Basic position where the height of the machine Pulley is comfortably reachable at overhead arm’s length; Most machine exercises can be performed from Neutral Position. *Long Position: The height of the Pulley is lowered from Neutral Position so that the Handles are 1”...
- Page 4 Muscles targeted: Muscles targeted: Chest, Shoulders, Triceps, Upper Back, Core Quads, Hamstrings, Flutes, Hips, Calves, Core Preparation: Preparation: Position Handles in Neutral Position so that Heel Position: Neutral Strap is 12”-14” off the ground. Put your machine in Locked Handle Mode Stand at an 80 degree angle from the ground (standing Grab the machine handles and place on foot inside straight up will put you at a 90 degree angle) and...
- Page 5 Muscles Targeted: Keep one leg straight and maintain pressure in the foot cradle Quads, Hamstrings, Glutes, Hips, Calves, Core Bring the heel of the other leg in and curl towards your glutes, lifting your torso as you curl (B) Preparation Position: Neutral Double Leg Curls Stand facing the pulley holding both handles...
- Page 6 Muscles targeted: Muscles targeted: Chest, Shoulders, Triceps, Lower Back, Core Shoulders, Upper Back, Triceps, Forearms, Core Preparation . Position: Neutral Preparation Refer to page 3 “POSITIONING YOUR FEET IN . Position: Neutral HANDLES” (B) . Stand shoulder width apart facing the machine Walk hands backwards, away from the pulley, until holding both handles feet are in a challenging incline position and there is...
- Page 7 Muscles targeted: Muscles targeted: Triceps, Shoulders, Forearms, Core Quads, Hamstrings, Glutes, Hips, Shoulders, Lower Back, Core Preparation . Position: Neutral Preparation . Stand with feet and hands Shoulder width apart . Position: Neutral . Stand with feet shoulder width apart facing the Execution Machine and holding both handles .
- Page 8 Muscles targeted: Muscles targeted: Quads, Hamstrings, Glutes, Hips, Shoulders, Lower Biceps, Forearms, Shoulders, Core Back, Triceps, Forearms, Core Preparation Preparation . Position: Neutral . Position: Neutral . Stand shoulder width apart facing the Machine . Stand with feet shoulder width apart facing the holding both handles Machine and holding both handles .
- Page 9 Muscles Targeted: Muscles targeted: Core, Triceps, Shoulders, Lower Back Core, Chest, Triceps, Shoulders, Hip Flexors Preparation Preparation . Sit on the ground and put both feet in the Machine . Position: Neutral foot cradles, with cradle strap underneath the ball of Refer to page 3 POSITIONING YOUR FEET IN the foot, and turn on your side with top foot crossed HANDLES (B)
- Page 10 Muscles targeted: Muscles targeted: Full Core and Upper Body Engagement, Hip Hamstrings, Glutes, Hips, Lower Back Calves, Core Flexors Preparation Preparation . Position: Neutral . Position: Short . Lay face up on the floor with both heels, feet flexed, . Sit on ground below the Machine with knees bent in the foot cradles, engage core and press hips up and and feet on the ground and grab both handles off the floor.
- Page 11 position, lower left foot down, moving both legs in a scissor motion (C) Muscles Targeted: . When finishing scissor kick and removing feet from handles, walk hands Upper and Lower Back, Biceps, Forearms, Shoulders, forward back to neutral position lowering your body to the ground and Core remove feet from Handles.
- Page 12 Muscles targeted: Core, Hip Flexors, Biceps, Triceps, Shoulders, Upper and Lower Back Preparation: . Position: Locked Mode . Hook each Machine handle carabiner into the Locked Mode holes located on top of the pulley (insert the carabiner through bottom of housing and out the top) .
Need help?
Do you have a question about the AF5004 and is the answer not in the manual?
Questions and answers