Goodwe SMT Series User Manual
Solar inverter
Hide thumbs
Also See for SMT Series:
- User manual (64 pages) ,
- Quick installation manual (22 pages) ,
- User manual (30 pages)
Table of Contents
Advertisement
SolarGo App
SEMS Portal App
LinkedIn
GOODWE (Germany)
Fürstenrieder Str. 279a 81377 München, Germany
T: +49 8974120210 +49 421 83570-170 (service)
sales.de@goodwe.com
service.de@goodwe.com
GOODWE (Netherlands)
Franciscusdreef 42C, 3565AC Utrecht, the Netherlands
T: +31 (0) 30 737 1140
sales@goodwe.com
service.nl@goodwe.com
GOODWE (India)
1202, G-Square Business Park, Sector 30A, Opp. Sanpada
Railway Stn., Vashi, Navi Mumbai- 400703
T: +91 (0) 2249746788
sales@goodwe.com / service.in@goodwe.com
GOODWE (Turbutton)
Adalet Mah. Megapol Tower K: 9 No: 110 Bayraklı - Izmir
T: +90 (232) 935 68 18
info@goodwe.com.tr
service@goodwe.com.tr
GOODWE (Mexico)
Oswaldo Sanchez Norte 3615, Col. Hidalgo, Monterrey,
Nuevo Leon, Mexico, C.P. 64290
T: +52 1 81 2871 2871
sales@goodwe.com / soporte.latam@goodwe.com
Note: The information above is subject to change without prior notice, for details refer to
www.goodwe.com
Offical Website
GOODWE (China)
No. 90 Zijin Rd., New District, Suzhou, 215011, China
T: +86 (0) 512 6958 2201
sales@goodwe.com (sales)
service@goodwe.com (service)
GOODWE (Brazil)
Rua Abelardo 45, Recife/PE, 52050-310
T: +55 81 991239286
sergio@goodwe.com
servico.br@goodwe.com
GOODWE (UK)
6 Dunhams Court, Dunhams Lane, Letchworth
Garden City, SG6 1WB UK
T:+ 44 (0) 333 358 3184
enquiries@goodwe.com.uk / service@goodwe.com.uk
GOODWE (Italy)
Via Cesare Braico 61, 72100 Brindisi, Italy
T: +39 338 879 38 81; +39 831 162 35 52
valter.pische@goodwe.com (sales)
operazioni@topsenergy.com; goodwe@arsimp.it (service)
GOODWE (Australia)
Level 14, 380 St. Kilda Road, Melbourne,
Victoria, 3004, Australia
T: +61 (0) 3 9918 3905
sales@goodwe.com / service.au@goodwe.com
GOODWE (Korea)
8F Invest Korea Plaza, 7 Heoleung-ro
Seocho-gu Seoul Korea (06792)
T: 82 (2) 3497 1066
sales@goodwe.com / Larry.Kim@goodwe.com
SMT SERIES USER MANUAL
SOLAR INVERTER
Advertisement
Table of Contents

Subscribe to Our Youtube Channel
Related Manuals for Goodwe SMT Series


Summary of Contents for Goodwe SMT Series
- Page 1 GOODWE (China) No. 90 Zijin Rd., New District, Suzhou, 215011, China T: +86 (0) 512 6958 2201 sales@goodwe.com (sales) service@goodwe.com (service) SMT SERIES USER MANUAL GOODWE (Germany) GOODWE (Brazil) Fürstenrieder Str. 279a 81377 München, Germany Rua Abelardo 45, Recife/PE, 52050-310...
-
Page 2: Table Of Contents
1 Symbols ..........................2 Safety Measures & Warning ............... 3 Product Introduction ..................3.1 Intended Usage .......................... 04 3.2 Inverter Overview ........................05 3.3 Technical Description ........................ 06 3.4 Package ............................07 4 Installation ........................4.1 Mounting Instructions ....................... 09 4.2 Equipment Installation ...................... -
Page 3: Symbols
1 Symbols 2 Safety Measures & Warning This manual contains important instructions for SMT series inverter that must be followed during Failure to observe warnings indicated in this manual may result in inverter installation. injury. The SMT series for three MPPT, Three-Phase solar inverter without transformer, consisting of: GW12KLV-MT, GW15KLV-MT, GW20KLV-MT, GW25K-MT, GW29.9K-MT, GW30K-MT and GW36K-MT... -
Page 4: Product Introduction
DC / AC connectors. The manufac- The SMT series is is a Four MPPT, three-phase transformer-less grid-connected inverter that is a turer will not bear any responsibilities or consequences caused by unauthorized actions that crucial unit between the PV string and the utility grid in the PV power system. -
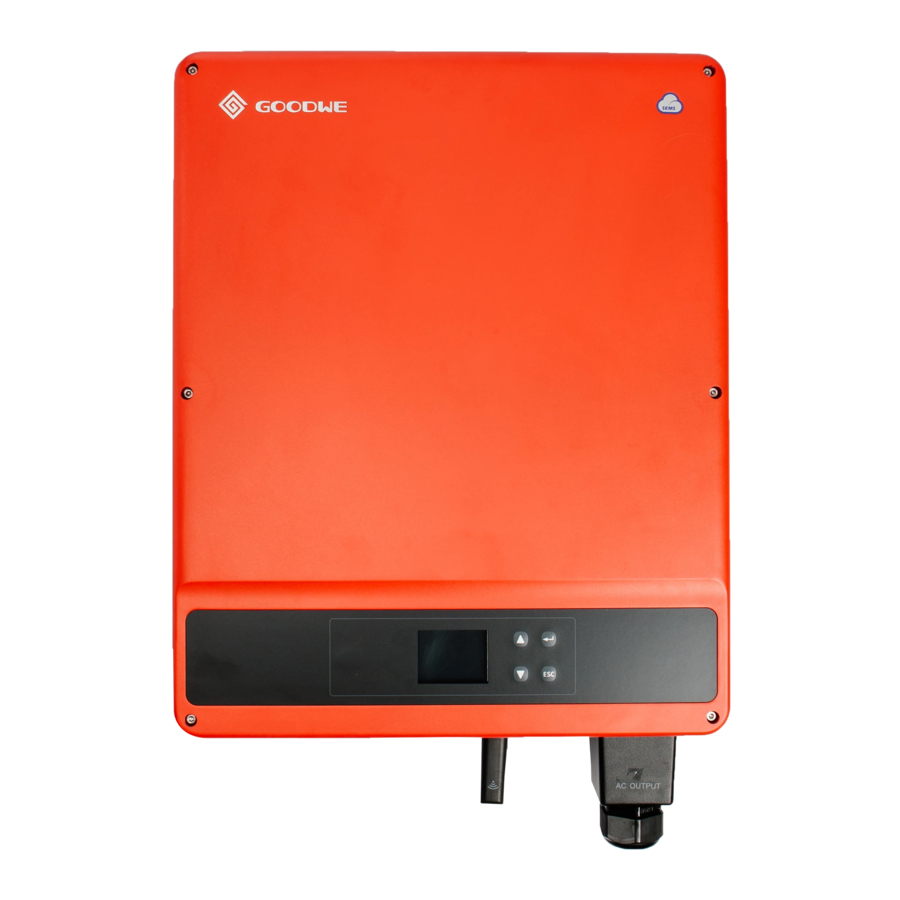
Page 5: Inverter Overview
PV string voltage is transmitted to the DC BUS via the BOOST circuit. ④ RS485 & (Demand response The SMT series is equipped with three MPPTs for six DC inputs to ensure that the maximum enabling device) DRED power is utilized even in different PV installation condition. -
Page 6: Package
3.4 Package 3.3.2 Function Description Inverter functions can be grouped as follows: 3.4.1 Unpacking and Inspection 1. Conversion function The unit is thoroughly tested and strictly inspected prior to delivery. Damage may occur during shipping. Inverter converts DC power into AC power, which conforms to the grid requirement of its installation country. -
Page 7: Installation
4 Installation To ensure heat dissipation and convenient disassembly, the minimum clearance around the inverter should not be less than the following values: 4.1 Mounting Instructions 1. In order to achieve optimal performance, the ambient temperature should be lower than 45℃. 200mm 2. -
Page 8: Electrical Connection
4.3 Electrical Connection 4.3.2 AC Circuit Breaker and Residual Current Device An independent three- or four-pole circuit breaker for each inverter must be installed at the 4.3.1 Connection to Grid (AC Side Connection) output side to ensure that the inverter can be securely disconnected from the grid. 1. - Page 9 PV TOOL The SMT series has three PV input areas: PV1 input, PV2 input and PV3 input. Each has an MPPT Please use special tools to do crimping tracker. Therefore, the three PV inputs can differ, including the type of module, the numbers of connecting PV strings and the orientation angles of PV modules.
-
Page 10: Communication Connection
To better dustproof and waterproof the internal inverter, all DC connectors provided by accessory The RS485 port of inverter is used to connect the EzLogger Pro, and the total length of connect- bag should be connected to the inverter. If only some of the DC connectors are used, the DC ing cable should not exceed 1000m. - Page 11 Please follow the steps below to complete the connection. Step 3 Dismantle the resistor or shortcircuit cable. Step 1 Note: The figure shown is 6-Pin termianl. Resistor Unplug the terminal. Step 4 Put the cable through the plate. Different cable and connection method should be applied for different functions. Please follow the connection steps in accordance to the function in need.
- Page 12 After the configurations are completed, please register on the website: www.goodwe.com. twisted-pair. The Wi-Fi module installation of the SMT series is shown in the below figure. Ethernet cable 120Ω termination resistor is controlled via dip switch. ‘ON’ means connected and ‘OFF’ means disconnected, illustrated as the above figure.
-
Page 13: System Operation
5 System Operation 4.4.2 Earth Fault Alarm The inverter complies with IEC62109-2 13.9. When an earth fault occurs, the buzzer in EzLogger Pro 5.1 LCD Panel And LED will ring for 1 min and an LED will light for 1 min. The alarm will ring again in half an hour unless the As a human‒computer interaction interface, the LCD display panel comprises LED indicators, fault is resolved. -
Page 14: User Interface Introduction
NOTE: First-level Menu Second-level Menu Third-level Menu Download SolarGo App from Google Play Store or Apple App Store to Country Code Country Code Set complete the system operation if the inverter has no screen. You can also scan the QR code to download it. SolarGo APP Home Hour... -
Page 15: System Configuration
5.4 System Configuration 5.3.1 Overview of Menu Architecture The display menu has a total of three levels. Use the ‘Up’ ‘Down’ ‘enter’ ‘ESC’ button to 5.4.1 Basic Settings operate the menu. The ‘enter’ button has two operating methods: long press (greater than 3 s) Basic Settings is mainly used to set commonly used parameters, including language settings, time and short press. -
Page 16: Error Message
5.4.2 Advanced Settings 5.4.3 History Information User must enter password to operate advanced settings because permission is required. The history information mainly includes information about the generating capacity of the equip- ment, the power generation information mainly includes the amount of electricity generation, Note: Initial password:... -
Page 17: Wi-Fi Reset & Wi-Fi Reload
6 Troubleshooting 5.5 Wi-Fi Reset & Wi-Fi Reload If the Inverter does not work properly, please refer to the following instructions before contact- These functions are only available for Wi-Fi model inverters. ing your local service centre. If any problems arise, the red (FAULT) LED indicator on the front 1. -
Page 18: Technical Parameters & Block Diagram
7 Technical Parameters & Block Diagram Type of fault Troubleshooting 7.1 Technical Parameters Relay-Check Failure Technical Data GW12KLV-MT GW15KLV-MT GW20KLV-MT DCI Injection High PV String Input Data Max. DC Input Power (Wp) 15600 19500 26000 EEPROM R / W Failure Max. - Page 19 Technical Data GW25K-MT GW29.9K-MT GW30K-MT GW36K-MT Note: PV String Input Data Overvoltage Category Definition Max. DC Input Power (Wp) 32500 39000 39000 42900 Max. DC Input Voltage (V) 1100 1100 1100 1100 Category I: applies to equipment connected to a circuit where measures have been taken to MPPT Range (V) 200~950 200~950...
-
Page 20: Block Diagram
8.1 Clearing the Fan Tri-level Input Output PV2+ DC / AC MPPT The SMT series inverter is equipped with three fans on its left side. The fan intakes and handle Circuit 2 PV2- Converter Filter Filter Filter covers should be cleaned yearly with a vacuum cleaner. For more thorough cleaning, completely Circuit remove the fans. -
Page 21: Checking The Dc Switch
8.2 Checking the DC Switch DC switch does not require any maintenance. It is recommended, though not compulsory, to: • Check the DC switch regularly. • Activate the DC switch 10 times in a row once per year. Operating the switch will clean the contacts and will extend the life of the DC switch. Boot order: 1.
Need help?
Do you have a question about the SMT Series and is the answer not in the manual?
Questions and answers