Table of Contents
Advertisement
Quick Links
18/04/2013
Ins-30116 Easyprox nano starter kit
Technical Support
01273 811011
Technical help is available:
Documentation on all Paxton products can be found on our website - http://www.paxton.co.uk/
Bench test guide
Please go to the following link to download your copy of Net2 Lite software. <
The current specification for compatible PC hardware, network and operating systems is
available on our website at the following link:
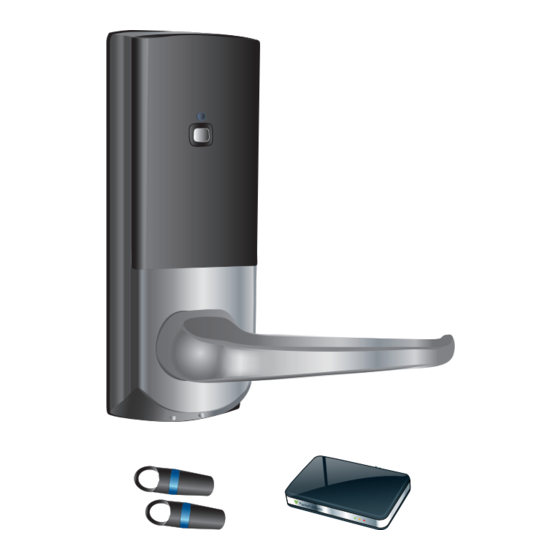
What's in the box?
Net2Air USB dongle
Net2 demonstration cards and keyfobs
Documentation
Part Number
Qty
746-284
1
Easyprox nano
1
514-326
USB desktop reader
support@paxton.co.uk
Monday - Friday from 07:00 - 19:00 (GMT)
Saturday from 09:00 - 13:00 (GMT)
Description
http://paxton.info/720
Paxton
http://paxton.info/1438 >
Page 1
Advertisement
Table of Contents

Related Manuals for Paxton Easyprox nano


Summary of Contents for Paxton Easyprox nano
- Page 1 Technical help is available: Monday - Friday from 07:00 - 19:00 (GMT) Saturday from 09:00 - 13:00 (GMT) Documentation on all Paxton products can be found on our website - http://www.paxton.co.uk/ Bench test guide What's in the box? Net2Air USB dongle...
-
Page 2: Identify The Parts
Identify the parts. 1 - Front lock assembly 2 - Handle 3 - Net2Air dongle P axton Access T his ba tt er y pack is t o b e 4 - User tokens r eplac ed with P ax t on A cc ess par t numb er 746-003 only . - Page 3 Click the Events tab. You will see the Events logged so far for this user. QNet2 software is common across all Paxton control units (Easyprox, Plus, Classic & Nano) and Qthe screens will self configure to display the relevant data.
- Page 4 The following pages contain the full instruction issued with the Easyprox nano. It includes the following procedures: - Mounting Easyprox on a door. - Commissioning. - Software configuration. - LED and alarm indications. - Detailed server operation. - Battery replacement.
-
Page 5: Parts List
Ins-30107 Easyprox nano Layout This wireless unit requires a Net2Air bridge to communicate with the server PC. This unit is for indoor use only. Parts list 1) Front Lock Assembly 2) Rear Lock Assembly 3) Rubber Escutcheon x2 4) Left and Right Handles... -
Page 6: Installing The Hardware
Installing the hardware Step 1 - Marking out Decide on the lock height and mark this on the door. Fold the template along one dotted line and tape it to the door with the 'Centreline of Latch' at the required height. -
Page 7: Step 6 - Fitting The Handles
Step 5 - Mounting on the door Select the short (doors thinner than 45 mm) or long mounting screws and cut to length if required. (door thickness + 5 mm) Fit the rubber escutcheons to the front and back plates. Present the front and rear lock assembly to the door, locating the square drive in its recess and join the two parts together with 4 mounting screws. -
Page 8: Commissioning Checks
Full documentation is supplied with the Net2Air bridge unit and also on the website as follows: XAN1051 - Installing Net2 software < http://paxton.info/1520 > XIns-30084 - Net2Air USB bridge < http://paxton.info/926 > XIns-30085 - Net2Air Ethernet bridge < http://paxton.info/920 >... -
Page 9: Software Configuration
Software Configuration Door name: Name the Door. Door open time: Set the door open time. Unlock the Door during: Holds the door unlocked during this timezone. - Set to 'At No Time' for normal user operation. Reader: Local settings for the reader. Output: Configures the lock for timed release or toggle mode. -
Page 10: Radio Frequency
Net2Air wireless communication The access control unit connects to the Net2 system using Paxton Net2Air proprietary wireless technology through a Net2Air bridge. Radio signals do not always behave as you might expect. For example, a mobile phone that displays a full signal on one part of the site will lose signal completely only a few metres away. -
Page 11: Low Battery Warning
3. Remove the access plate to reveal the battery pack. - Fig 2. 4. Unplug the lead and replace the pack with a new Paxton battery pack. - Fig 3. (The unit will retain its settings and should not be manually reset). - Page 12 30 mm Environment Operating temperature - Battery limits 0 °C + 55 °C Waterproof Vandal resistance Battery type - High capacity (746-003) Paxton Battery Pack Typical battery life 30,000 operations Dimensions Height Depth Width Reader/Keypad module (required space on door)
Need help?
Do you have a question about the Easyprox nano and is the answer not in the manual?
Questions and answers