HunterDouglas Silhouette Installation Operation Care
Hide thumbs
Also See for Silhouette:
- Installation manual ,
- Installation and operation manual (32 pages) ,
- Installation operation care (28 pages)

Related Manuals for HunterDouglas Silhouette


Summary of Contents for HunterDouglas Silhouette
- Page 1 Installation Operation Care • • Silhouette Window Shadings ® Tilt-Only Low-Profile...
-
Page 2: Table Of Contents
CONTENTS Getting Started: Product View ..............1 Tools and Fasteners Needed .......... 2 Installation: Installation Overview ............. 3 Mount the Installation Brackets — Inside Mount ..... 4 Mount the Installation Brackets — Outside Mount ..5 Install the Shading ............6 Install the Tilt Wand (Optional) ........ -
Page 3: Getting Started
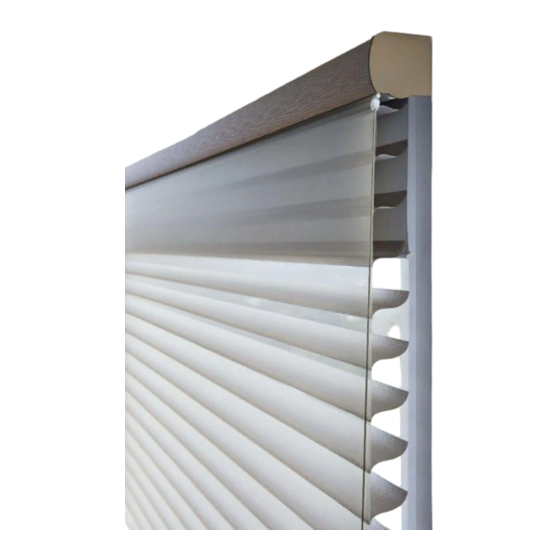
GETTING STARTED Product View Slot End Installation Bracket Control End Installation Bracket with Pivot Cup Headrail End Cap Tilt Wand (Optional) Hold-Down Bracket... -
Page 4: Tools And Fasteners Needed
GETTING STARTED Thank you for purchasing Hunter Douglas Silhouette Tilt-Only window shadings. With ® proper installation, operation and care, your new shadings will provide years of beauty and performance. Please thoroughly review this instruction booklet and the enclosed packing list before beginning the installation. -
Page 5: Installation
INSTALLATION Installation Overview Your order will include a control end and a slot end installation bracket. ■ Control End Bracket Slot End Bracket Mounting Types and Window Terminology If the installation brackets are mounted correctly, the rest of the installation process follows easily. -
Page 6: Mount The Installation Brackets - Inside Mount
INSTALLATION Mount the Installation Brackets — Inside Mount Identify the brackets. The control end installation bracket has the pivot cup and the opposite ■ side has the slot. Pivot Control Ball Pin Compression Clutch Measure the width of the headrail from the top edge of end cap to the opposite end cap or ■... -
Page 7: Mount The Installation Brackets - Outside Mount
INSTALLATION Mount the Installation Brackets — Outside Mount Identify the brackets. The control end bracket has the pivot cup and the opposite side has ■ the slot. Pivot Control Ball Pin Compression Clutch Center the headrail above the window opening at the desired height. ■... -
Page 8: Install The Shading
INSTALLATION Install the Shading Peel back the protective covering from the top of ■ the headrail. Pivot With the vanes closed, hold the shading so the ■ front of the headrail faces you. Compression Clutch On the control side, line up the grooves and set ■... -
Page 9: Attach The Magnetic Hold-Down Brackets (Optional)
INSTALLATION Attach the Magnetic Hold-Down Brackets (Optional) Close the vanes. ■ Attach the magnetic hold-down brackets onto the bottom rail just ■ inside the end caps, oriented as shown. Bottom Rail Mark the screw location using the mounting options shown below. ■... -
Page 10: Operation
OPERATION Operate the Shading The shading can be operated by lifting the end cap or by using the optional tilt wand. Lift straight up on the end cap or optional tilt wand to open the vanes. ■ Pull straight down on the end cap or optional tilt wand to close the vanes. ■... - Page 11 OPERATION Use pliers to remove the ball pin from the headrail. ■ On the opposite side of the ball pin piece, ■ The ball pin use a " hex wrench to adjust the ball pin. will adjust as the hex wrench Reinsert the ball pin into the headrail.
-
Page 12: Troubleshooting
OPERATION Troubleshooting Problem Headrail does not fit securely in the brackets. Solution The headrail is held in the brackets by the ball pin on the slot end cap. You may need to extend the ball pin in order for the headrail to fit securely. See “Adjust the Ball Pin”... -
Page 13: Care
Regular light dusting with a feather duster is all the cleaning needed in most circumstances. ■ Vacuuming Use a low suction, hand-held vacuum for more thorough dust removal. ■ Forced Air Blow away dirt and debris between the vanes using clean compressed air. ■ Spot-Cleaning Do not spot-clean Silhouette window shadings. - Page 14 Fabrics ® As with all textiles, Silhouette fabrics are subject to some variations. Slight wrinkling, puckering, or bowing is inherent to this textile product and should be considered normal, acceptable quality. These characteristics are not usually visible from the front or rear but may be visible from a side angle.
- Page 16 If you are not thoroughly satisfied, simply contact Hunter Douglas at (888) 501-8364 or visit hunterdouglas.com. In support of this policy of consumer satisfaction, we offer our Lifetime Limited Warranty as described below.
Need help?
Do you have a question about the Silhouette and is the answer not in the manual?
Questions and answers