Advertisement
Quick Links
Product Registration
Registering your new BDI product allows us to send you
important product updates, service information and helpful hints
related to your BDI products. Register today, and you will be
entered to win a free BINK table from BDI:
www.bdiusa.com/register
Placement and Maintenance
Your Margo Cabinet is designed for indoor use on level floors.
Clean all surfaces with a damp cloth.
Margo is engineered for easy assembly. Carefully follow this
procedure to prevent any damage. Do not use power tools
for assembly of this product.
Step 1
Unpack and identify the parts listed below. The assembly
workspace should be a non-marring surface such as carpet.
For missing hardware pieces, contact BDI Customer Service at:
customerservice@bdiusa.com.
For all other concerns, please contact your BDI retailer.
A2 Left Leg x 1
Designed by Jeff Bare.
These distinctive product configurations are protected by US and international patents, trade dress, and/or
copyright laws. Margo & BDI are trademarks of Becker Designed, Inc. All rights reserved. ©2018, BDI
Patent:
Made in China. 08.06.2019 V3
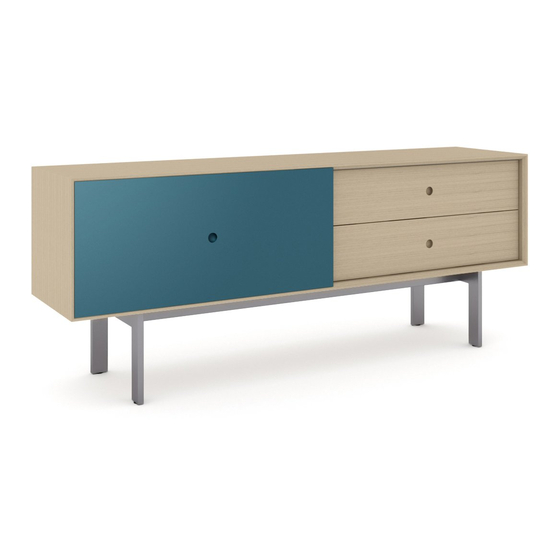
MARGO
5229
™
Cabinet
C2 Shelf x 1
bdiusa.com
customerservice@bdiusa.com
Component List
T1 Hex driver x 1
T2 Small Hex wrench x 1
H1 M6 x 12mm
Screw x 4
H2 M6 x 72 mm
Screw x 7
H3 Thumb Screw x 2
H4 5/16 x 5/8"
Screw x 1
H5 TV Safety Strap x 1
C1 Cabinet x 1
A1 Base Rail x 1
A3 Right Leg x 1
C3 Door Fascia x 1
Tool Required:
Phillips Screwdriver
Advertisement

Related Manuals for BDI MARGO 5229


Summary of Contents for BDI MARGO 5229
- Page 1 Designed by Jeff Bare. These distinctive product configurations are protected by US and international patents, trade dress, and/or copyright laws. Margo & BDI are trademarks of Becker Designed, Inc. All rights reserved. ©2018, BDI Patent: Made in China. 08.06.2019 V3...
- Page 2 Attach leg to base rail with screws H1 and hex driver T1. Do not fully tighten the screws yet. A2 Left Leg pairs of holes facing you A3 Right Leg H1 x 4 bdiusa.com MARGO 5229 customerservice@bdiusa.com CABINET...
-
Page 3: Step 3 - Attach The Base
H2 x 7 Step 4 - Stand Up With help from another person, and making sure the door does not slide, carefully position the cabinet onto its base. 2 Person Task secure door before moving the cabinet bdiusa.com MARGO 5229 customerservice@bdiusa.com CABINET... - Page 4 If it is, proceed to step 6. If your door is level and the gaps on the top and bot- tom are even, proceed to step 7. slide to the right to lock Door frame Door fascia threaded holes this side bdiusa.com MARGO 5229 customerservice@bdiusa.com CABINET...
- Page 5 Lifting the door frame up with your other hand allows the adjustment wheel to turn more freely. adjustment wheel turning the wheel horizontally adjusts the corresponding door corner up or down wheel direction turn wheel lift gently bdiusa.com MARGO 5229 customerservice@bdiusa.com CABINET...
- Page 6 Incorrect Door Stop Position Position Door Stop Edge of green door stop should be 19mm (3/4") away from end of track. 3/4" Use Small Hex Wrench T2 19mm to tighten door stop in correct position. bdiusa.com MARGO 5229 customerservice@bdiusa.com CABINET...
- Page 7 Levelers are integrated into each leg assembly and are accessed at the bottom of each leg. If your floor is uneven, you may extend one or more levelers to attain a level, stable cabinet position. Shelf Pins Levelers bdiusa.com MARGO 5229 customerservice@bdiusa.com CABINET...
- Page 8 Rotating away moves it right. into the cabinet. Down 3) Pushing the orange lever towards the outside wedges the drawer up. Pulling it towards the middle of the drawer makes the drawer drop. bdiusa.com MARGO 5229 customerservice@bdiusa.com CABINET...
Need help?
Do you have a question about the MARGO 5229 and is the answer not in the manual?
Questions and answers